Moticos is a surrealist senior film set in the Texas landscape about a breakup. Utilizing a road trip to show the progressive unraveling of the main character’s mental state. It is written and directed by Paige Meakin. I worked as a set and prop fabricator and assisted with set dressing, mold making, casting, and rigging.
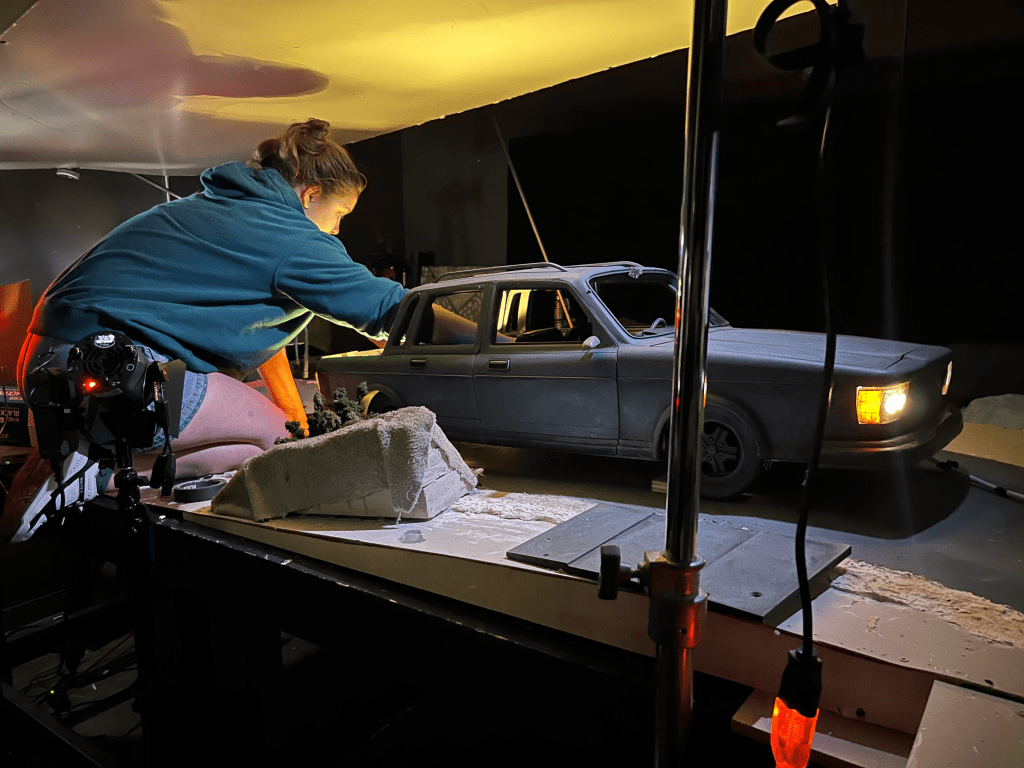
Exploding Car Shot
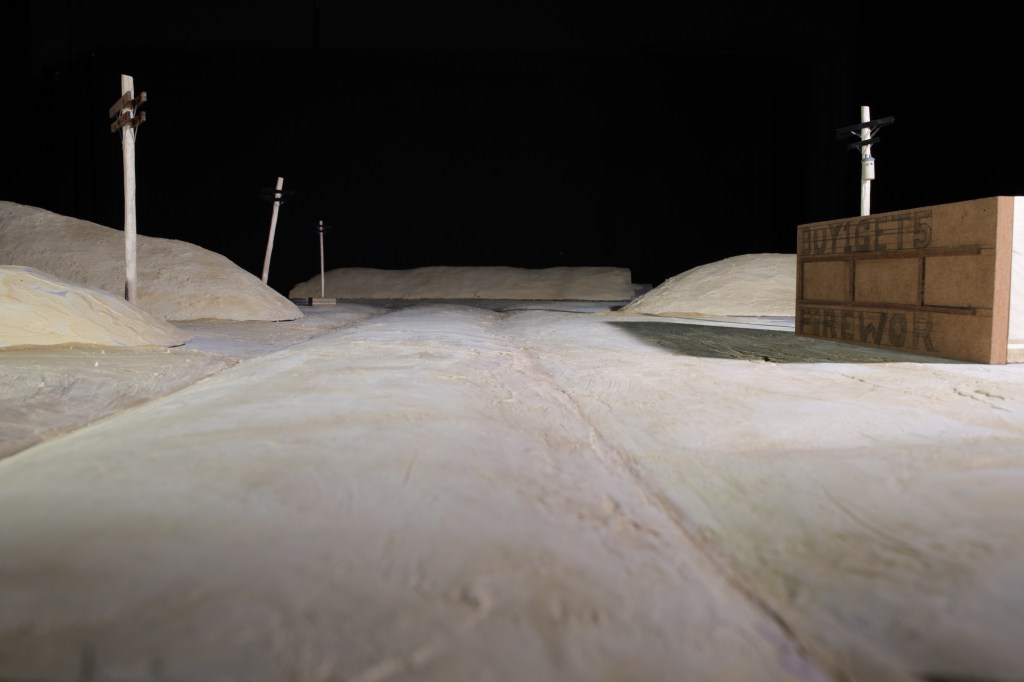
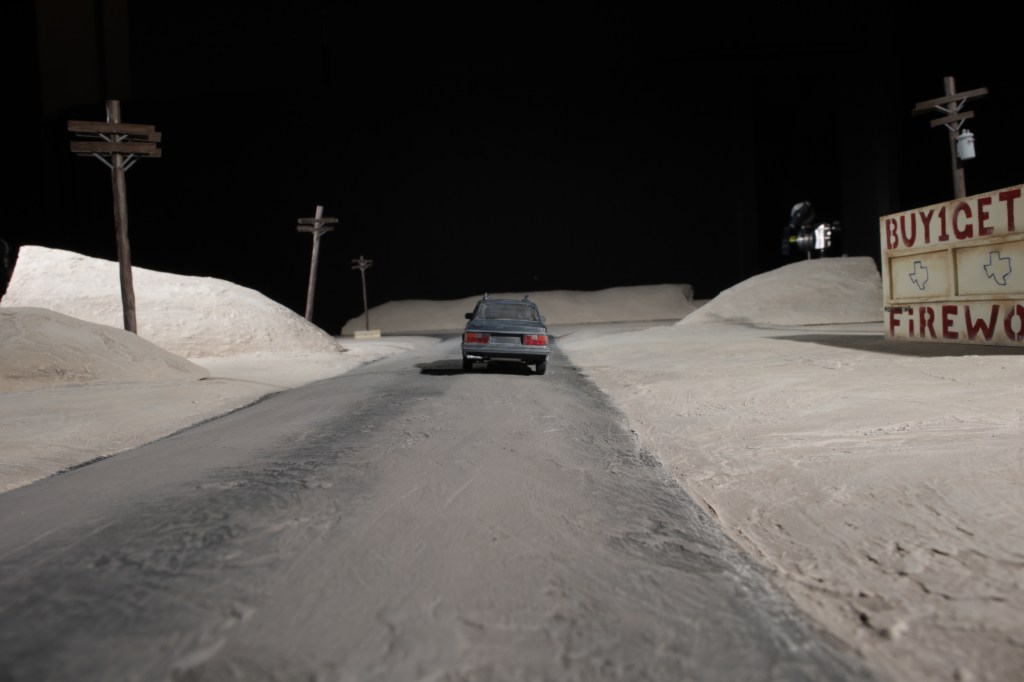
This shot was achieved by animating a puppet-scale car across 34 ft of tables and then compositing that animation into an 8 ft-deep scaled set.
The original vision for this shot was for the car to drive straight back in space, disappearing over the horizon. Due to the limitations of the space, we changed the plan, adding a curve in the road and something to obscure the car as it turns.
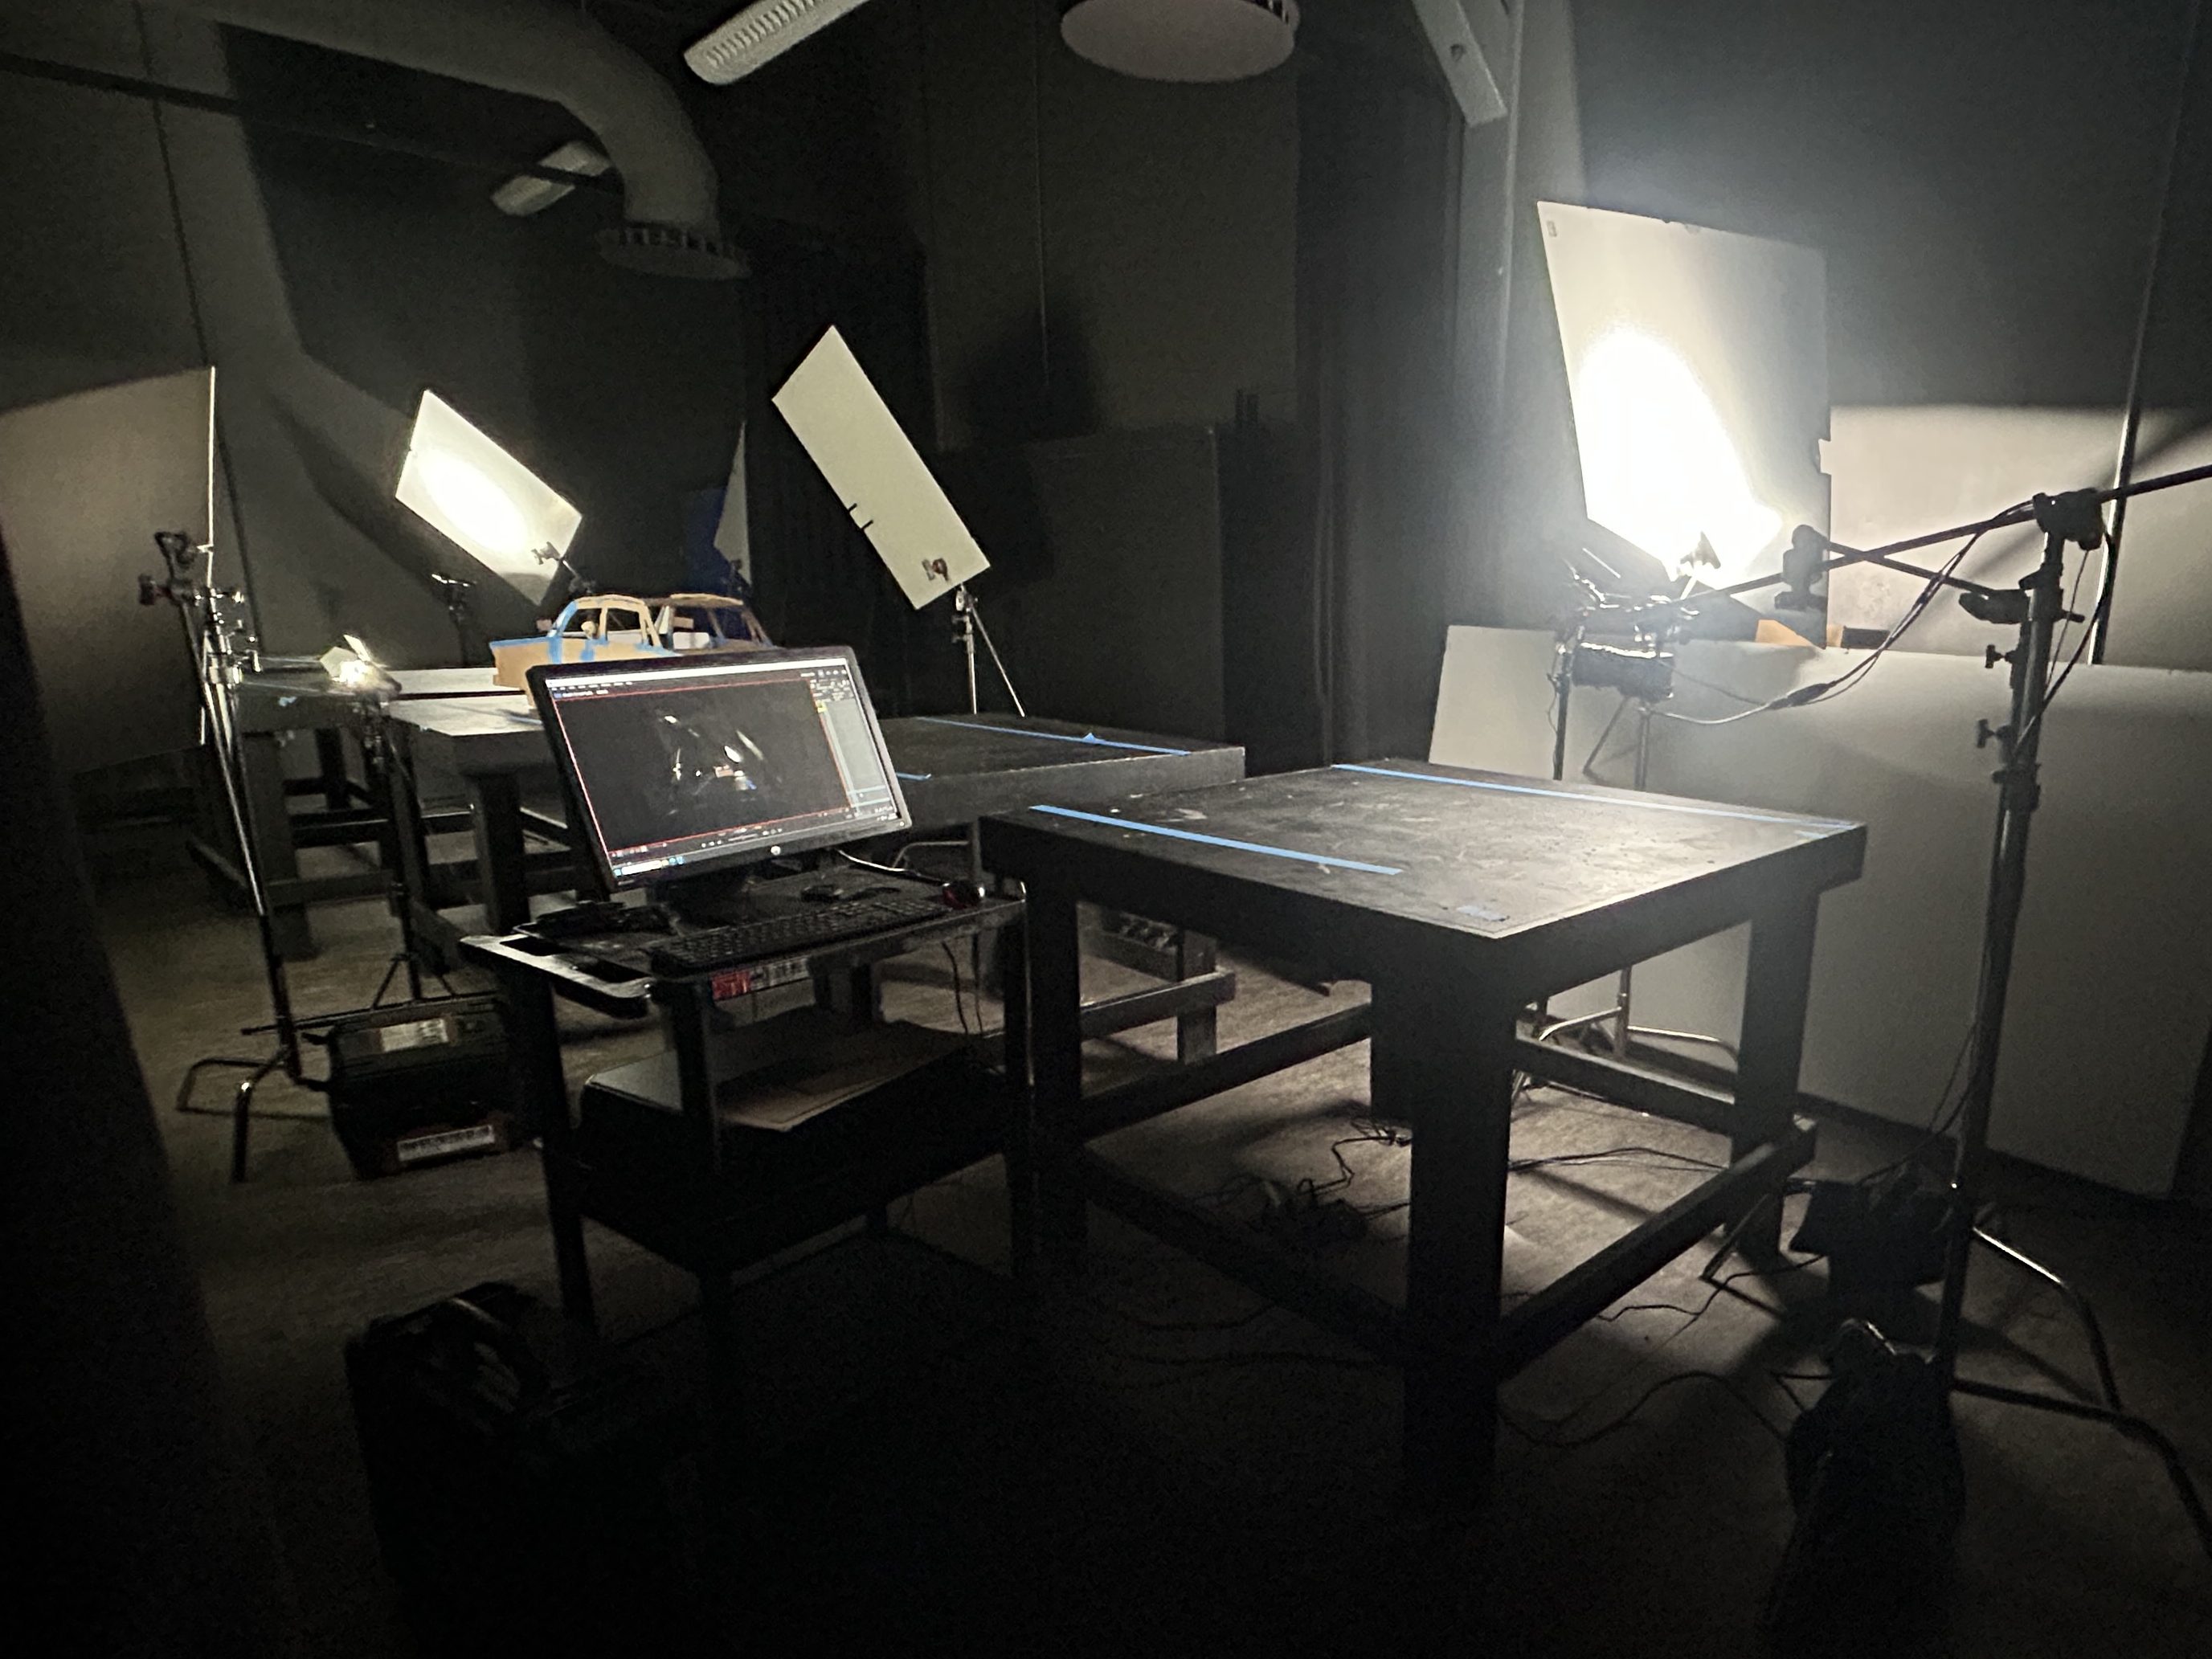
I worked out the plan for this shot through cardboard mock-ups. This included a plan for the camera to pass through the car. I started with the puppet-scale car set, then made the background set match the car set’s specifications for the space’s capabilities.
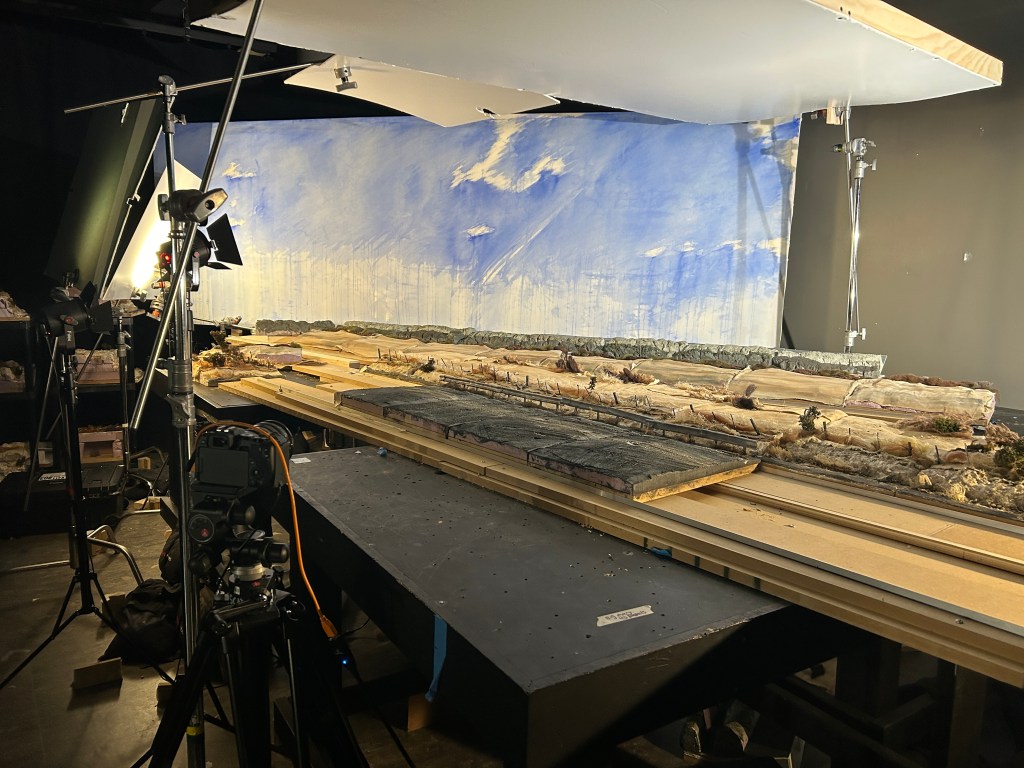
Construction
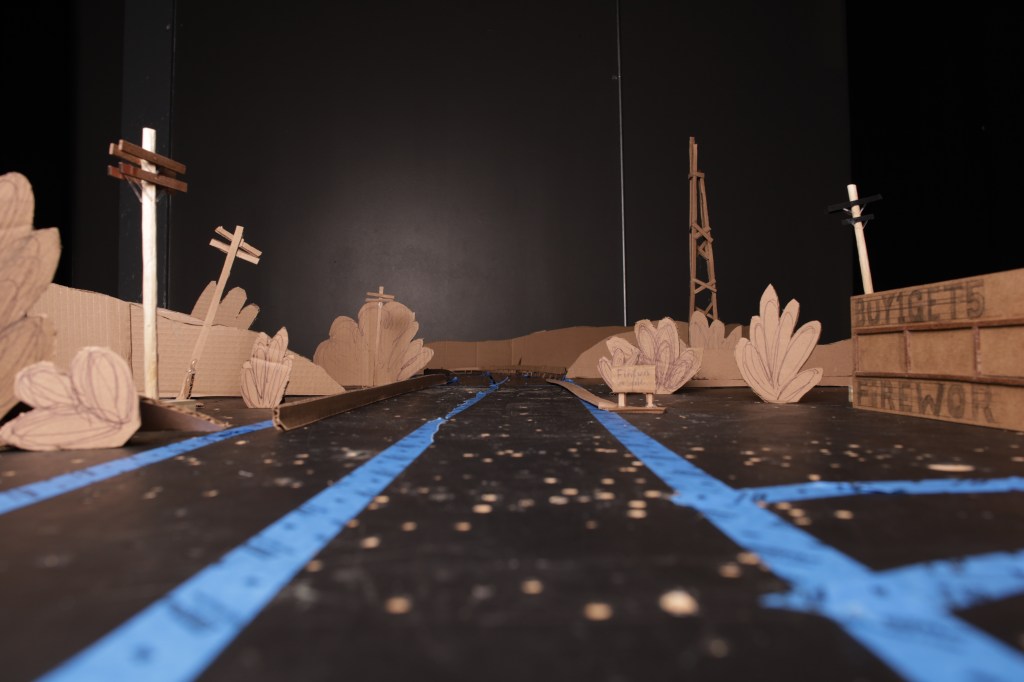
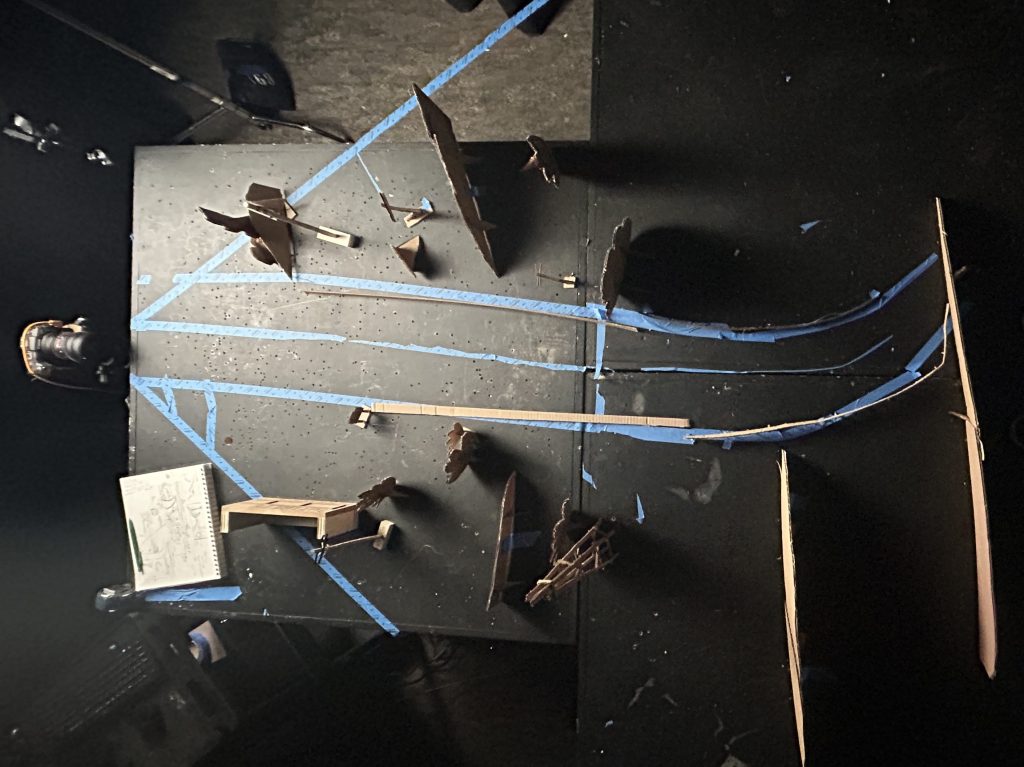
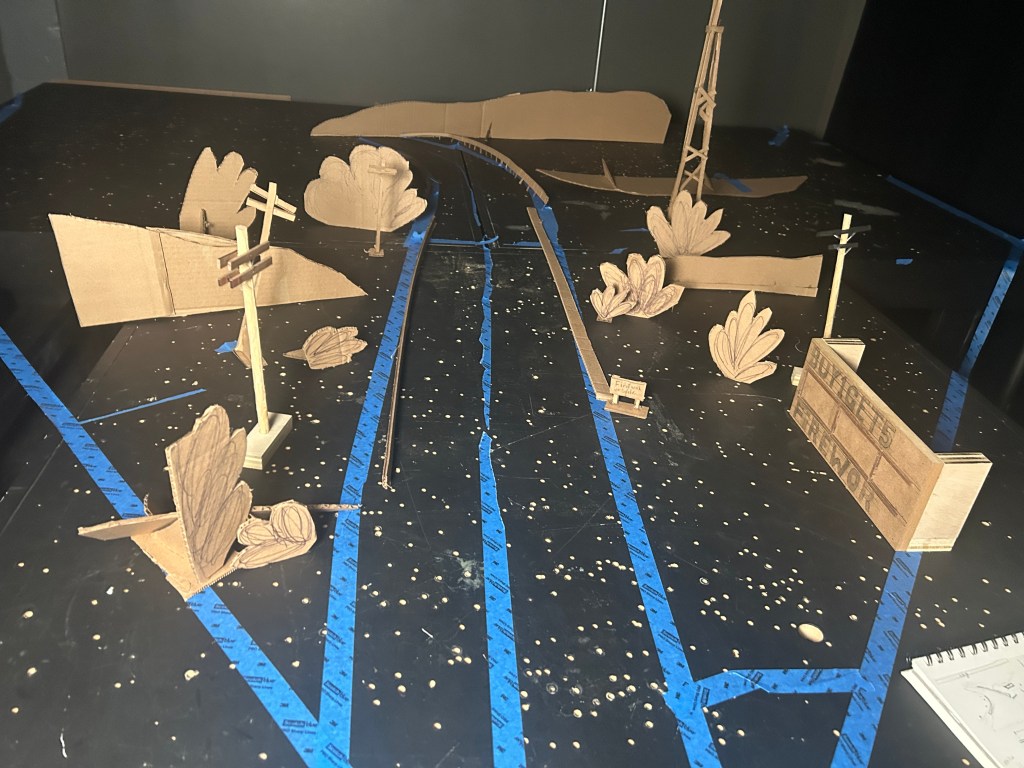
I started laying out the ground of the scales by mapping a plan that matches the curve of the cardboard mockup.
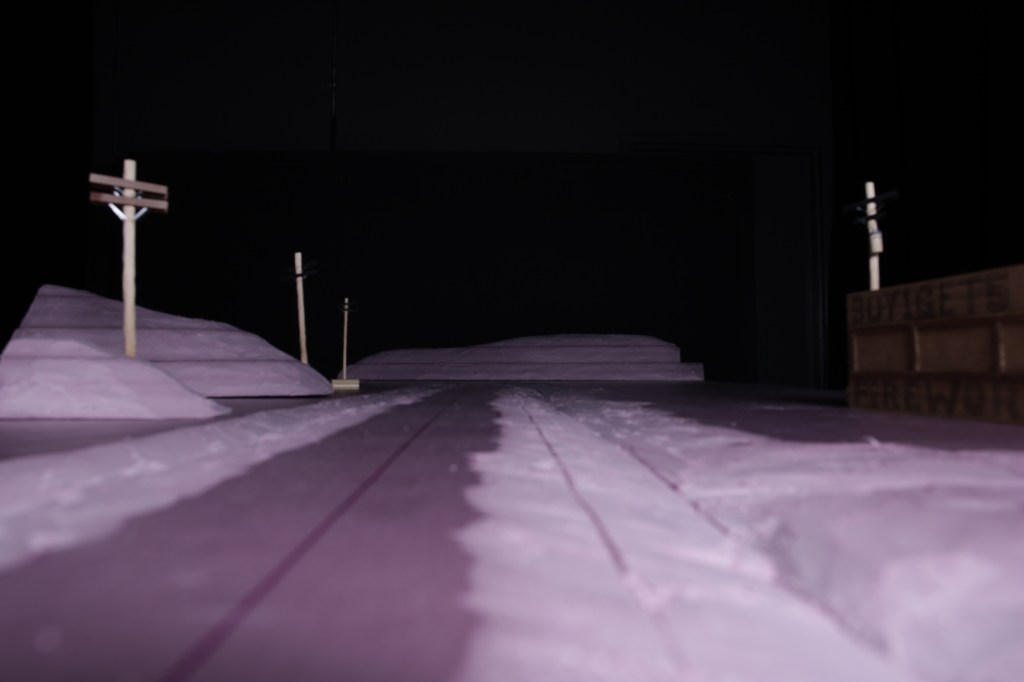
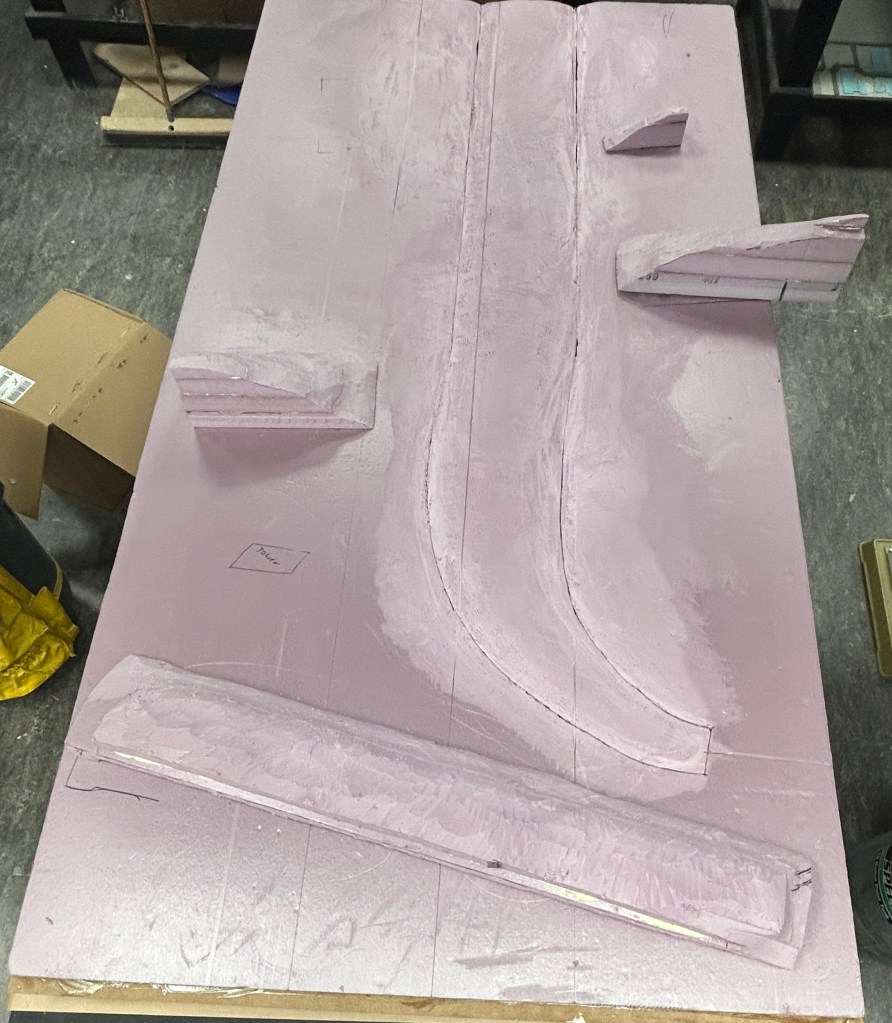
After I had the curve mapped out, I carved the road and the roadside from a 4’x8′ sheet of 2 1/2″ insulation foam. I separated it into three parts: the two sides of the road and the road.
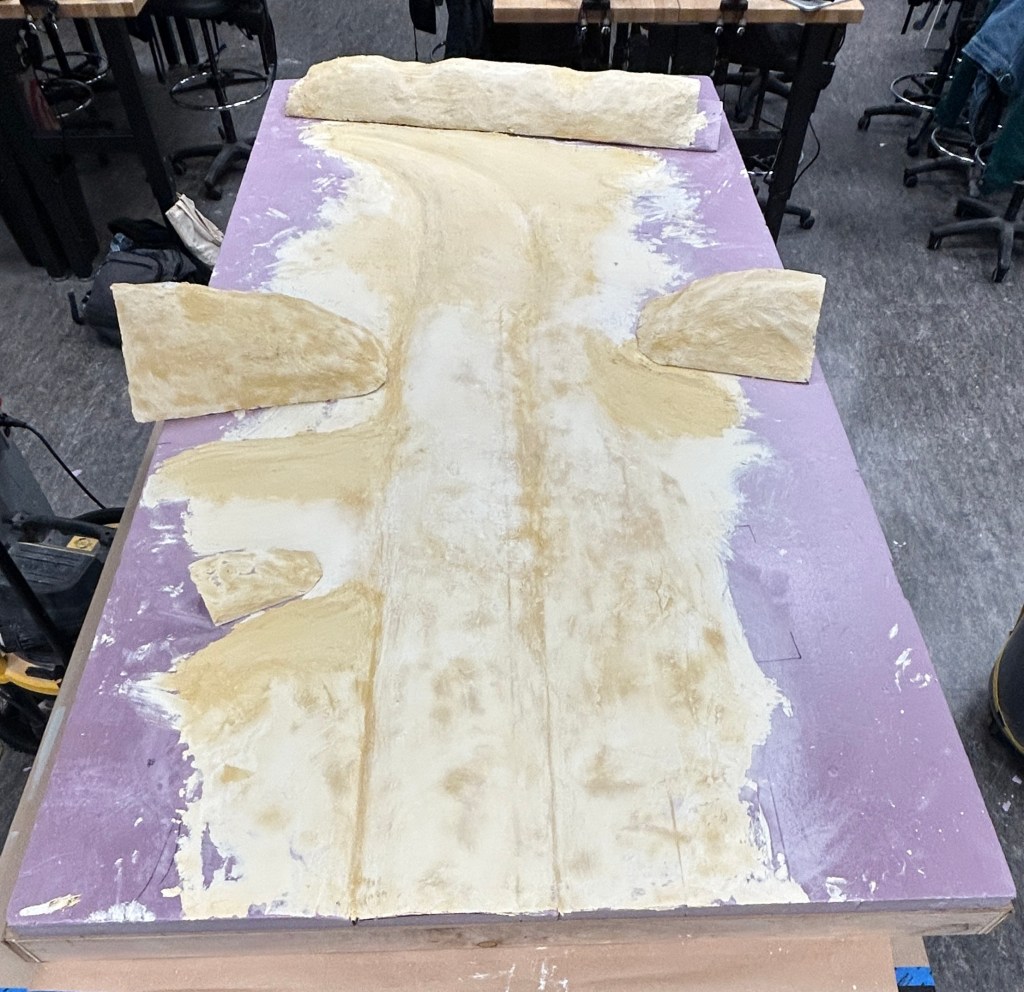
After the parts had the shape I wanted, I glued them to an MDF and birch frame. Then I textured the road and shoulders with Durham’s water putty. To create the illusion of receding in space, I added more texture to the first portion of the model and tapered it off as it went back.
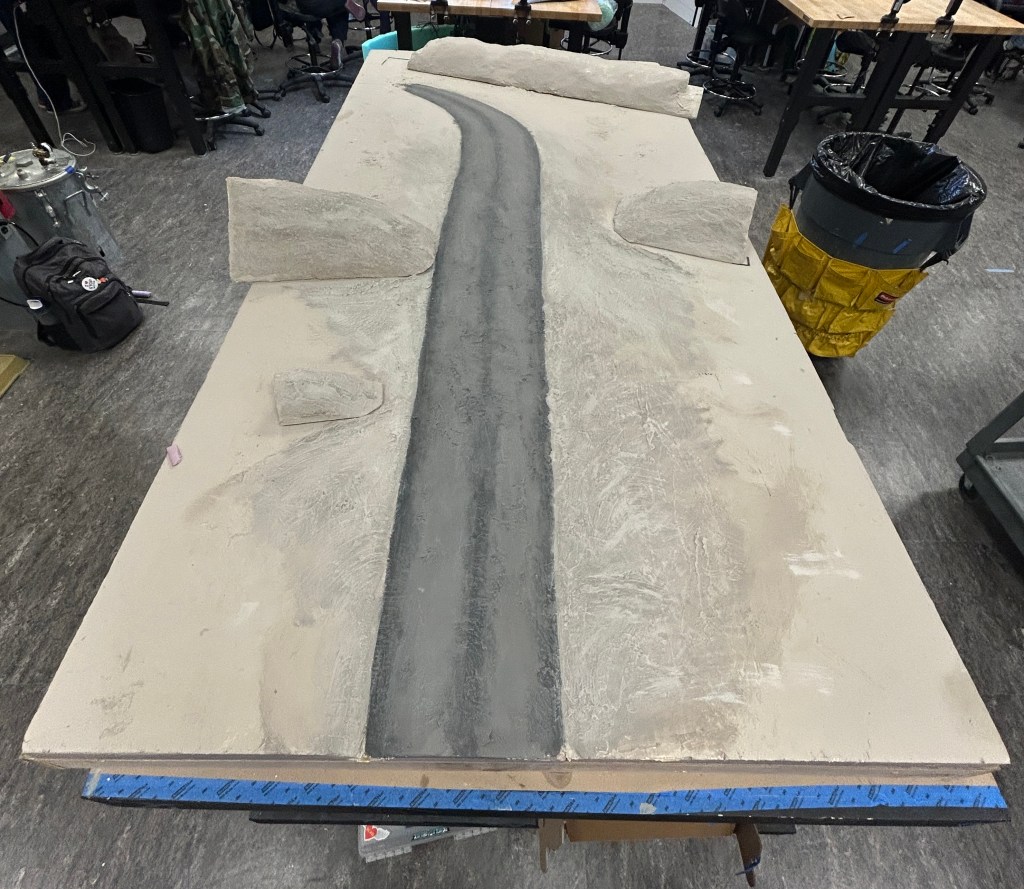
Then gave it a first pass at the paint.
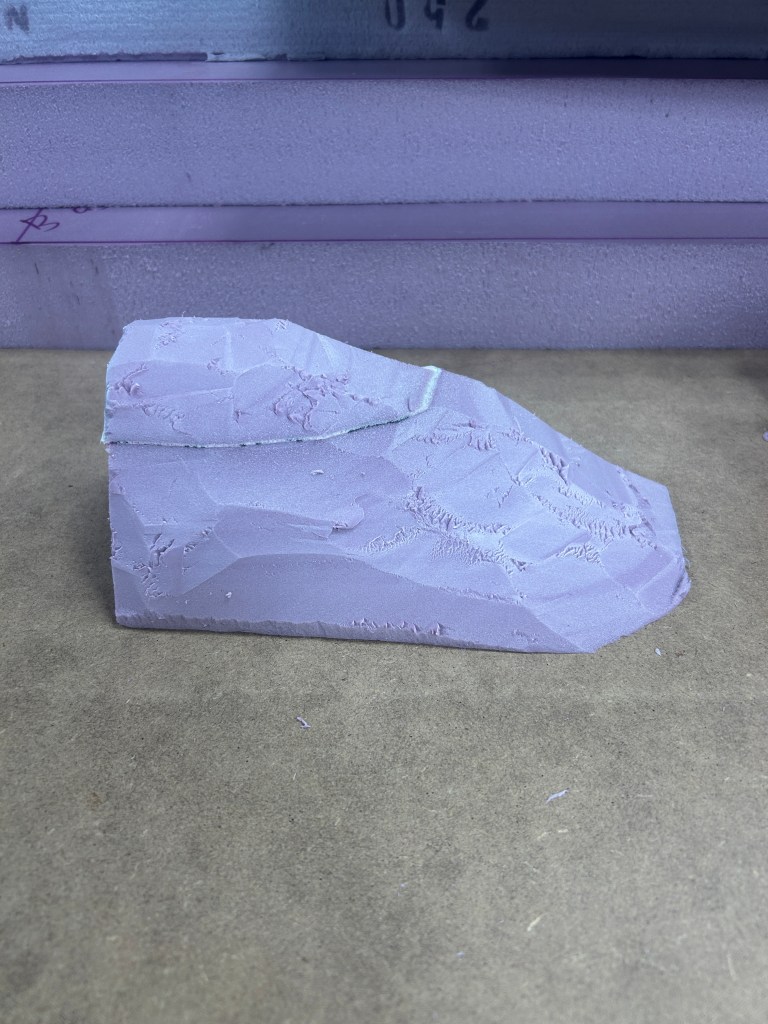
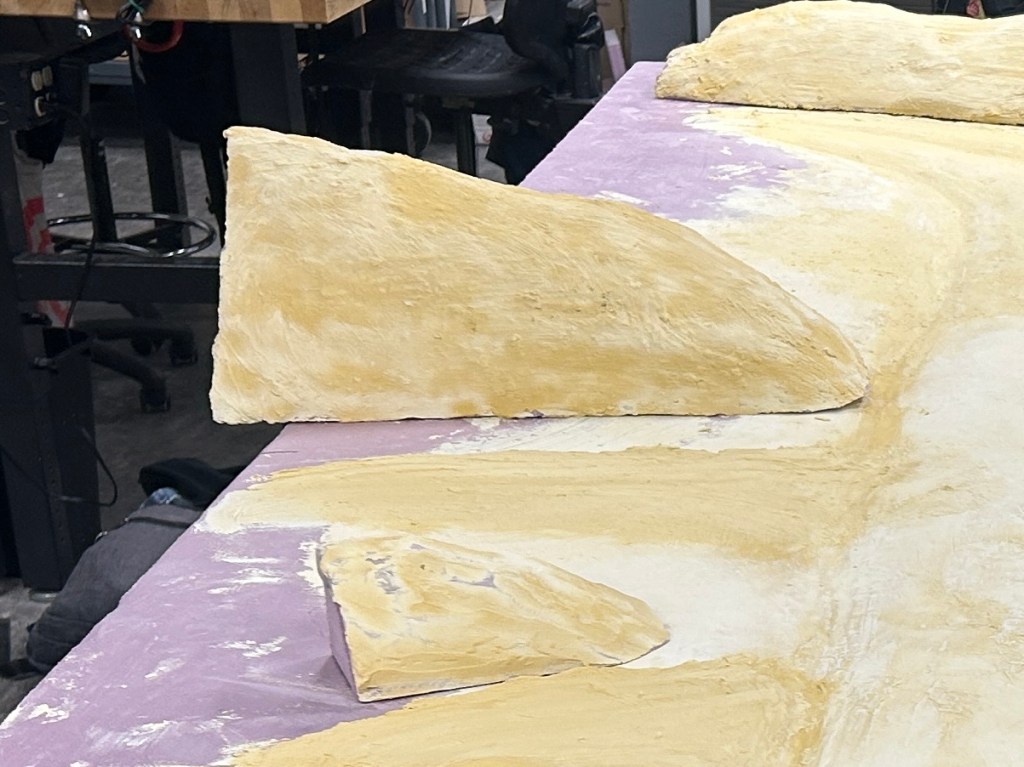
I also carved the mountains out of pink insulation foam and covered them with Druham water putty to create a base texture.
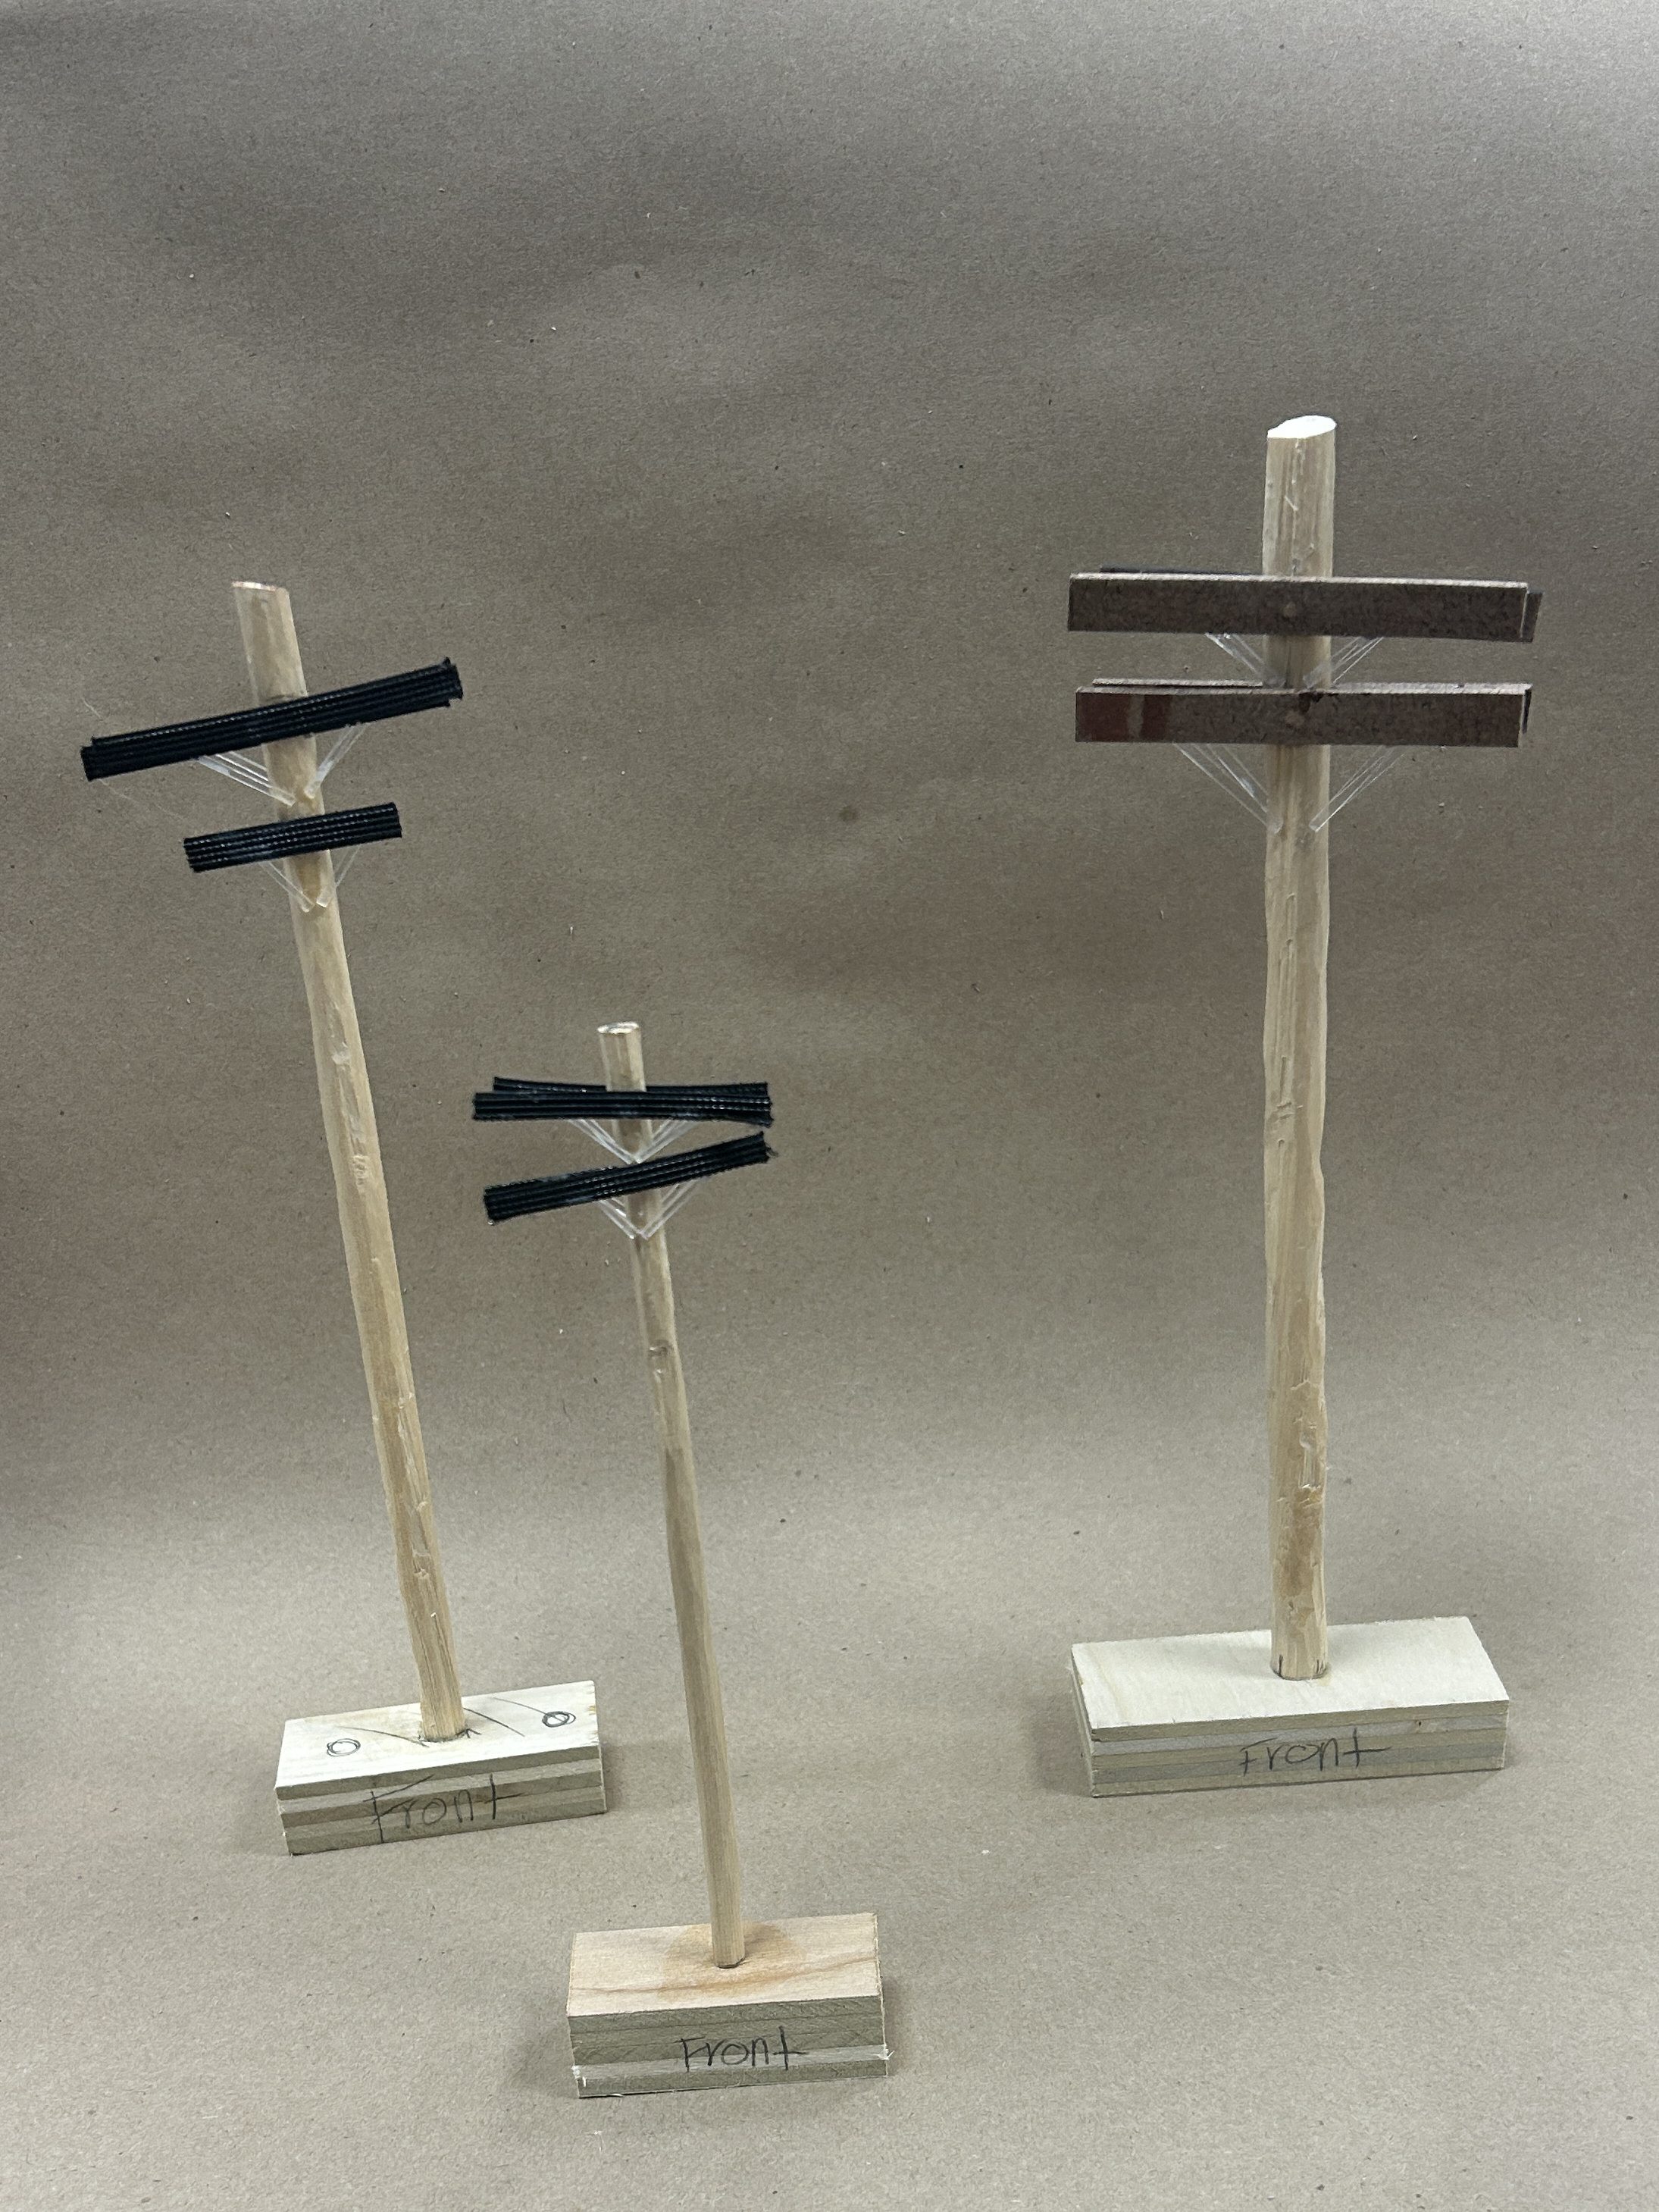
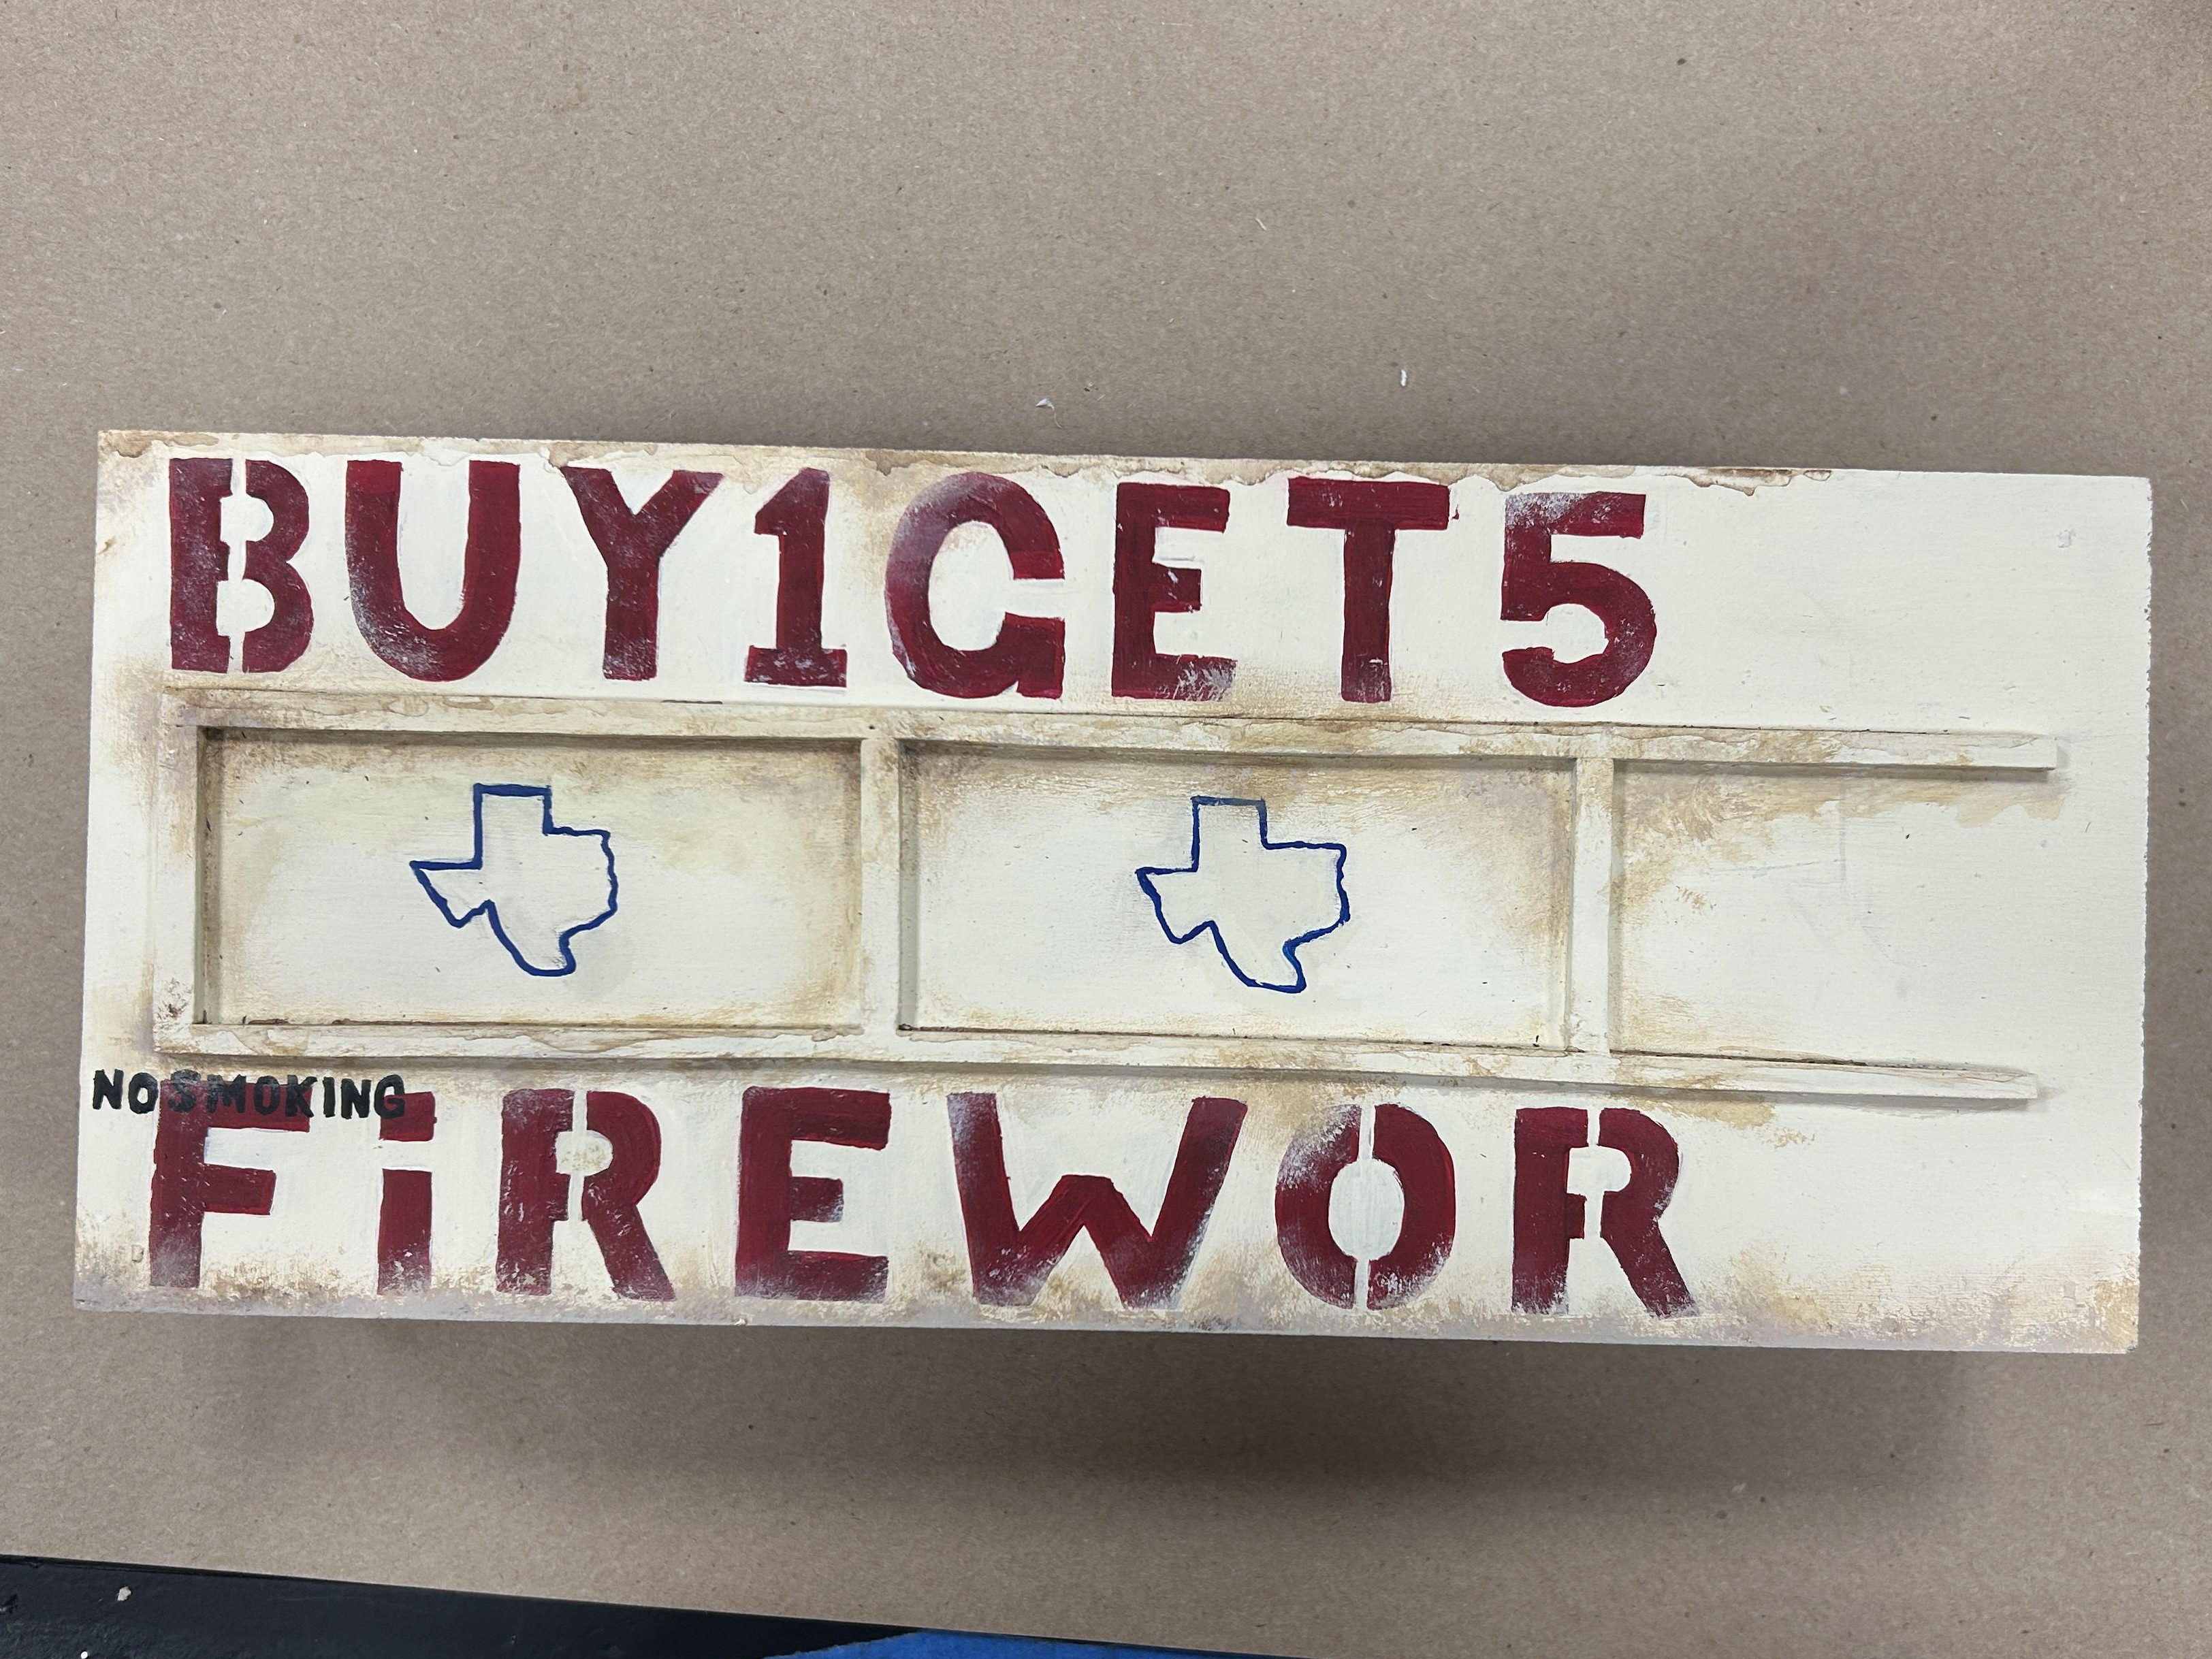
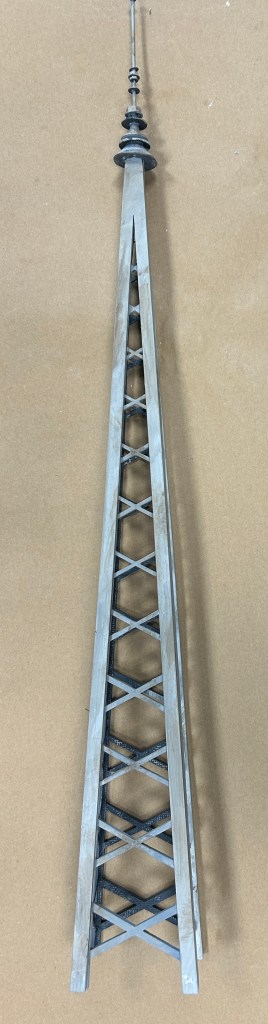
As well as making the telephone pole and the first iteration of the firework stand.
Quilt
I sewed and rigged a quilt that was animated to emulate the breathing of the characters sleeping under it. I was responsible for the construction, distressing, and rigging of the quilt.
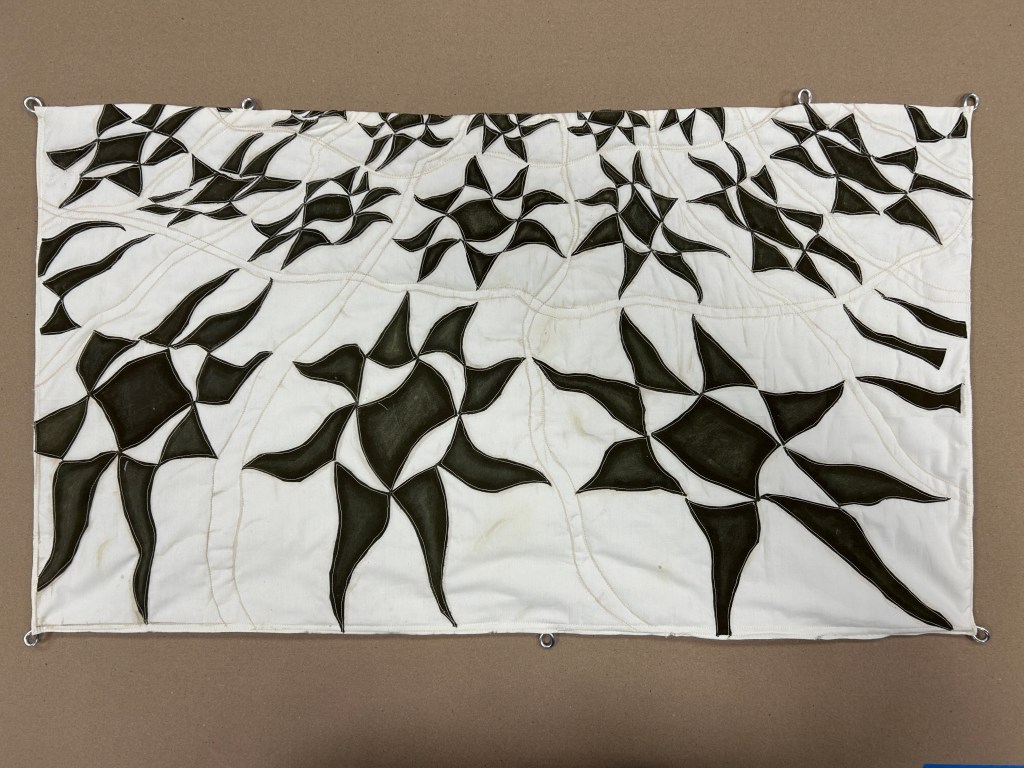
I started by tracing the linework pattern onto the fabric, then I sewed the fabric onto a quilt backing to get the look of a quilt. The quilt was designed to be in a forced perspective, so the pattern got smaller as it was farther from the camera.
To achieve the green color we wanted for the stars, I dyed a fabric to match the color script. Next, I cut out all of the pieces of the star patterns. For the larger pieces, I cut them out slightly larger than the pattern, then folded over the extra and glued it to match the pattern. This was to prevent fraying and keep the look of a real quilt. With the smaller pieces, I glued the edges with an anti-fray glue.
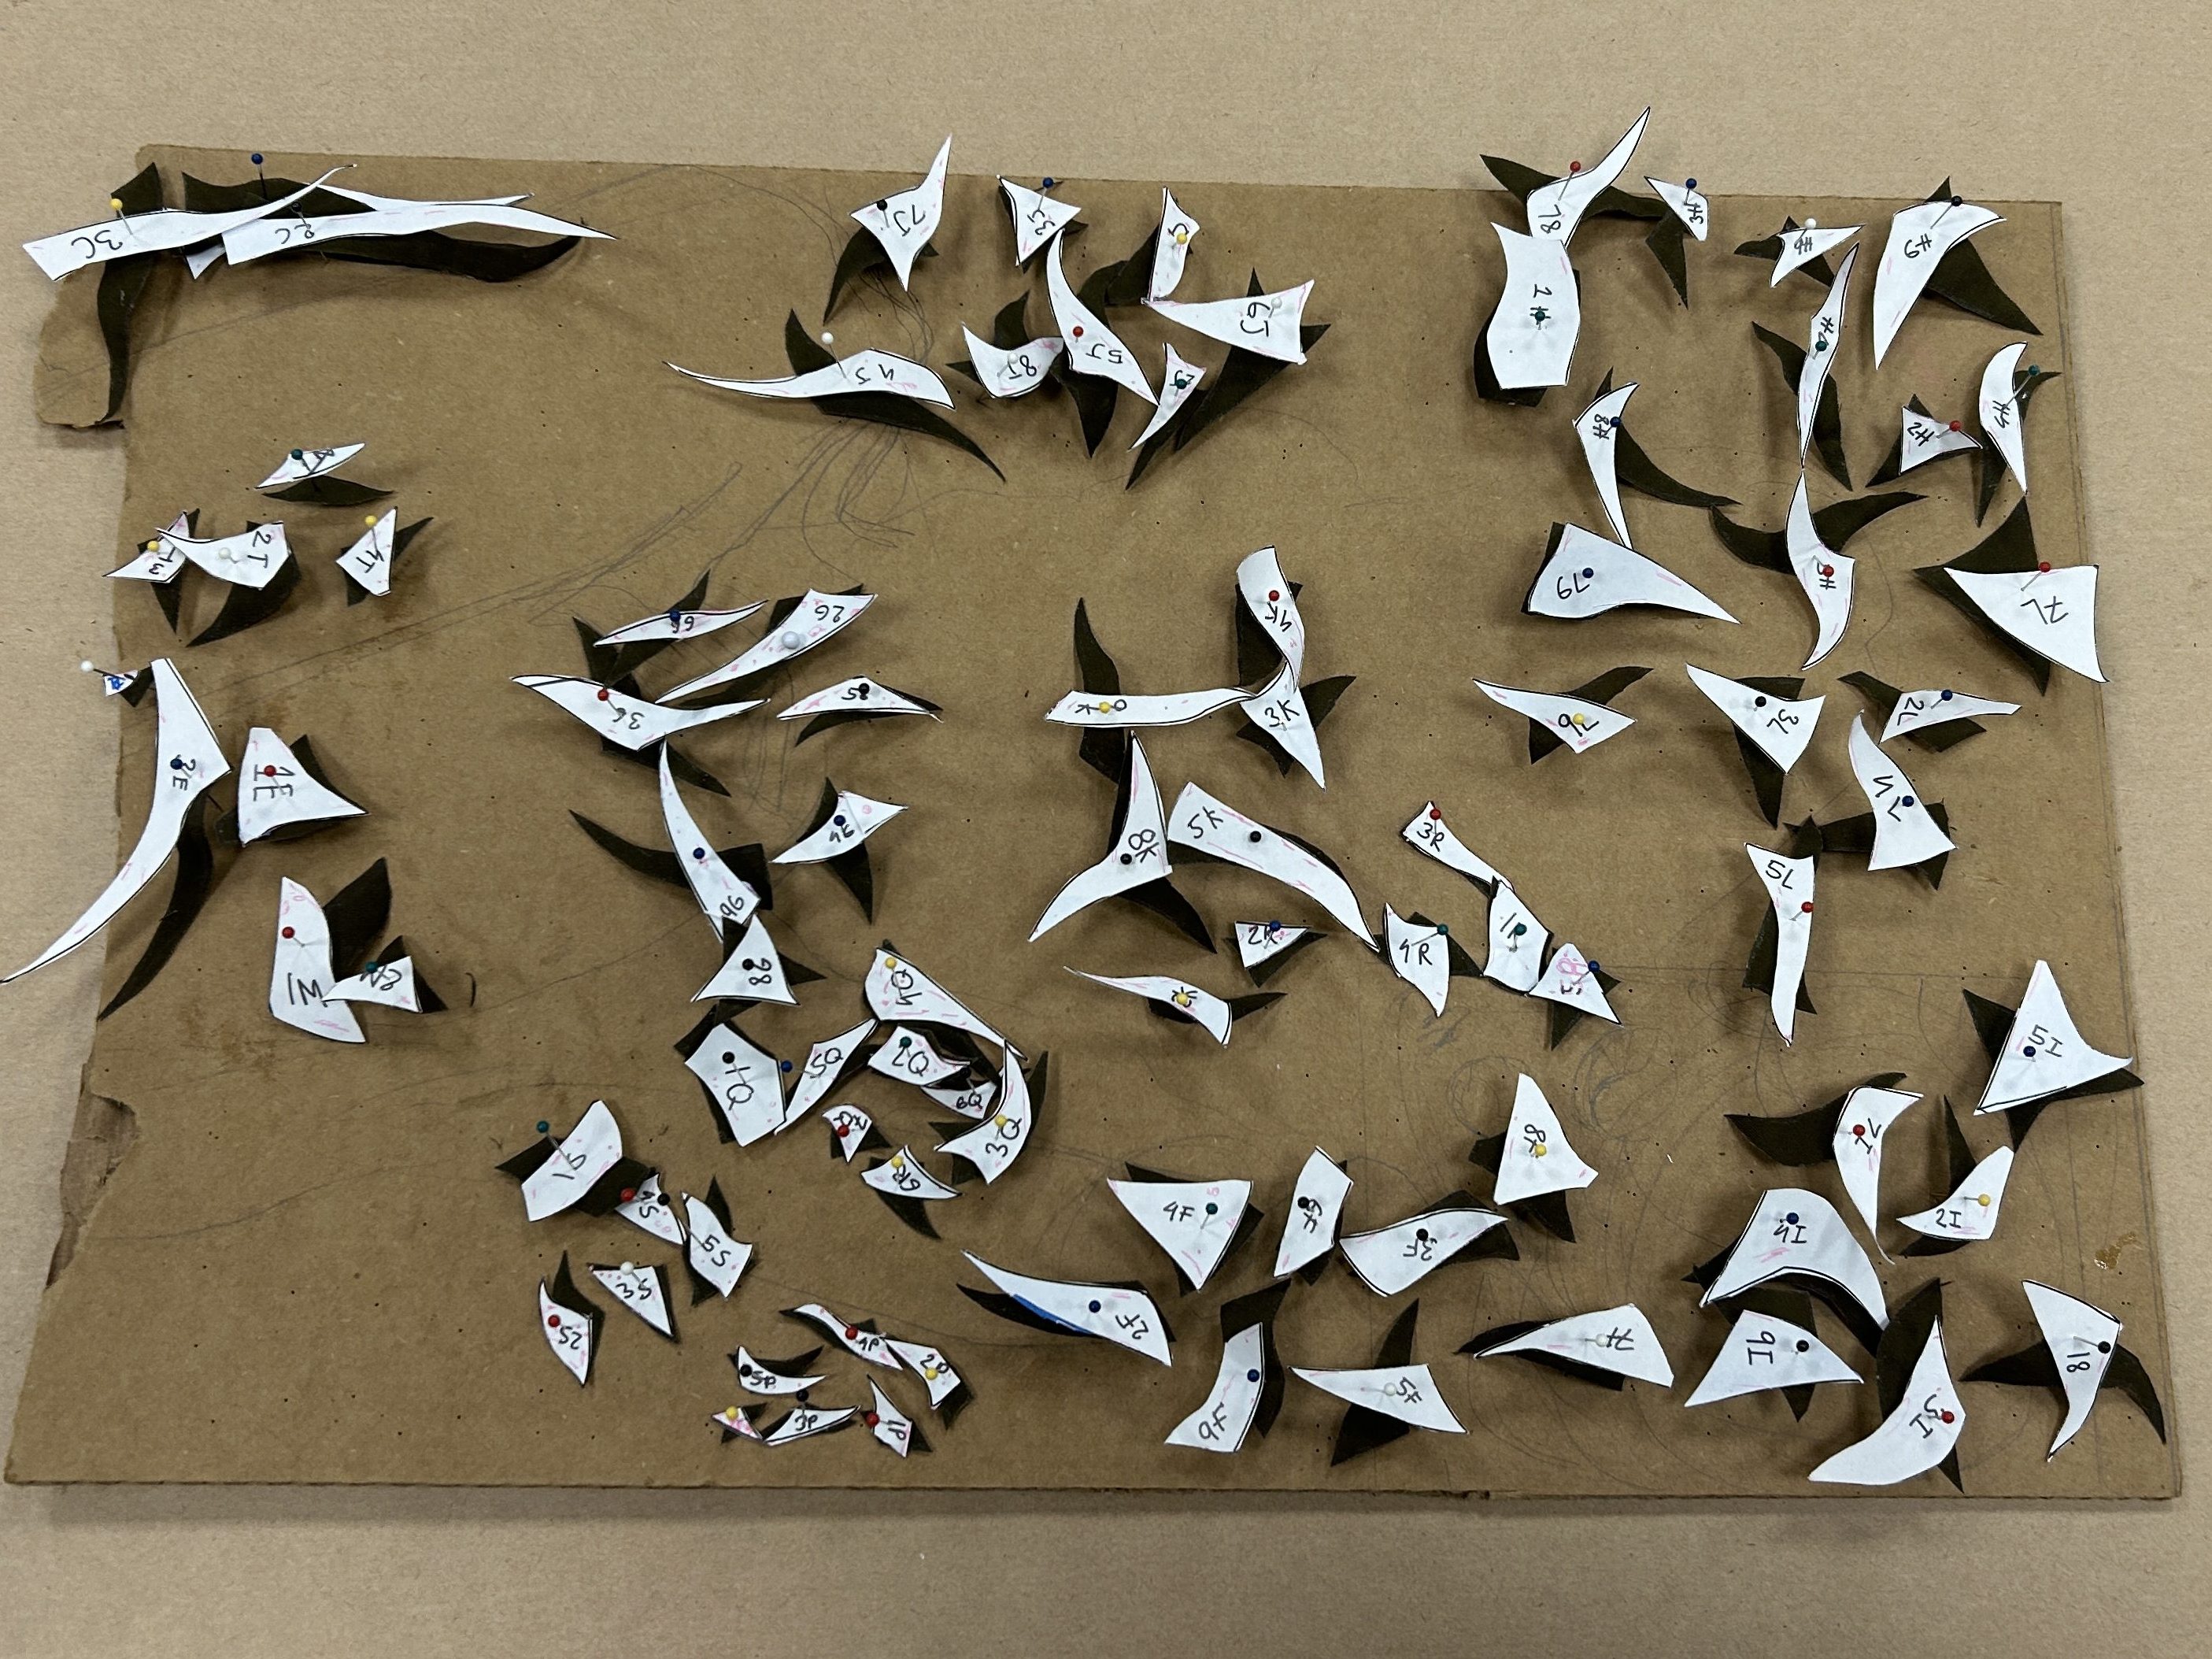
From there, I placed all of the pieces onto the quilt base and glued them in place.
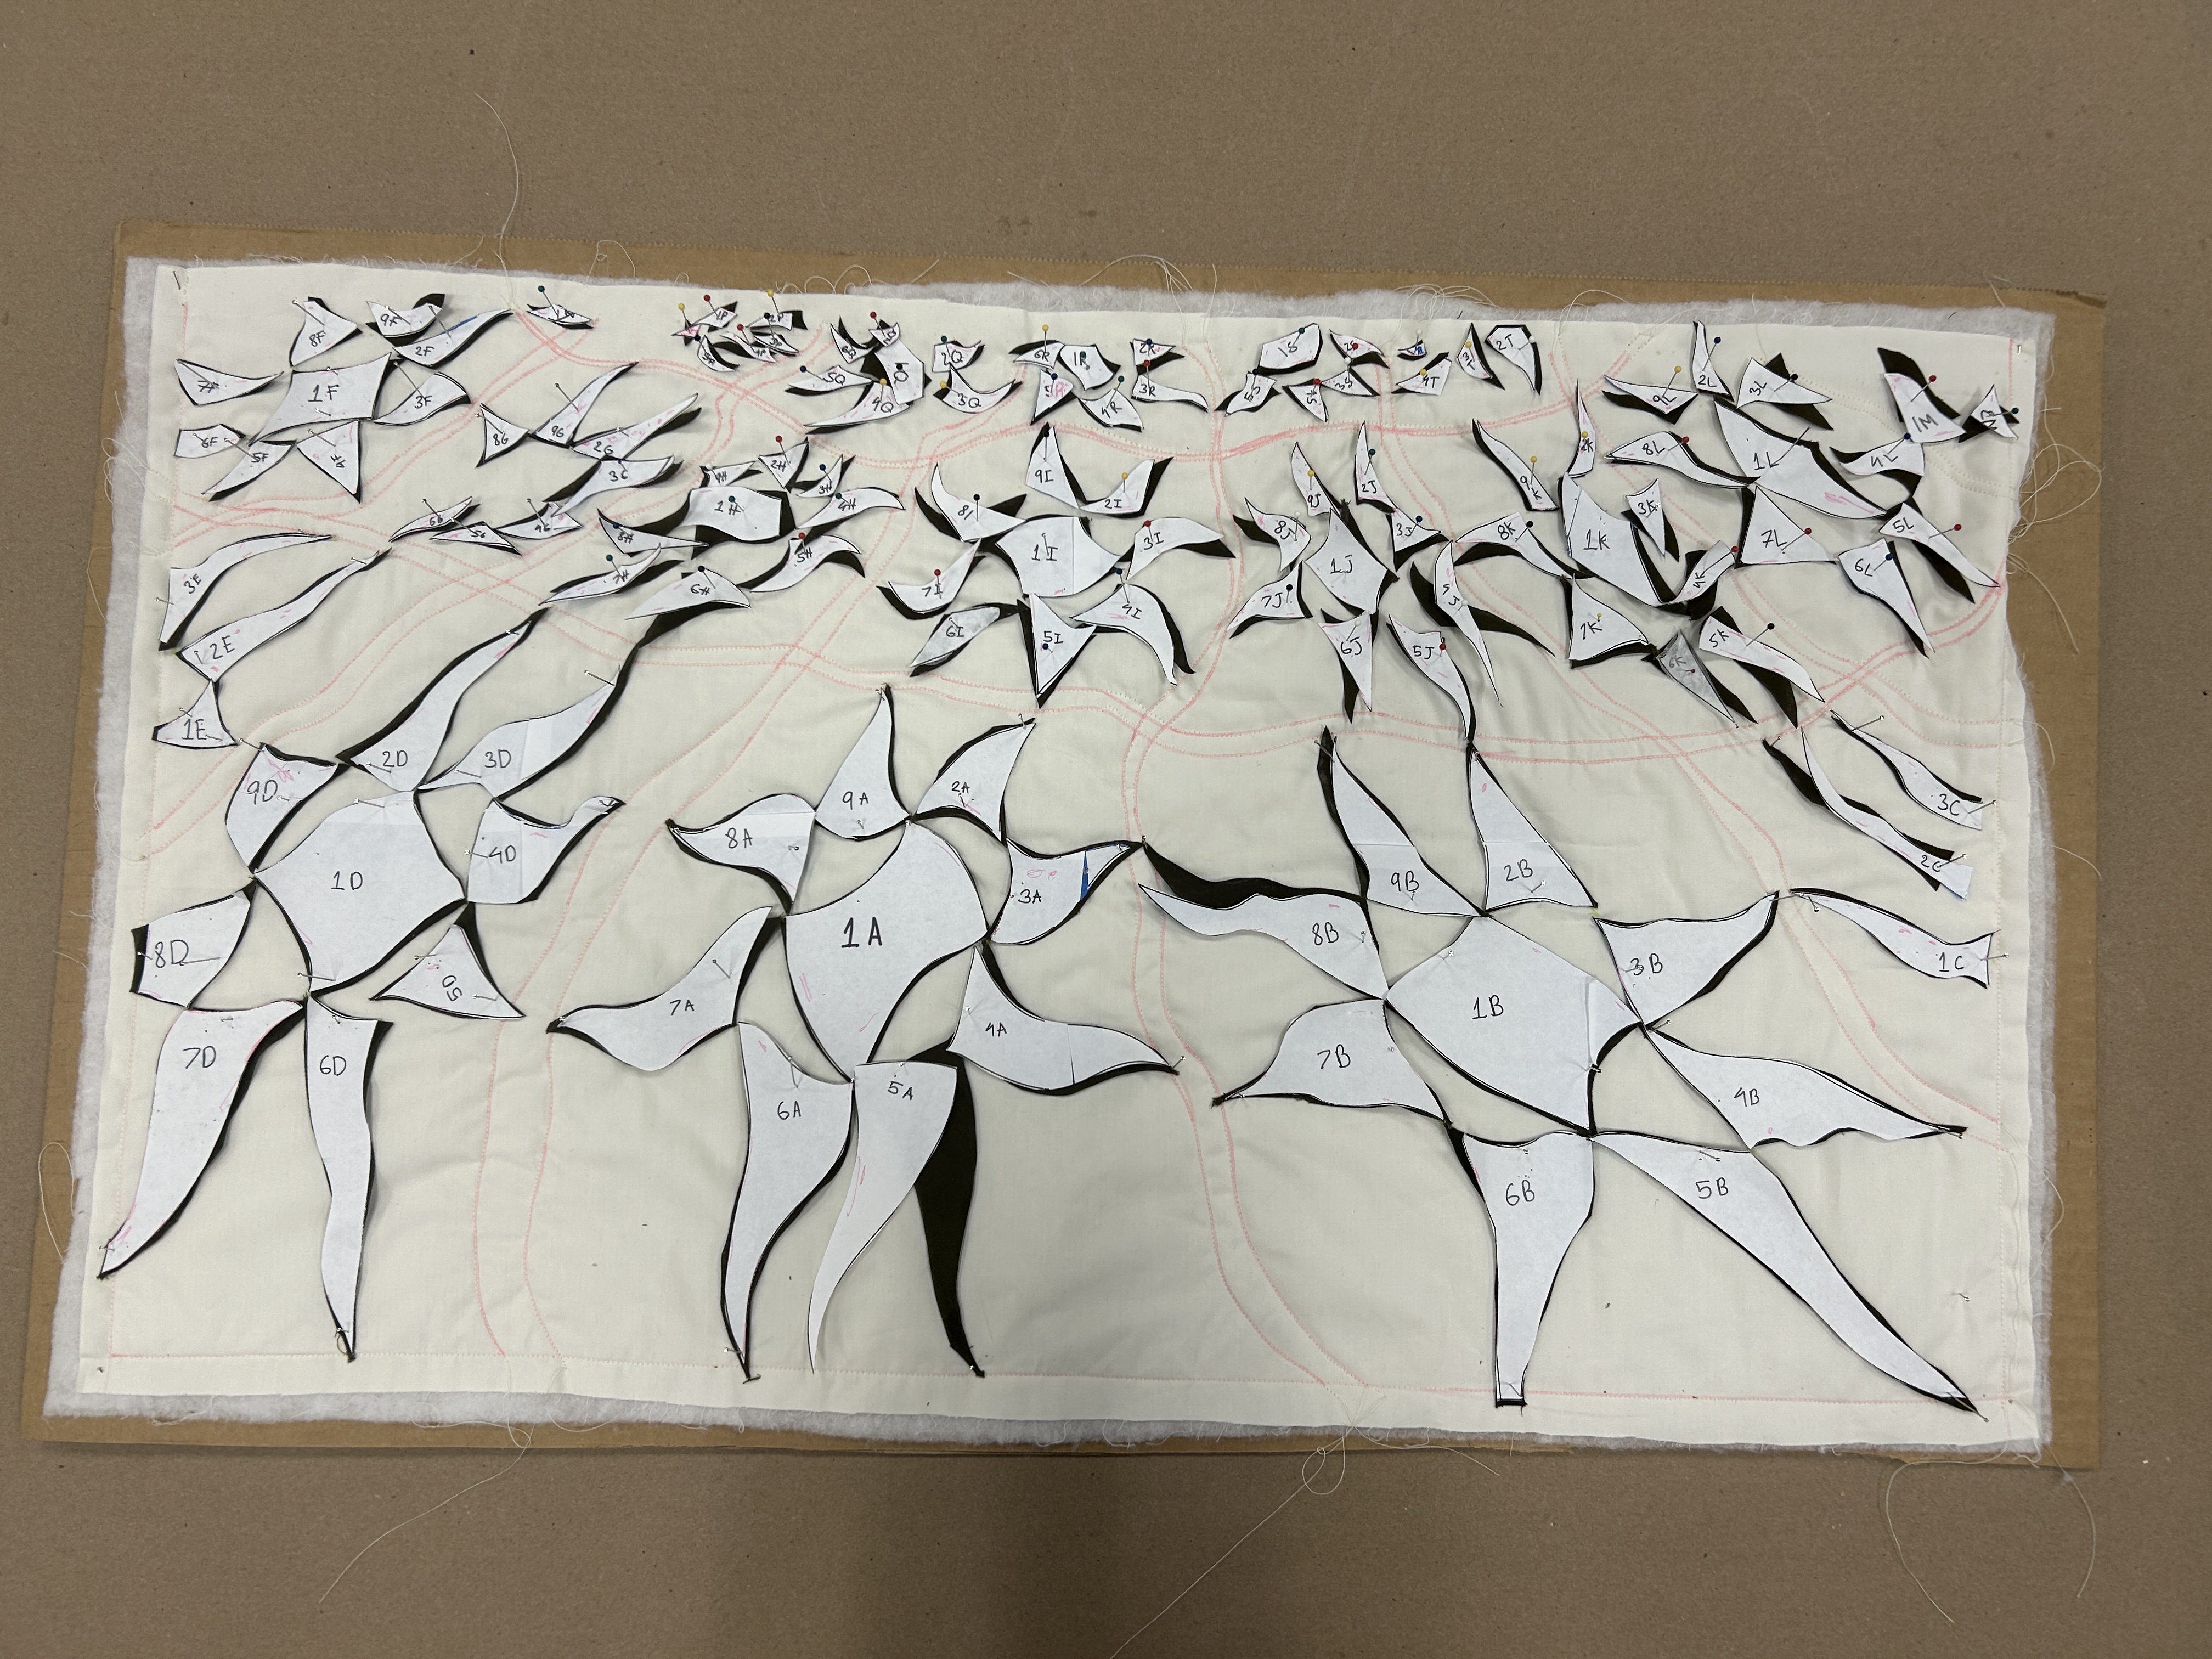
Then I sewed all the pieces onto the base with a sewing machine.
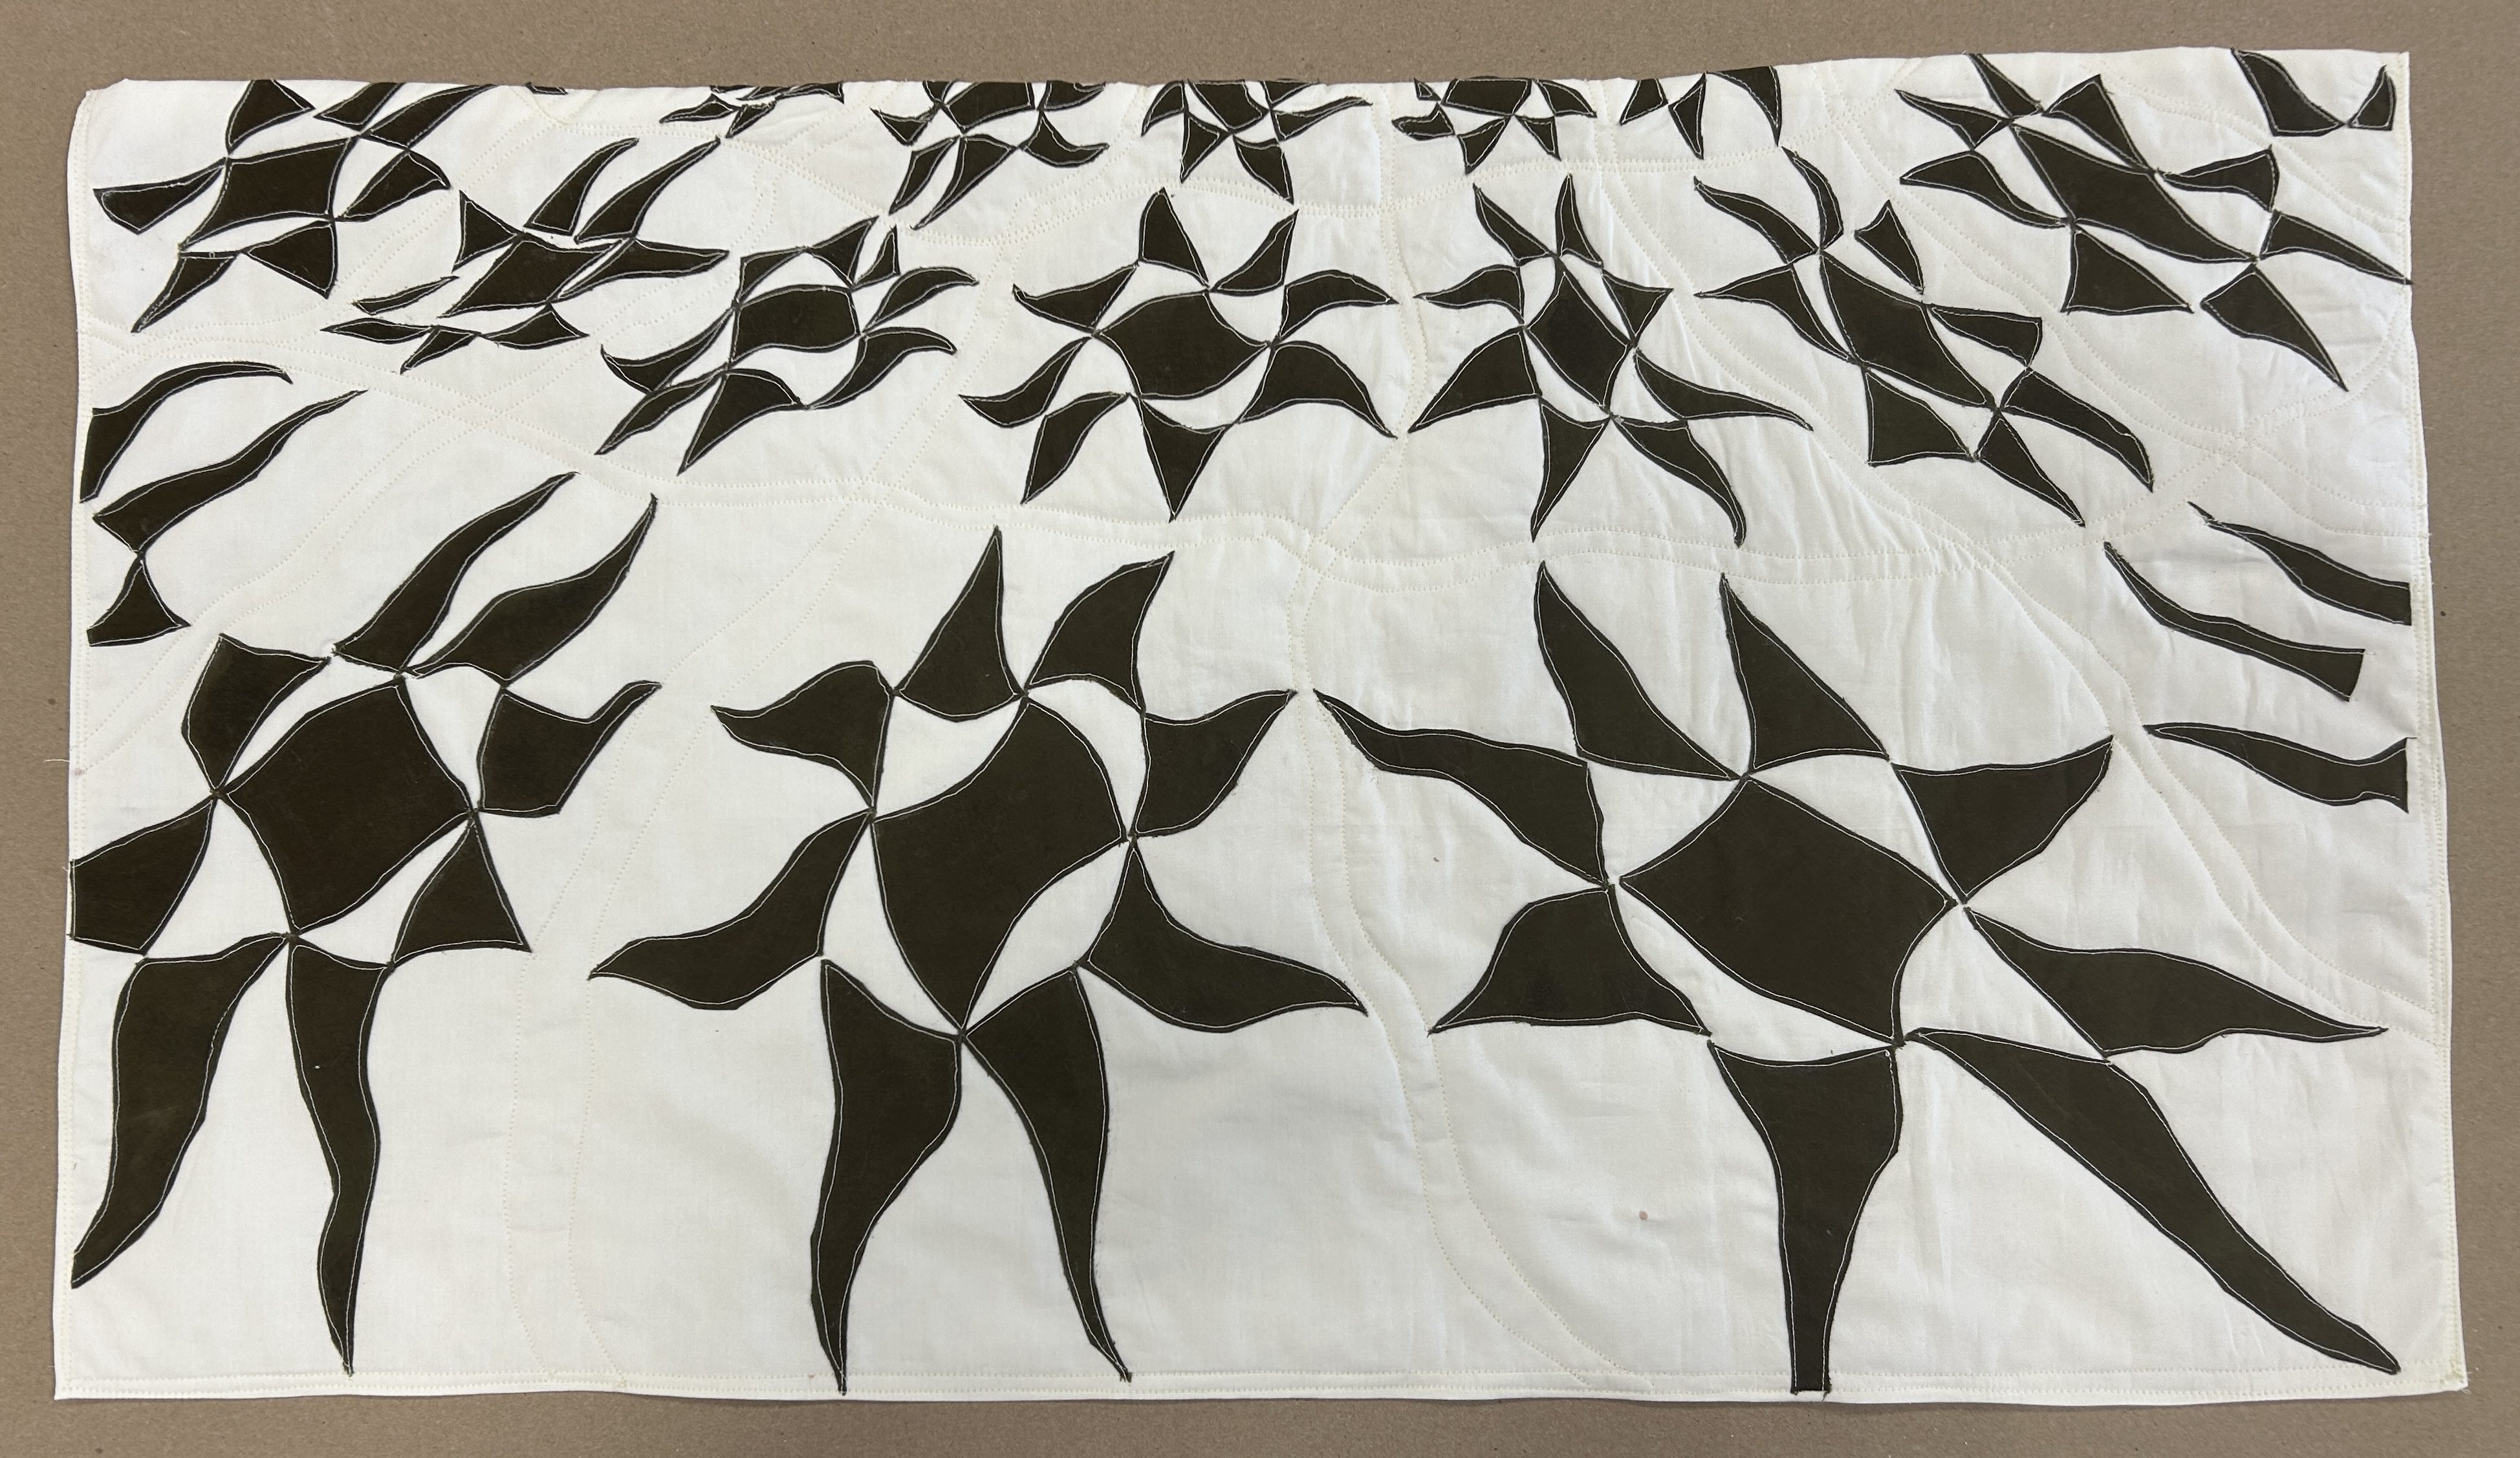
After assembling the quilt, I distressed it with washes of paint. I further weathered the quilt in camera as well.
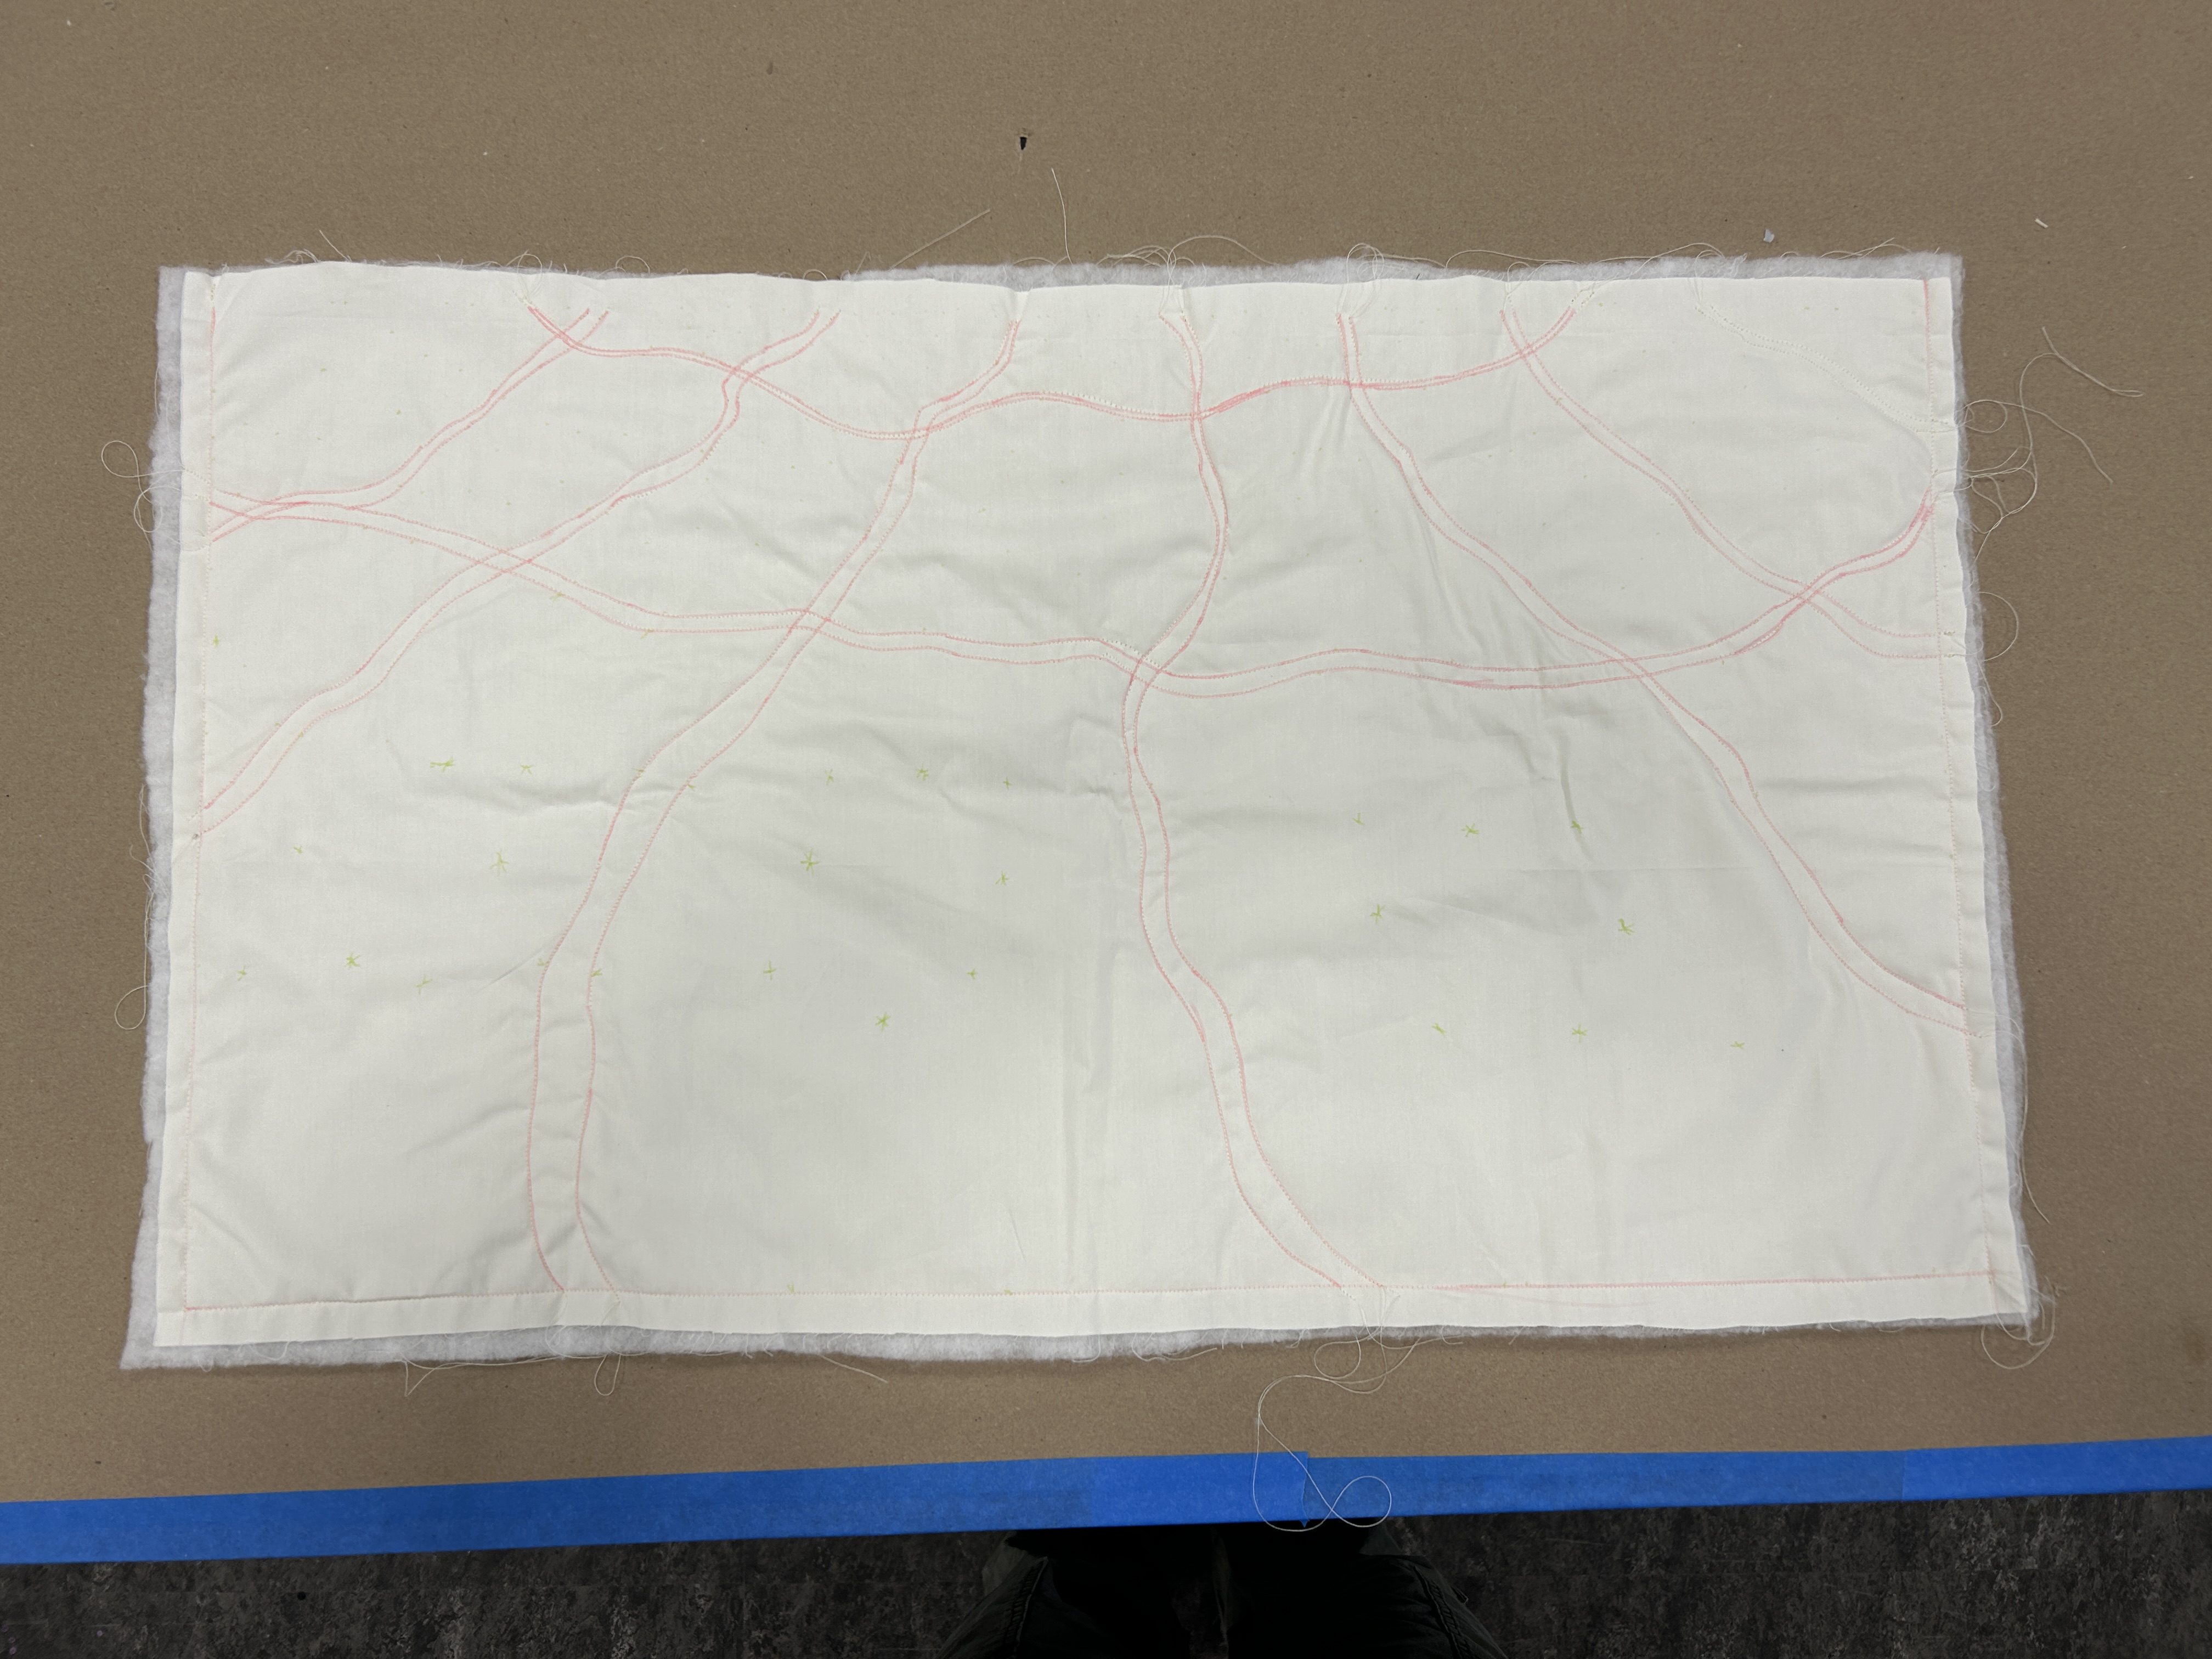
Quilt Rigging
Before the quilt was constructed, I made a test quilt with wire rigging to develop a plan for the hero assets. Through trial and error of animation tests, I created a rigging system that works with the animation style.
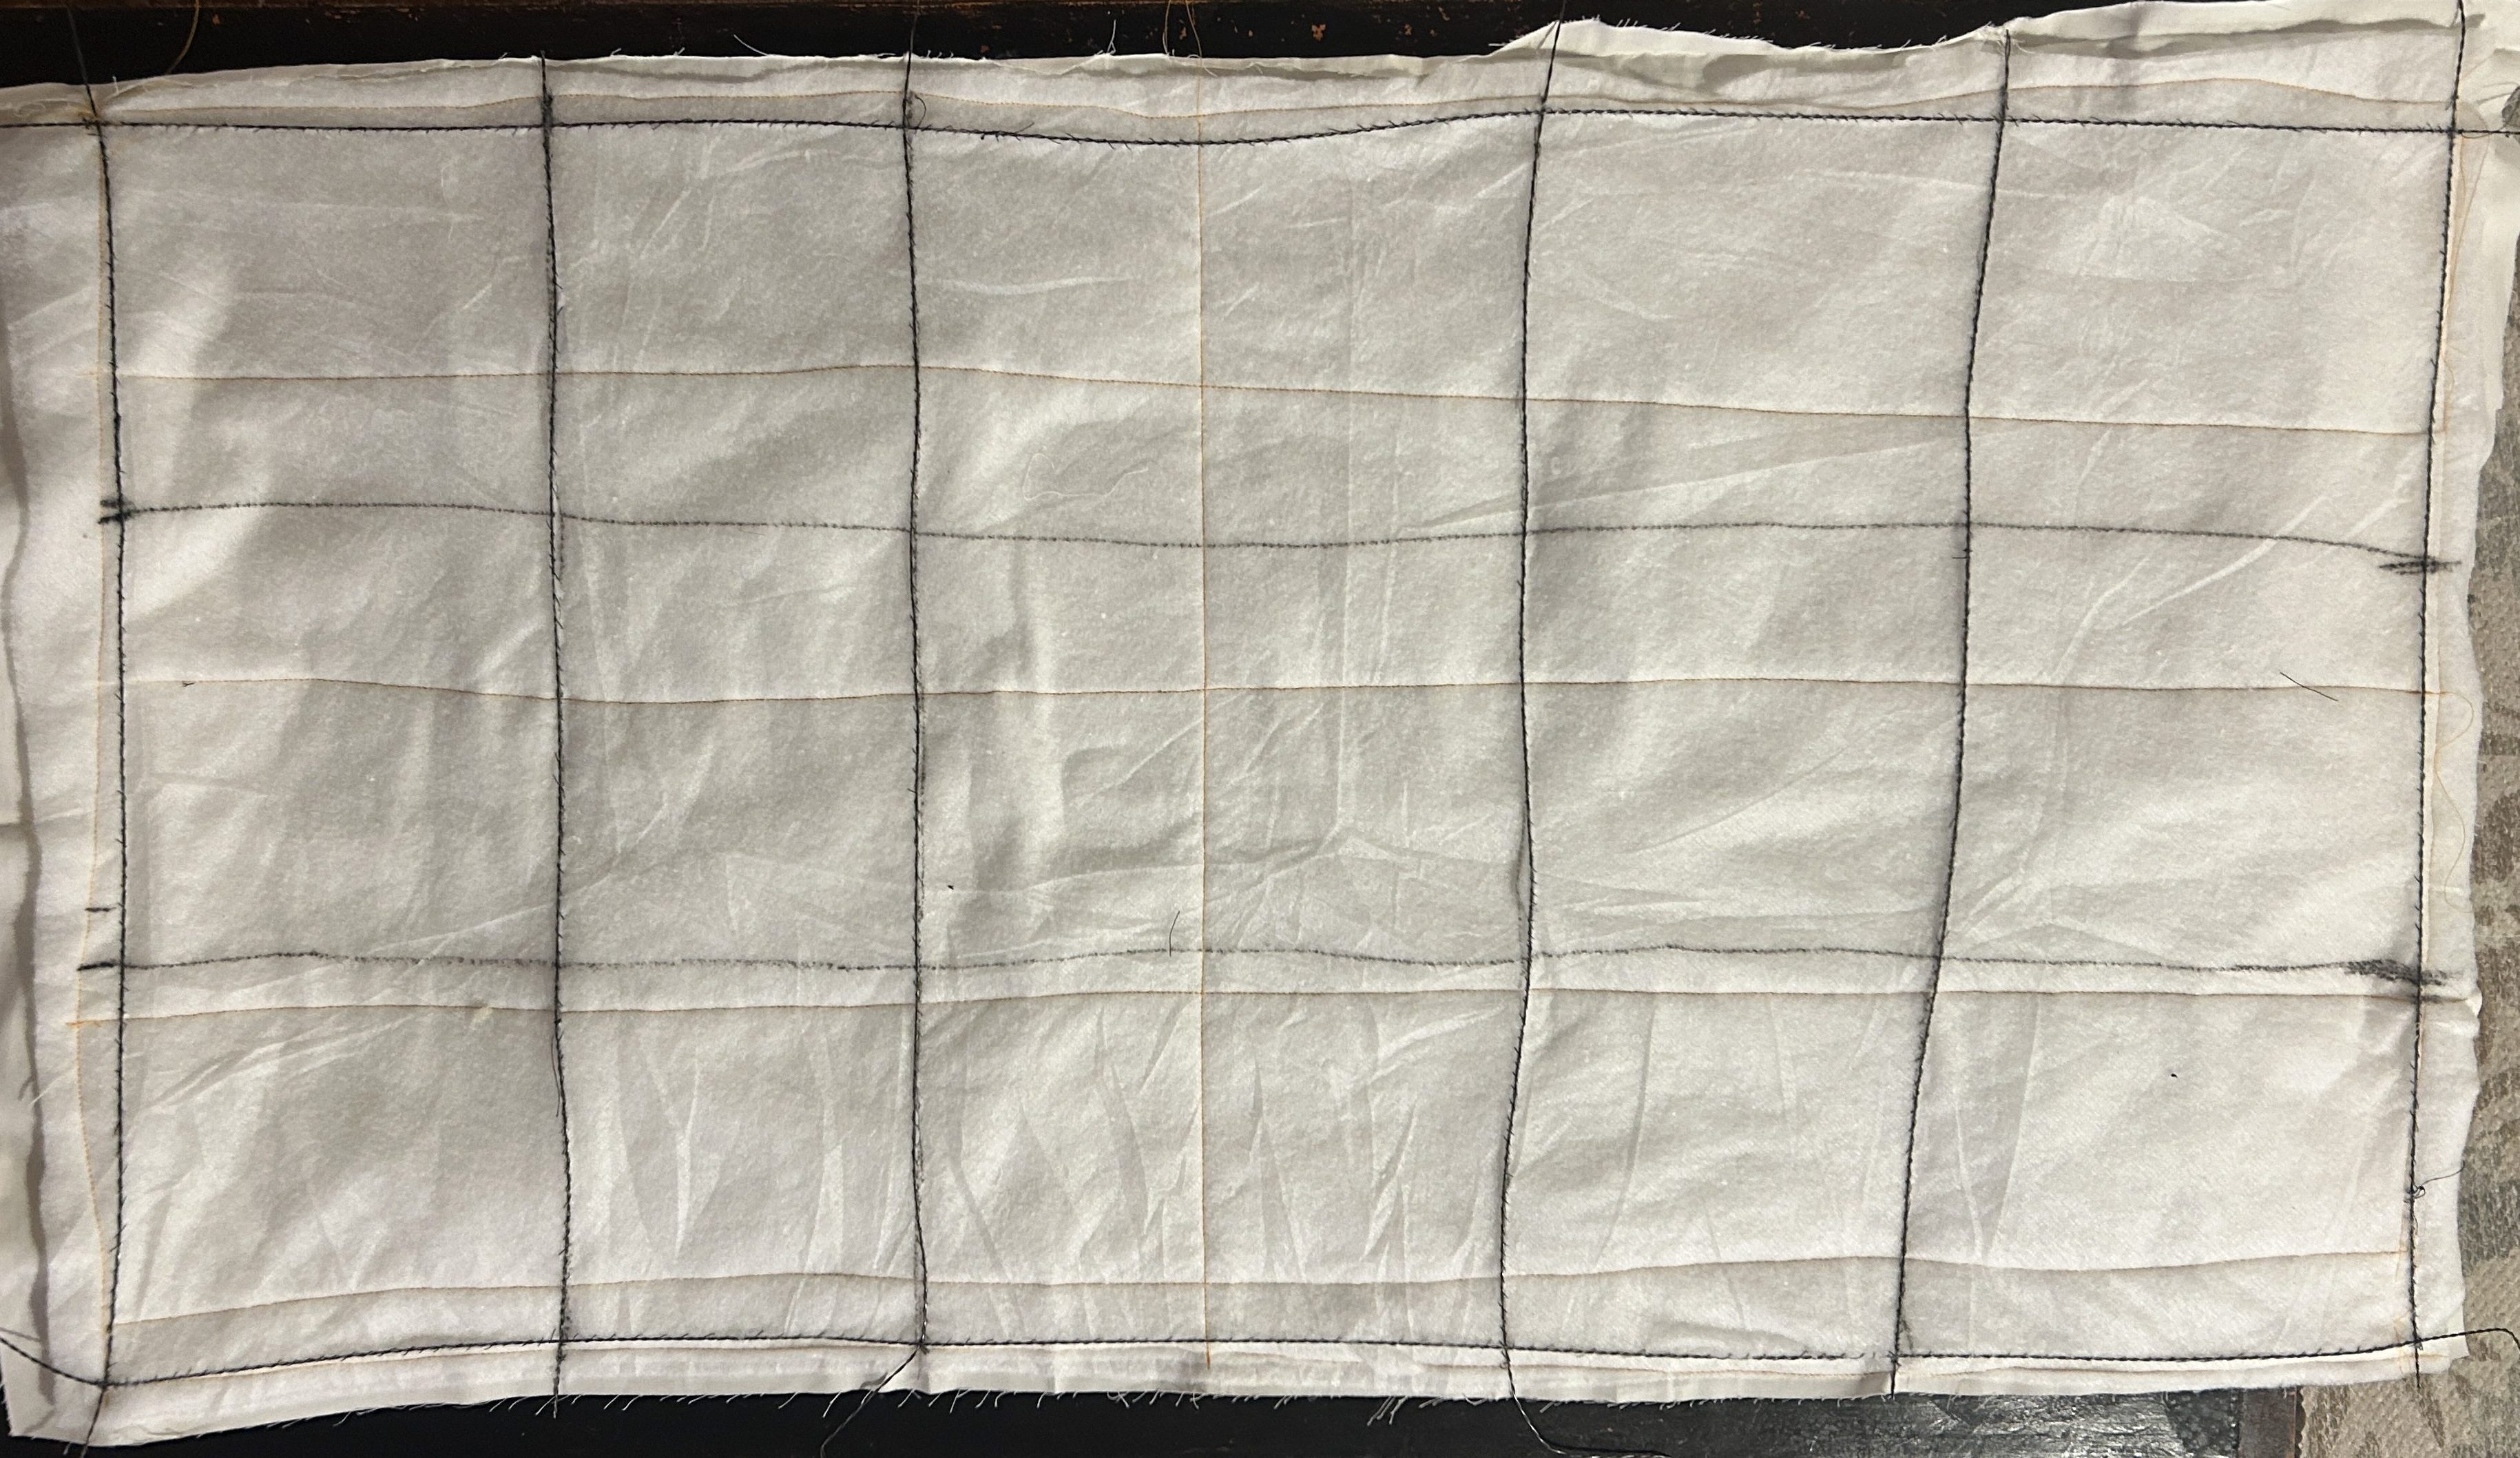
I used 1/8″ wire with loops on the corners and other points where we wanted to have a strong contact with the quilt. This frame was completed with a triple twist of 28-gauge wire along the top edge where the puppets would be. This was to allow more flexibility for animation. Also, a grid of twisted 28-grade wire was placed in the middle of the quilt to control the movement of the animation.
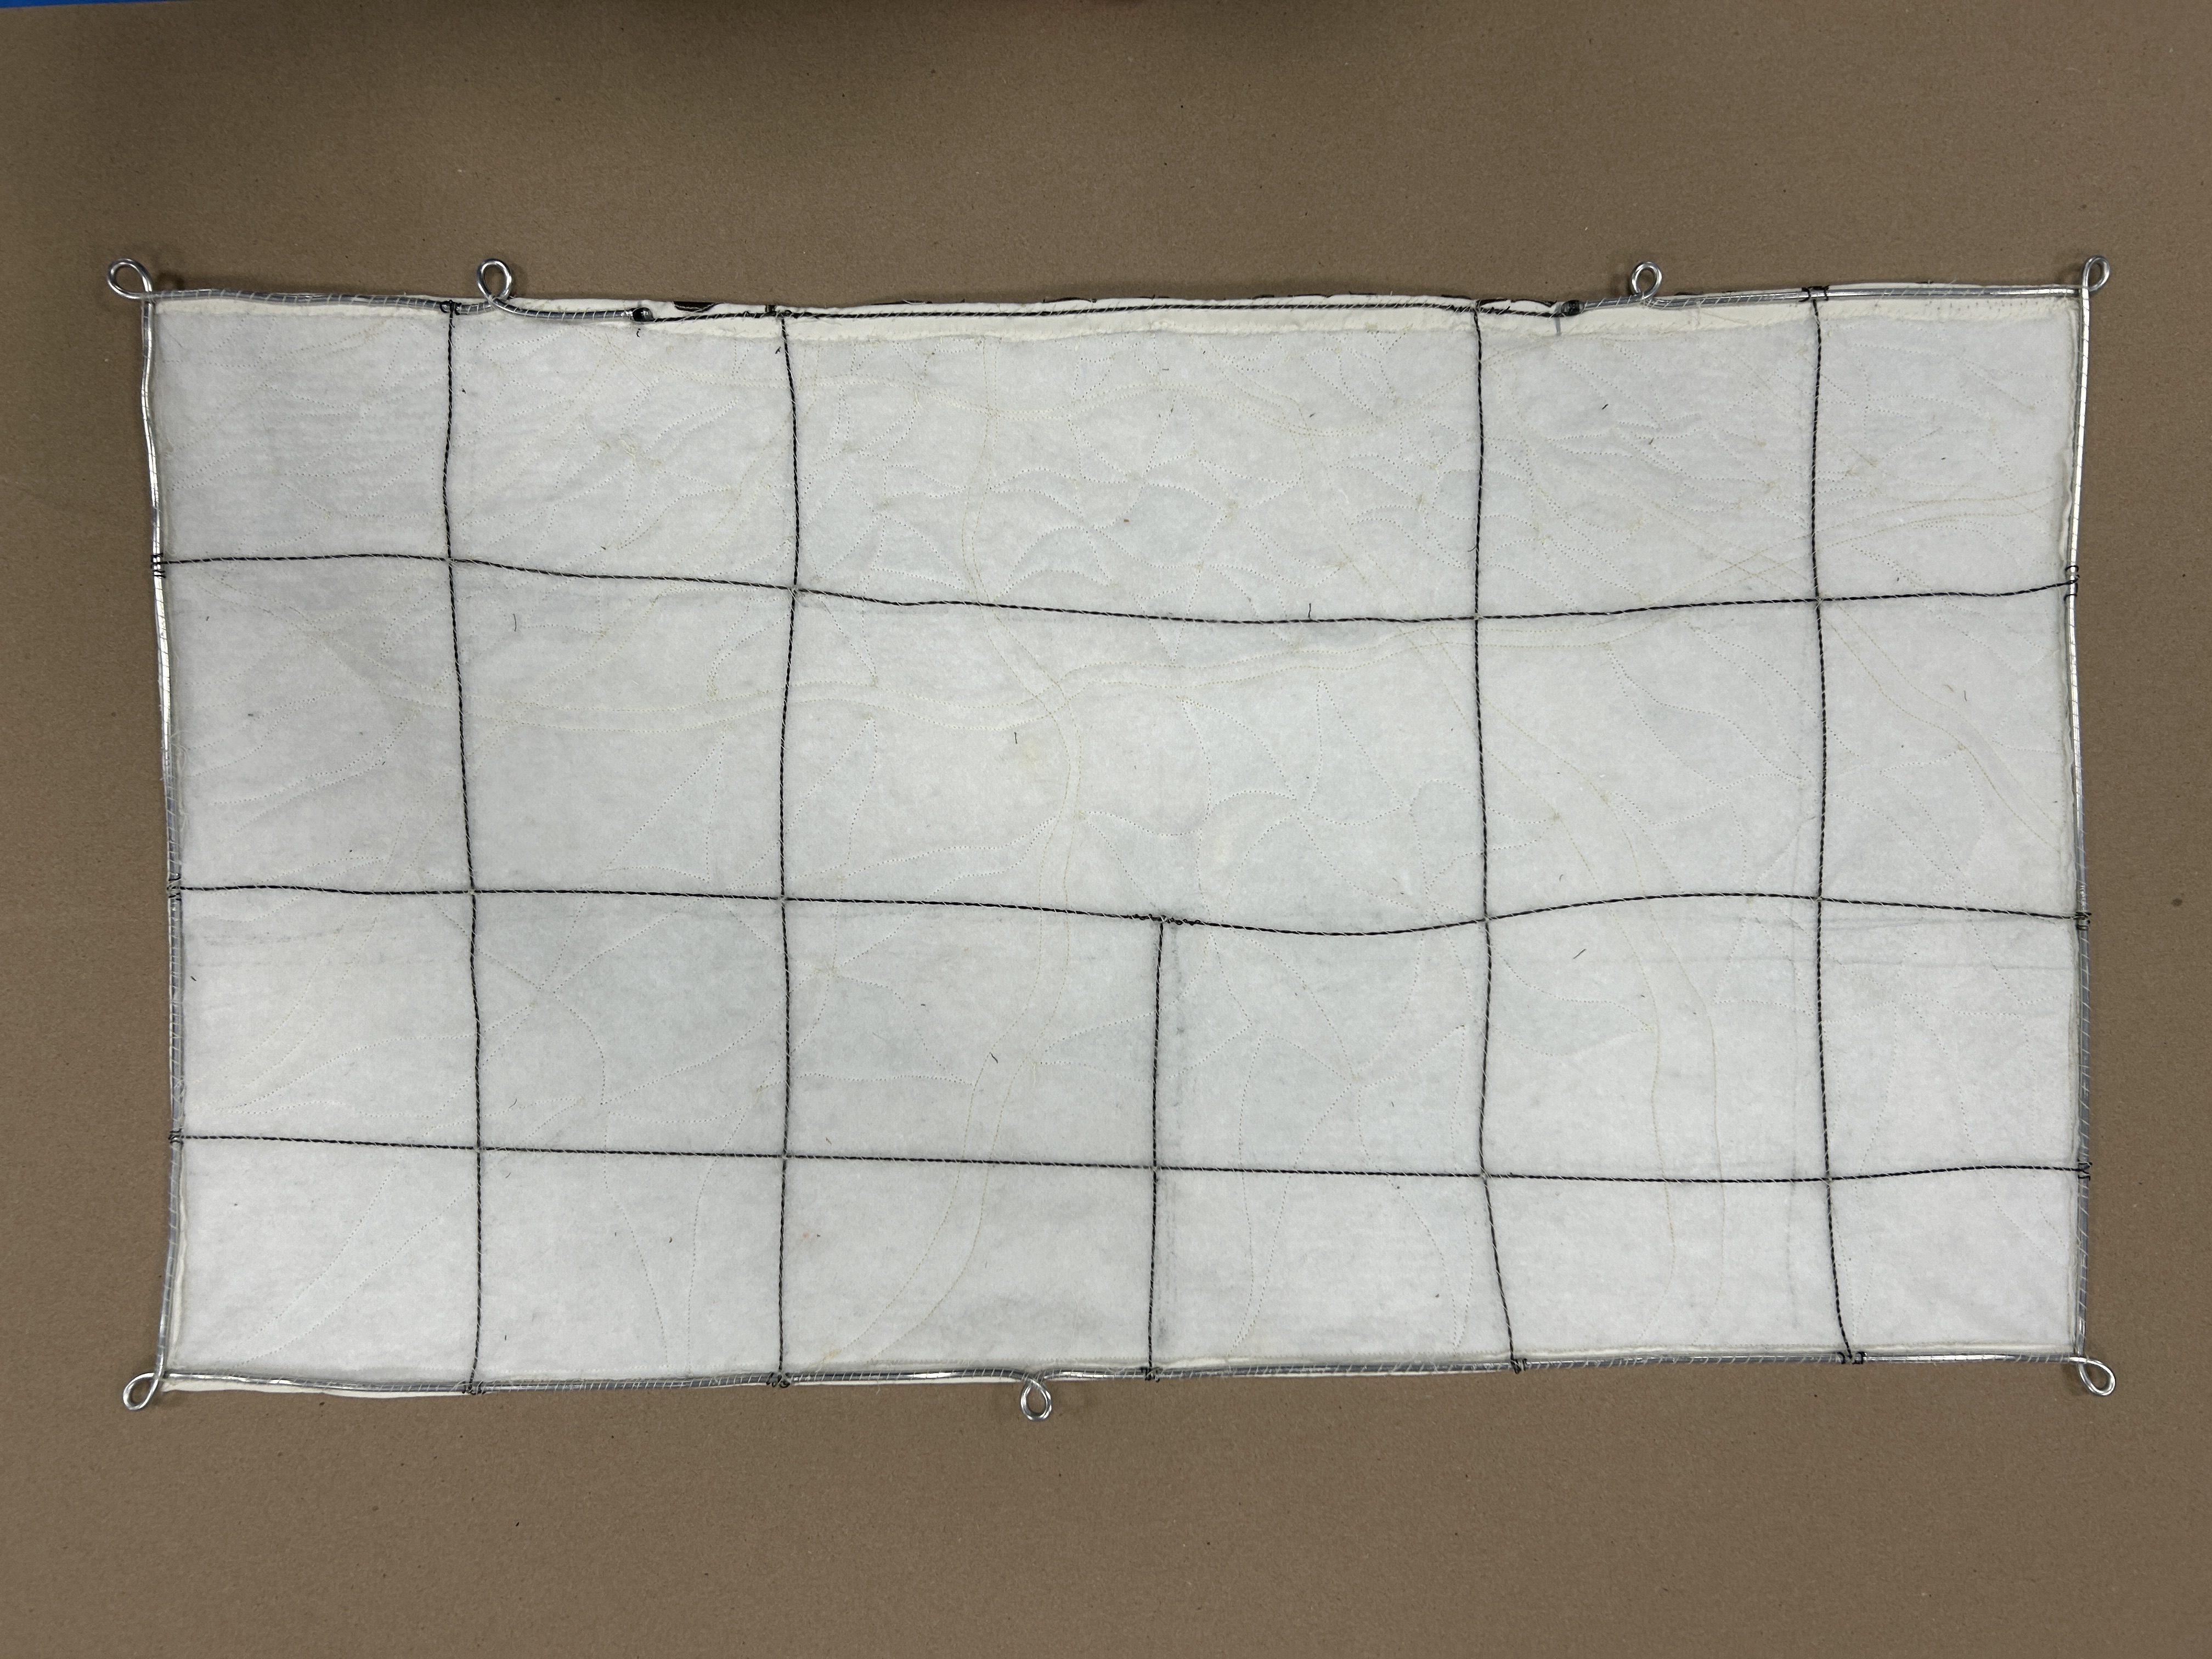
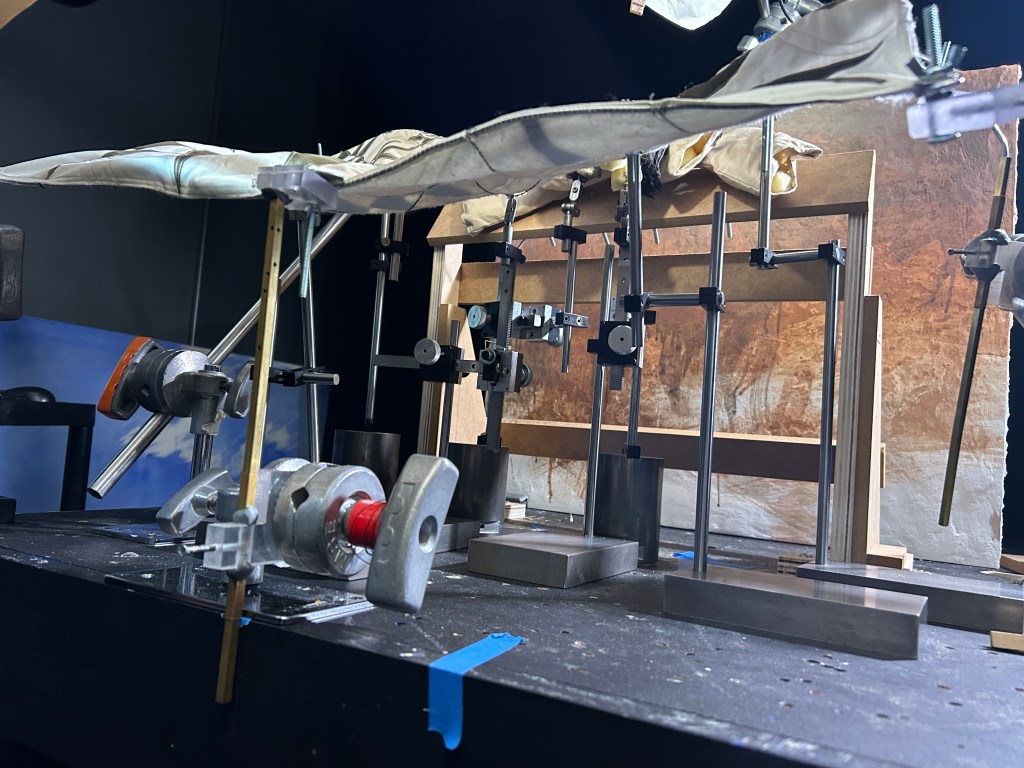
On set, all of the corner loops were grasped tightly with nuts and bolts attached to polycarbonate blocks on brass square tubes that were held by C-stand arms mounted to the table.
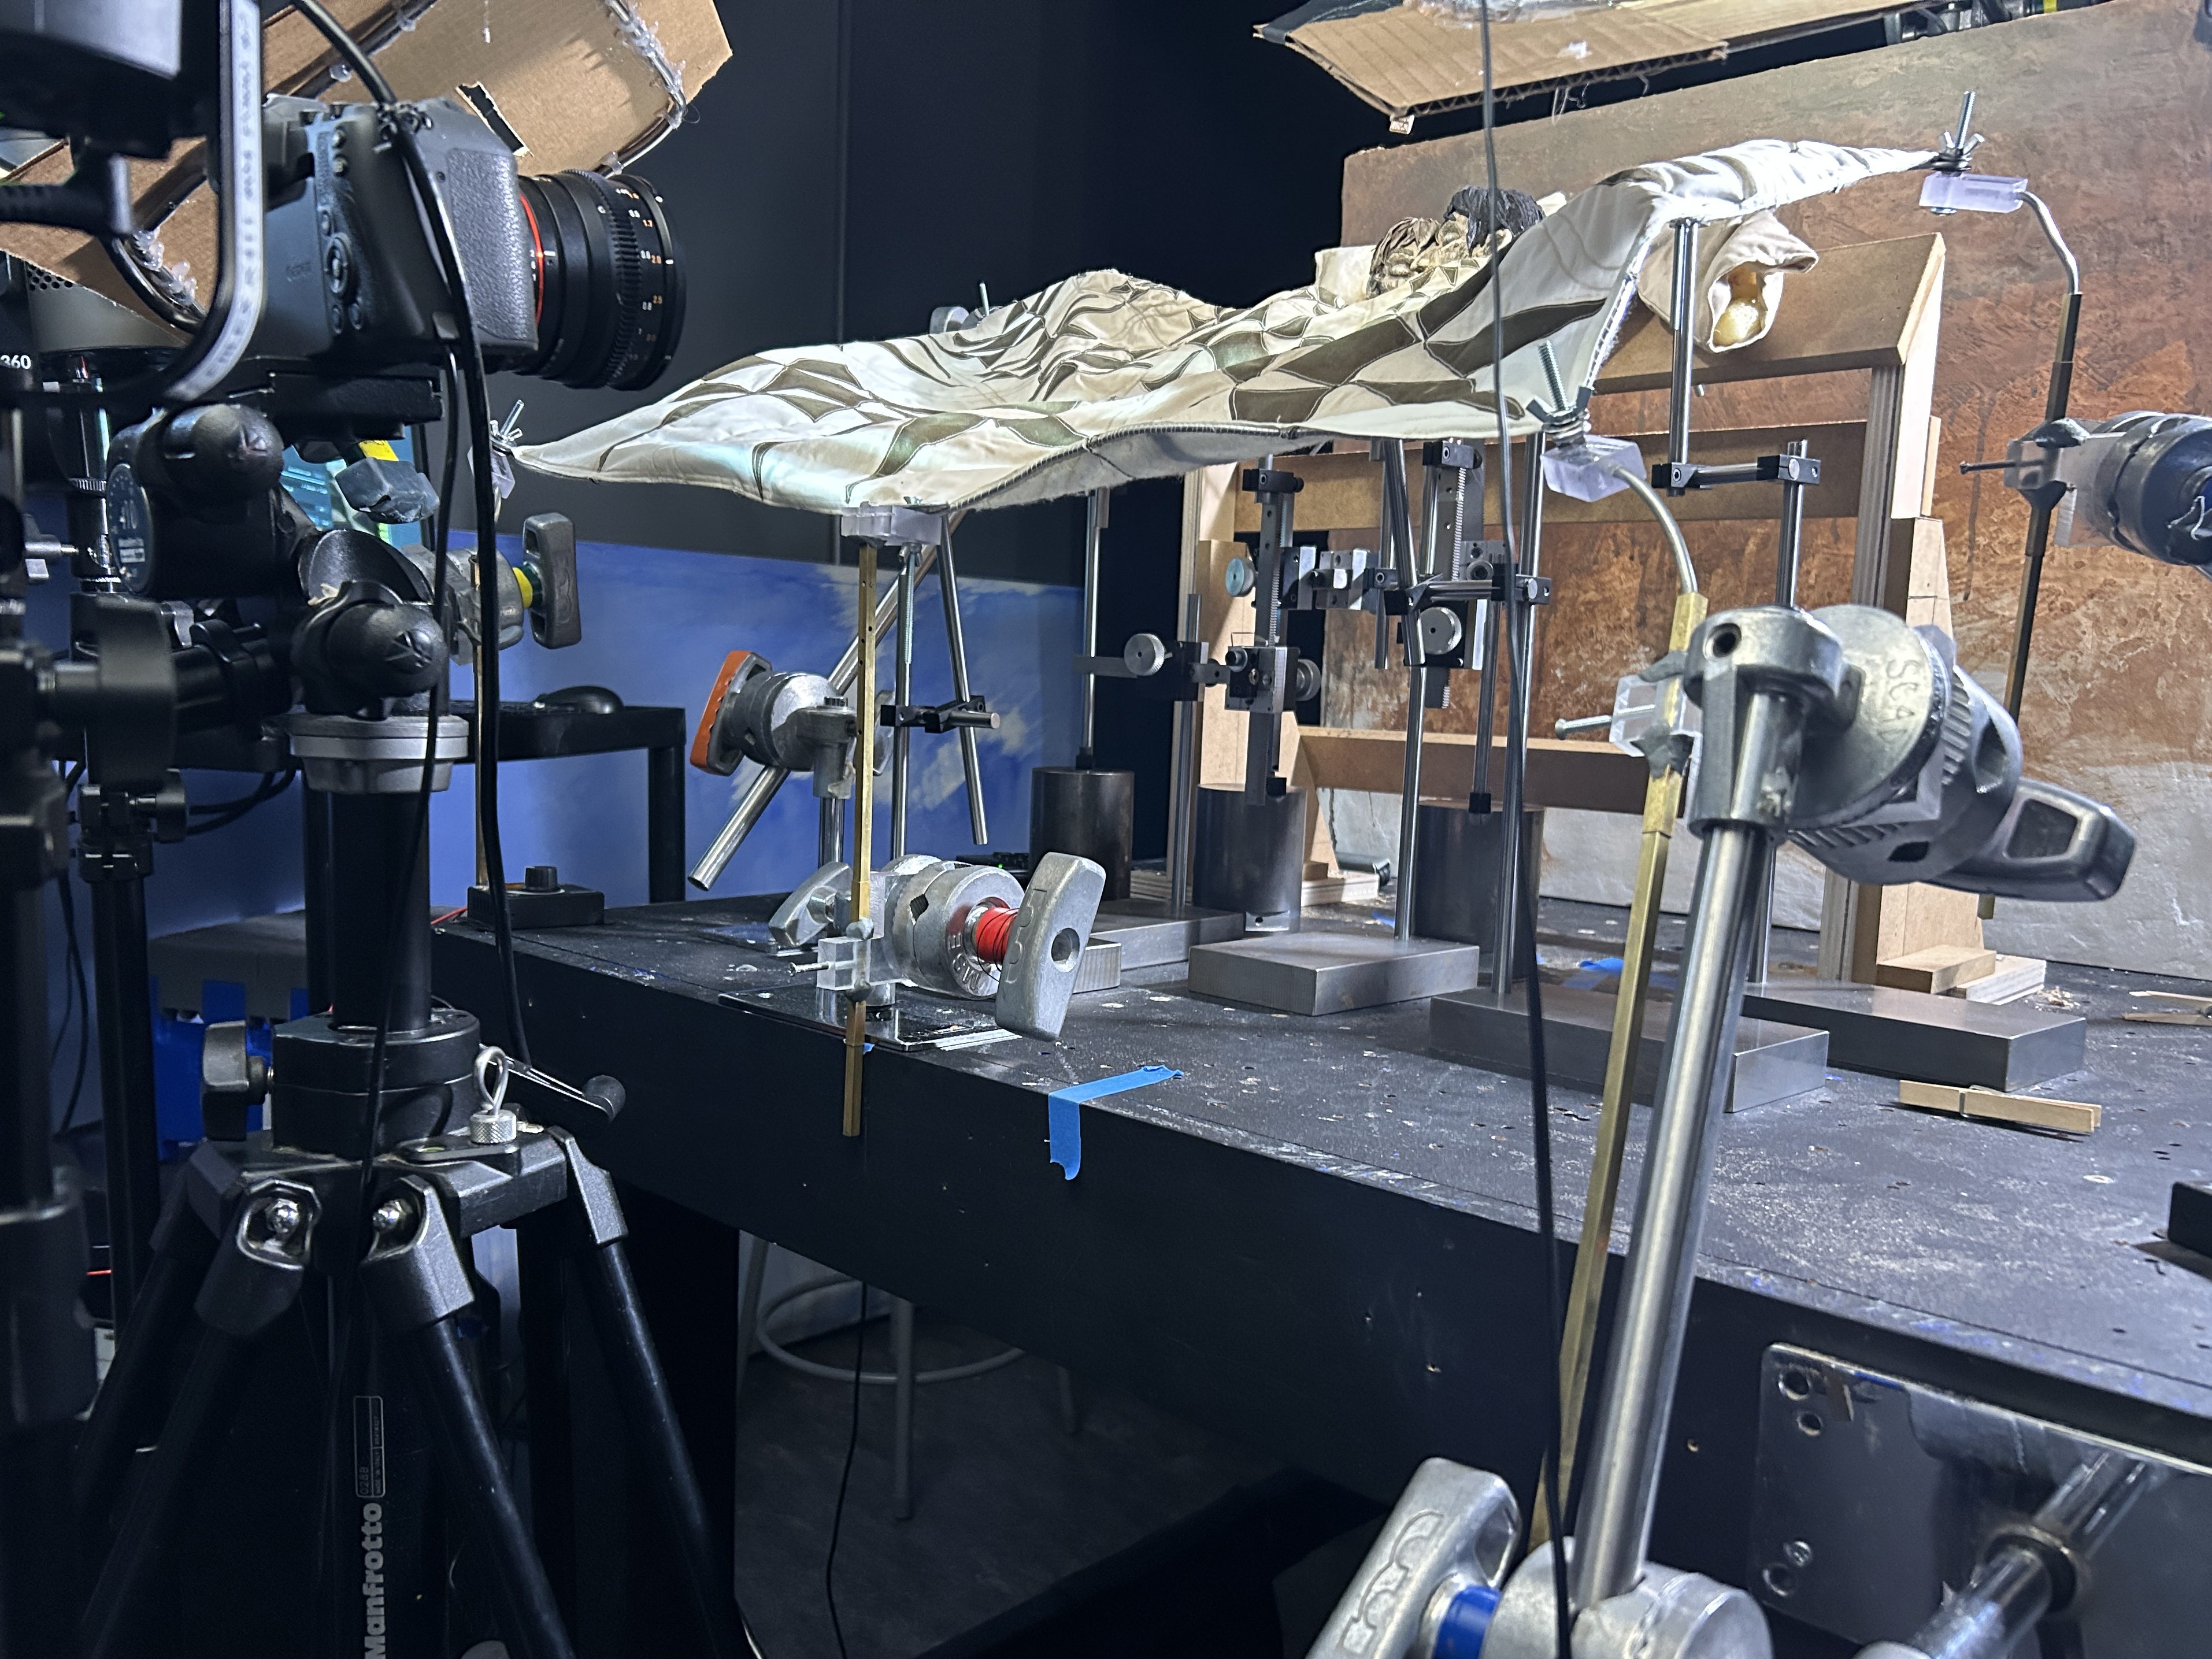
This was so it could be posed into the desired framing. The points at the top close to the puppets were attached to a burkey system hardware on rods on weights, as well as two more points of support in the middle of the quilt. These were added for extra support and used small hardware going through the quilt, just out of frame.
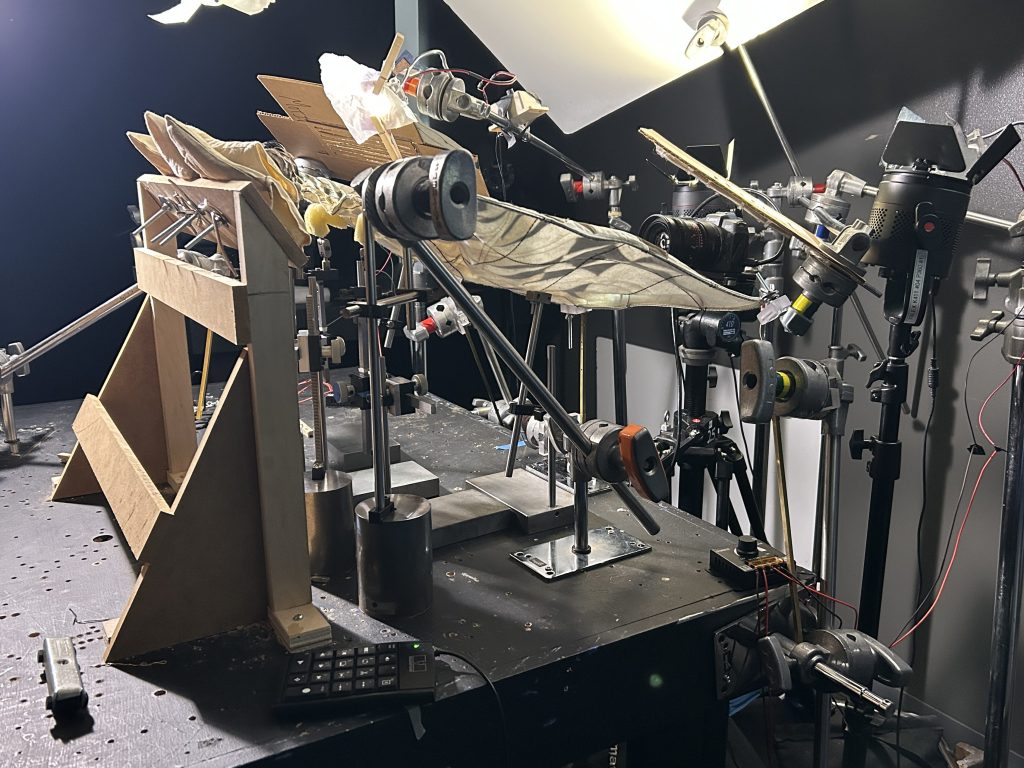

For the perspective decided for the shot, the puppets’ heads were at an angle; they would have to be separated from the bodies, so the bodies were not used. Instead, I made armatured foam arms to animate the quilt against.
Pillows
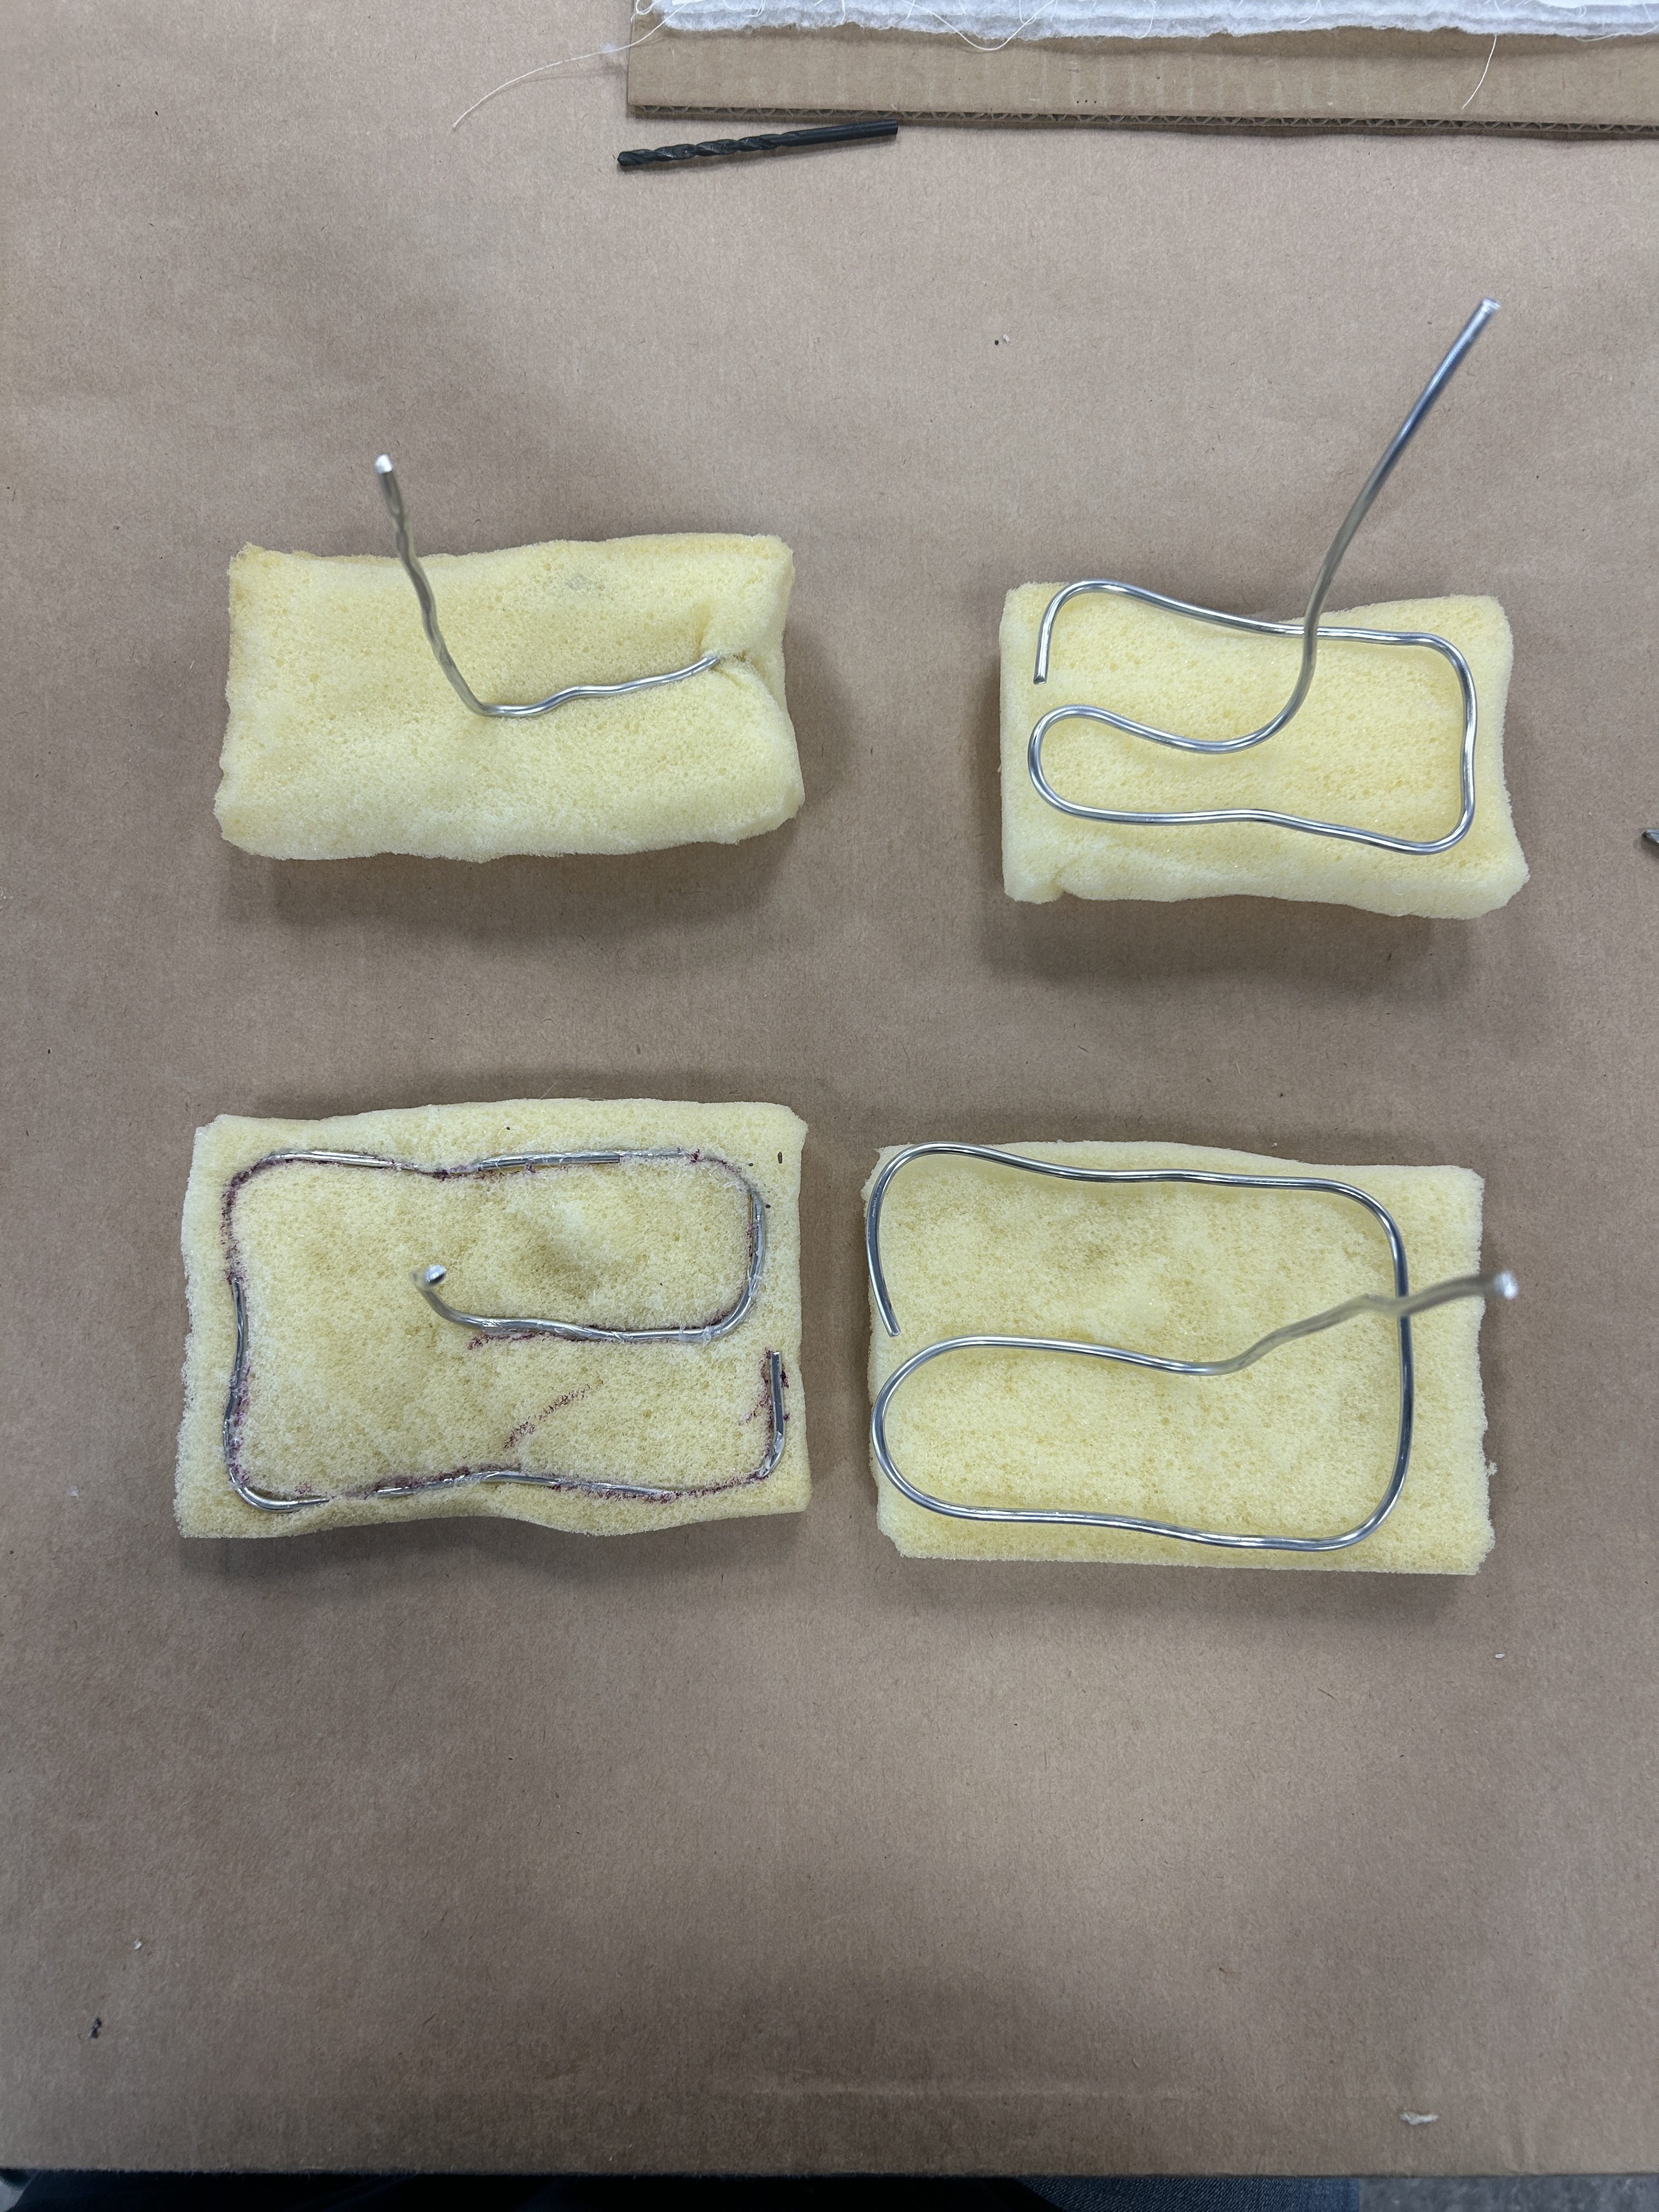
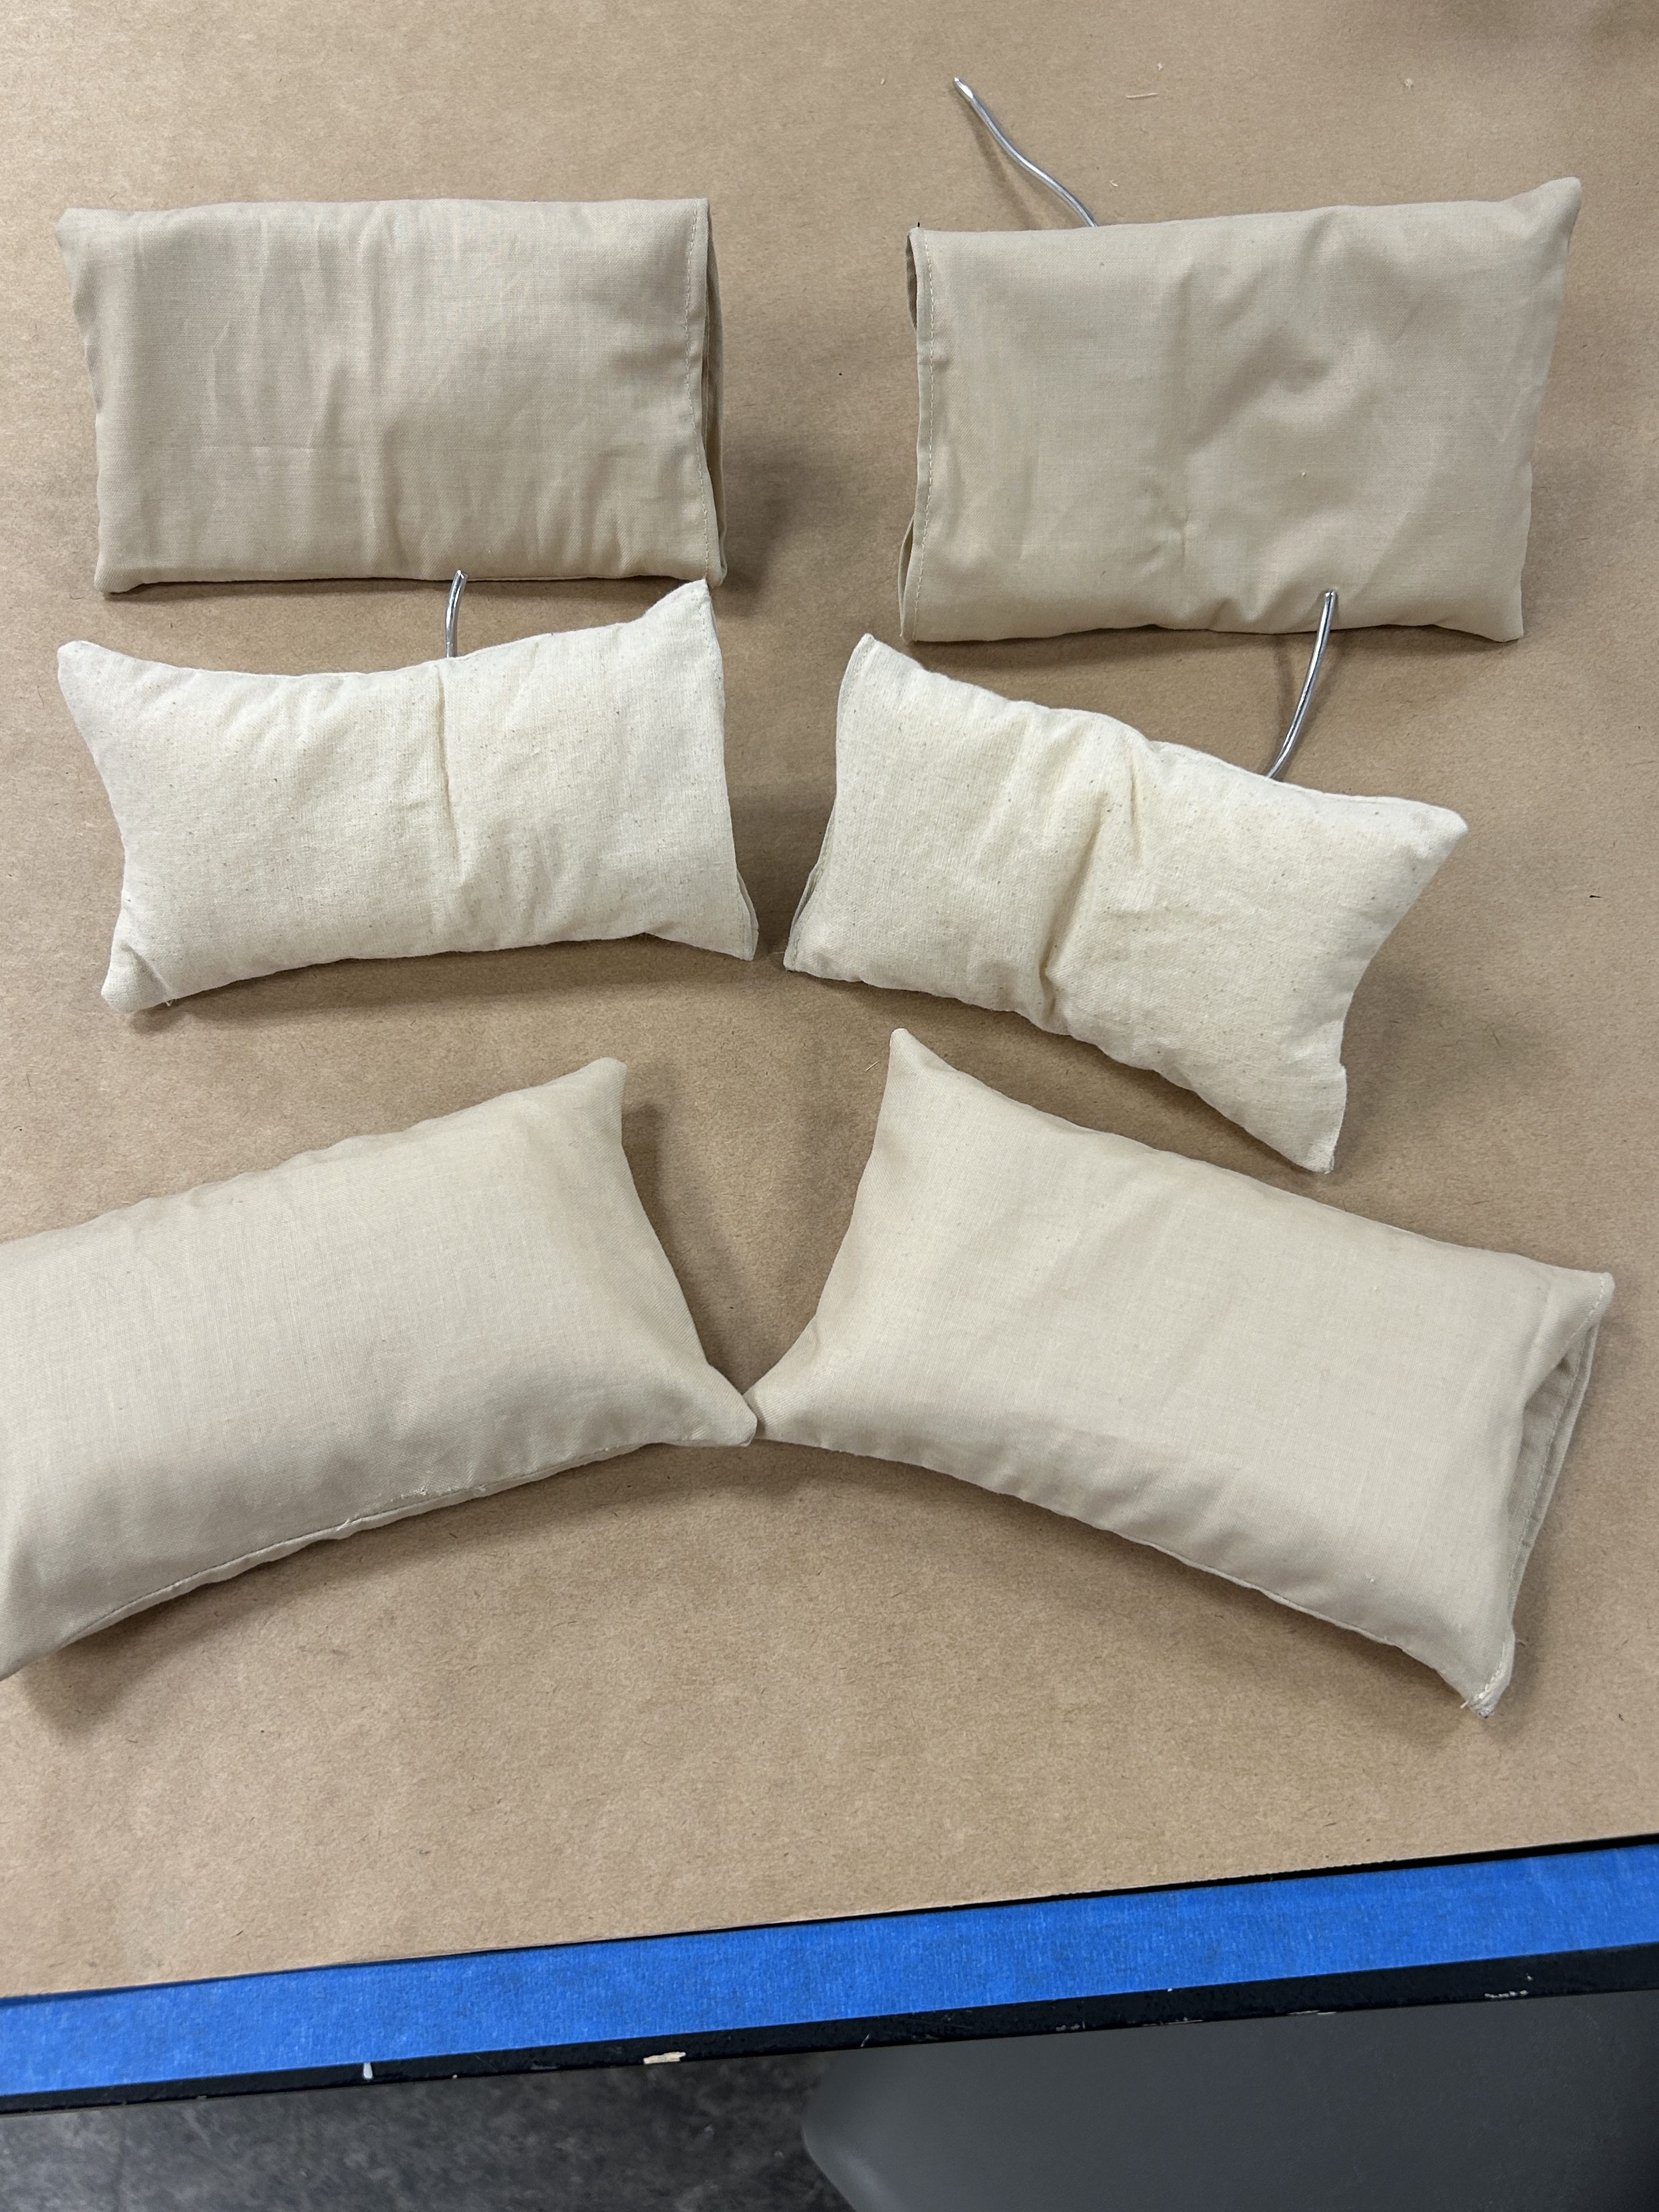
I constructed 4 upholstery foam pillows with 1/8″ wire rigging so the pillows could be posable and anmiatable. I also made pillowcases with 28-gauge wire, lining the openings so the cases could also be posed. And I made a stand for the pillows to attach to.
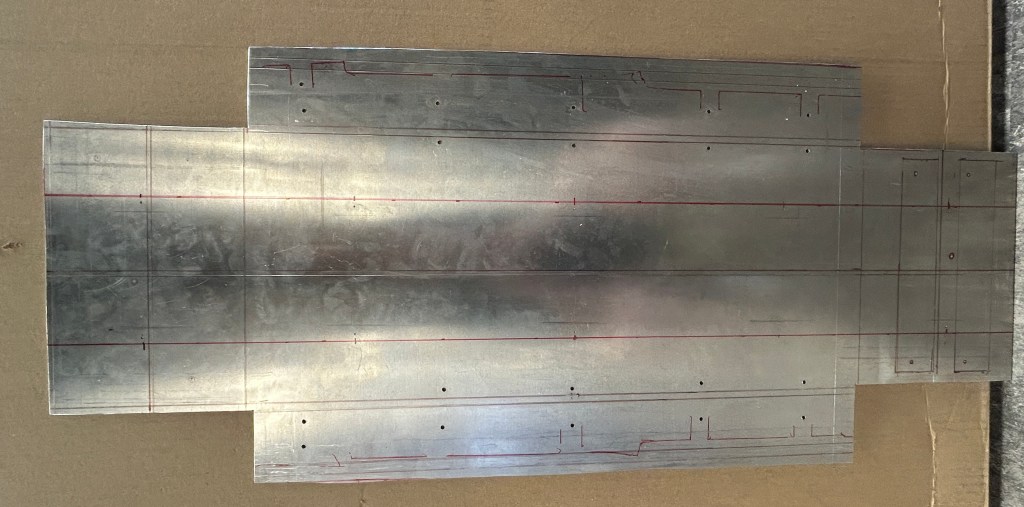
Car
Car Chassis
I co-built and assembled the car chassis with Mary Mihalko. The car is 54” long. The body panels were a mix of 3D prints and cast urethane parts, bringing the car’s total weight to over 60 lbs and requiring a sturdy structure for consistent animation.

I started by making a grid with the measurements where the car body would sit.
We placed the car parts on the base and drilled all the holes for attachment. Then we cut out the main body of the chassis with a jigsaw.
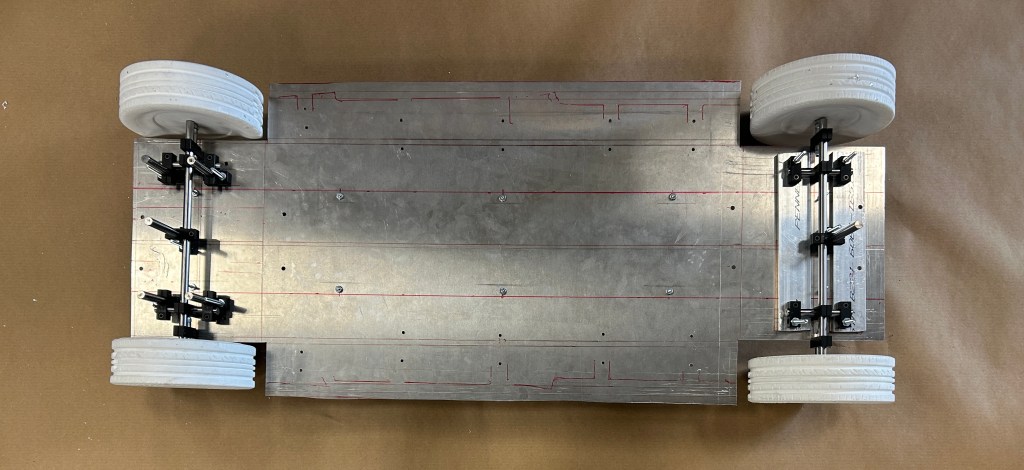
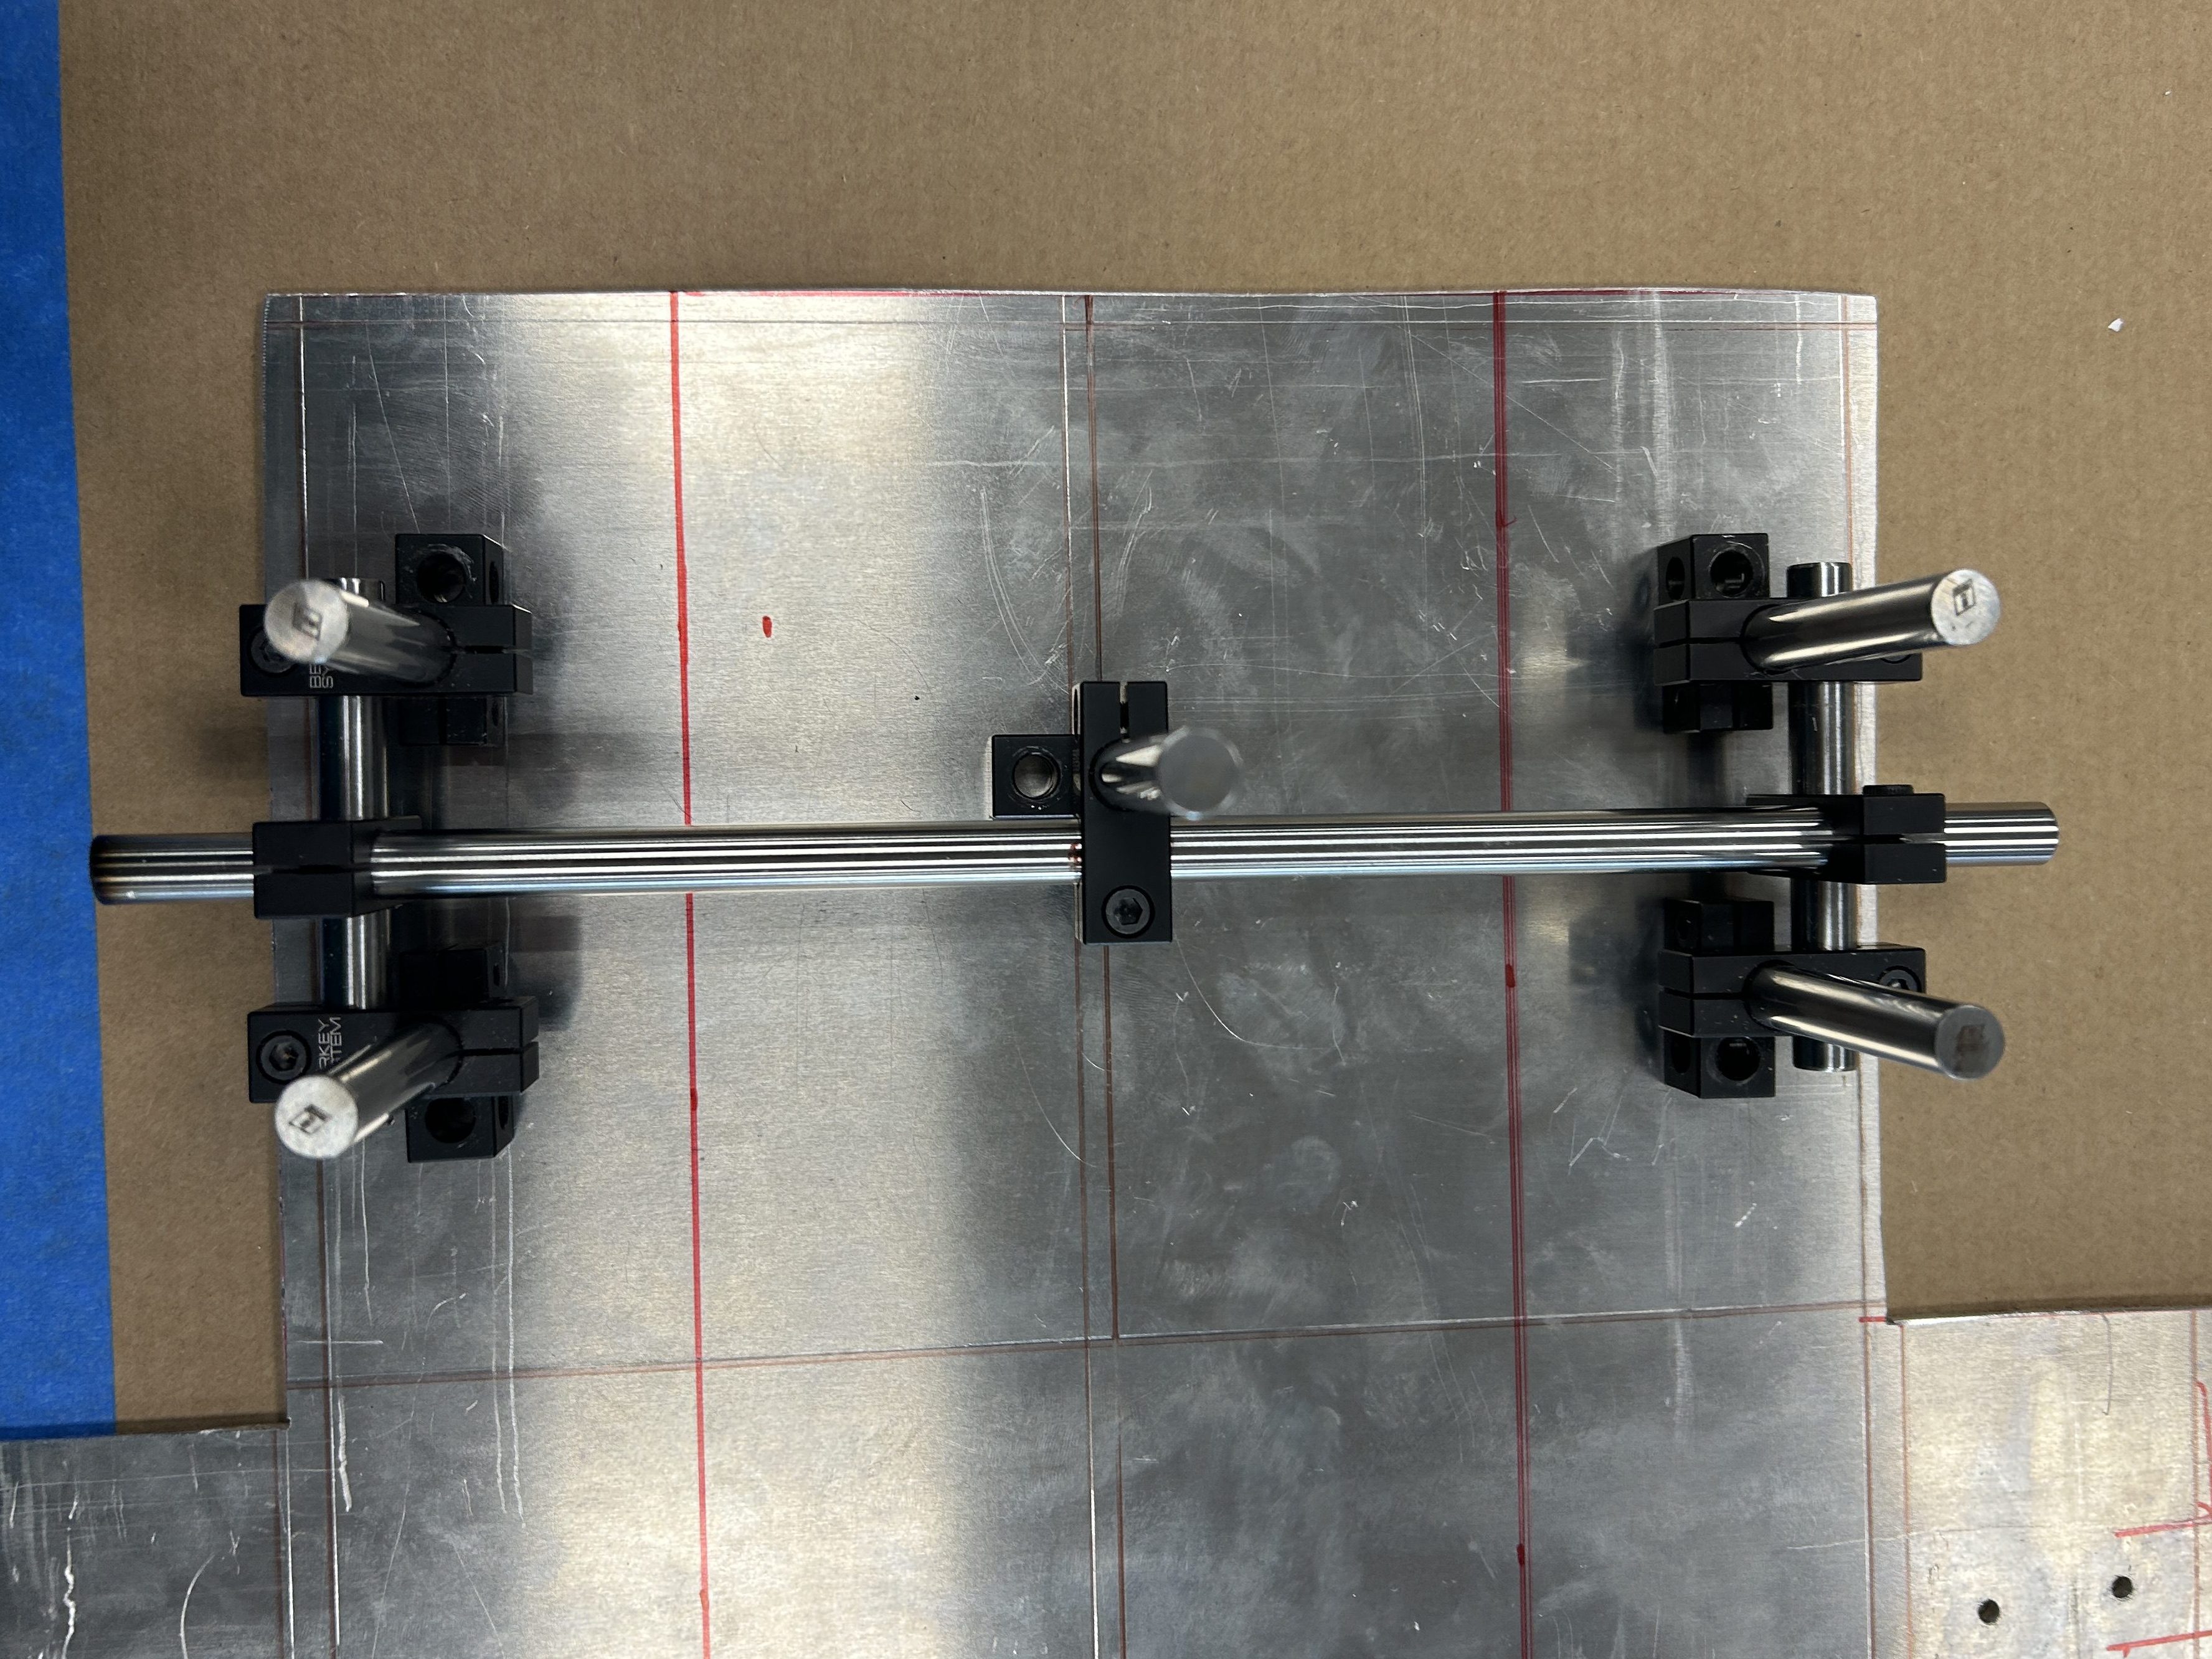
After that, we attached the wheels and wheel rigging.
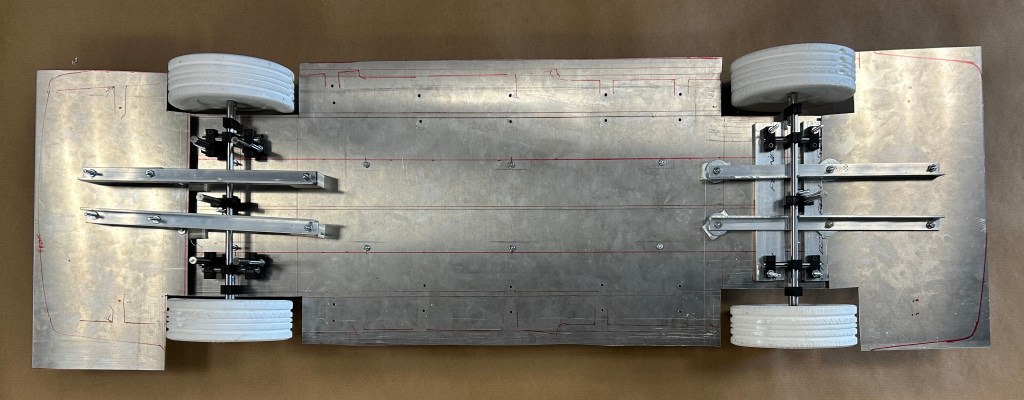
Then we added on a slightly angled front and back panel.
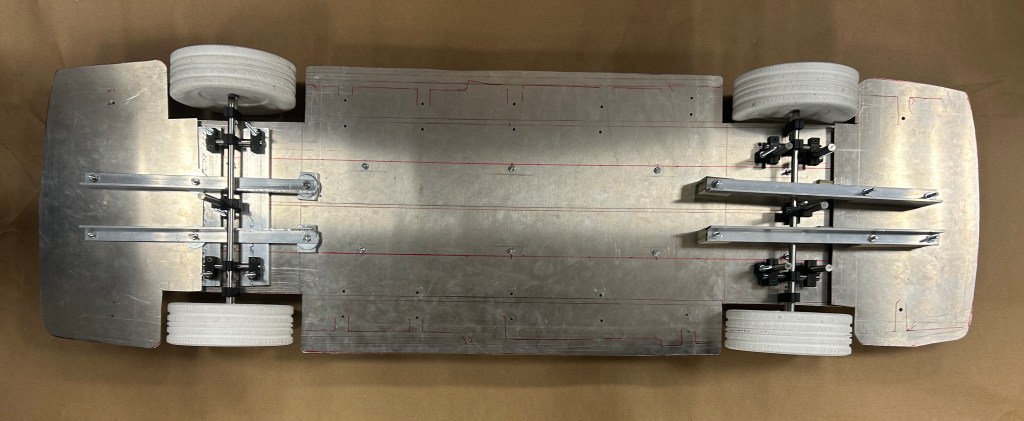
Then we cut the panels to match the car’s shape.
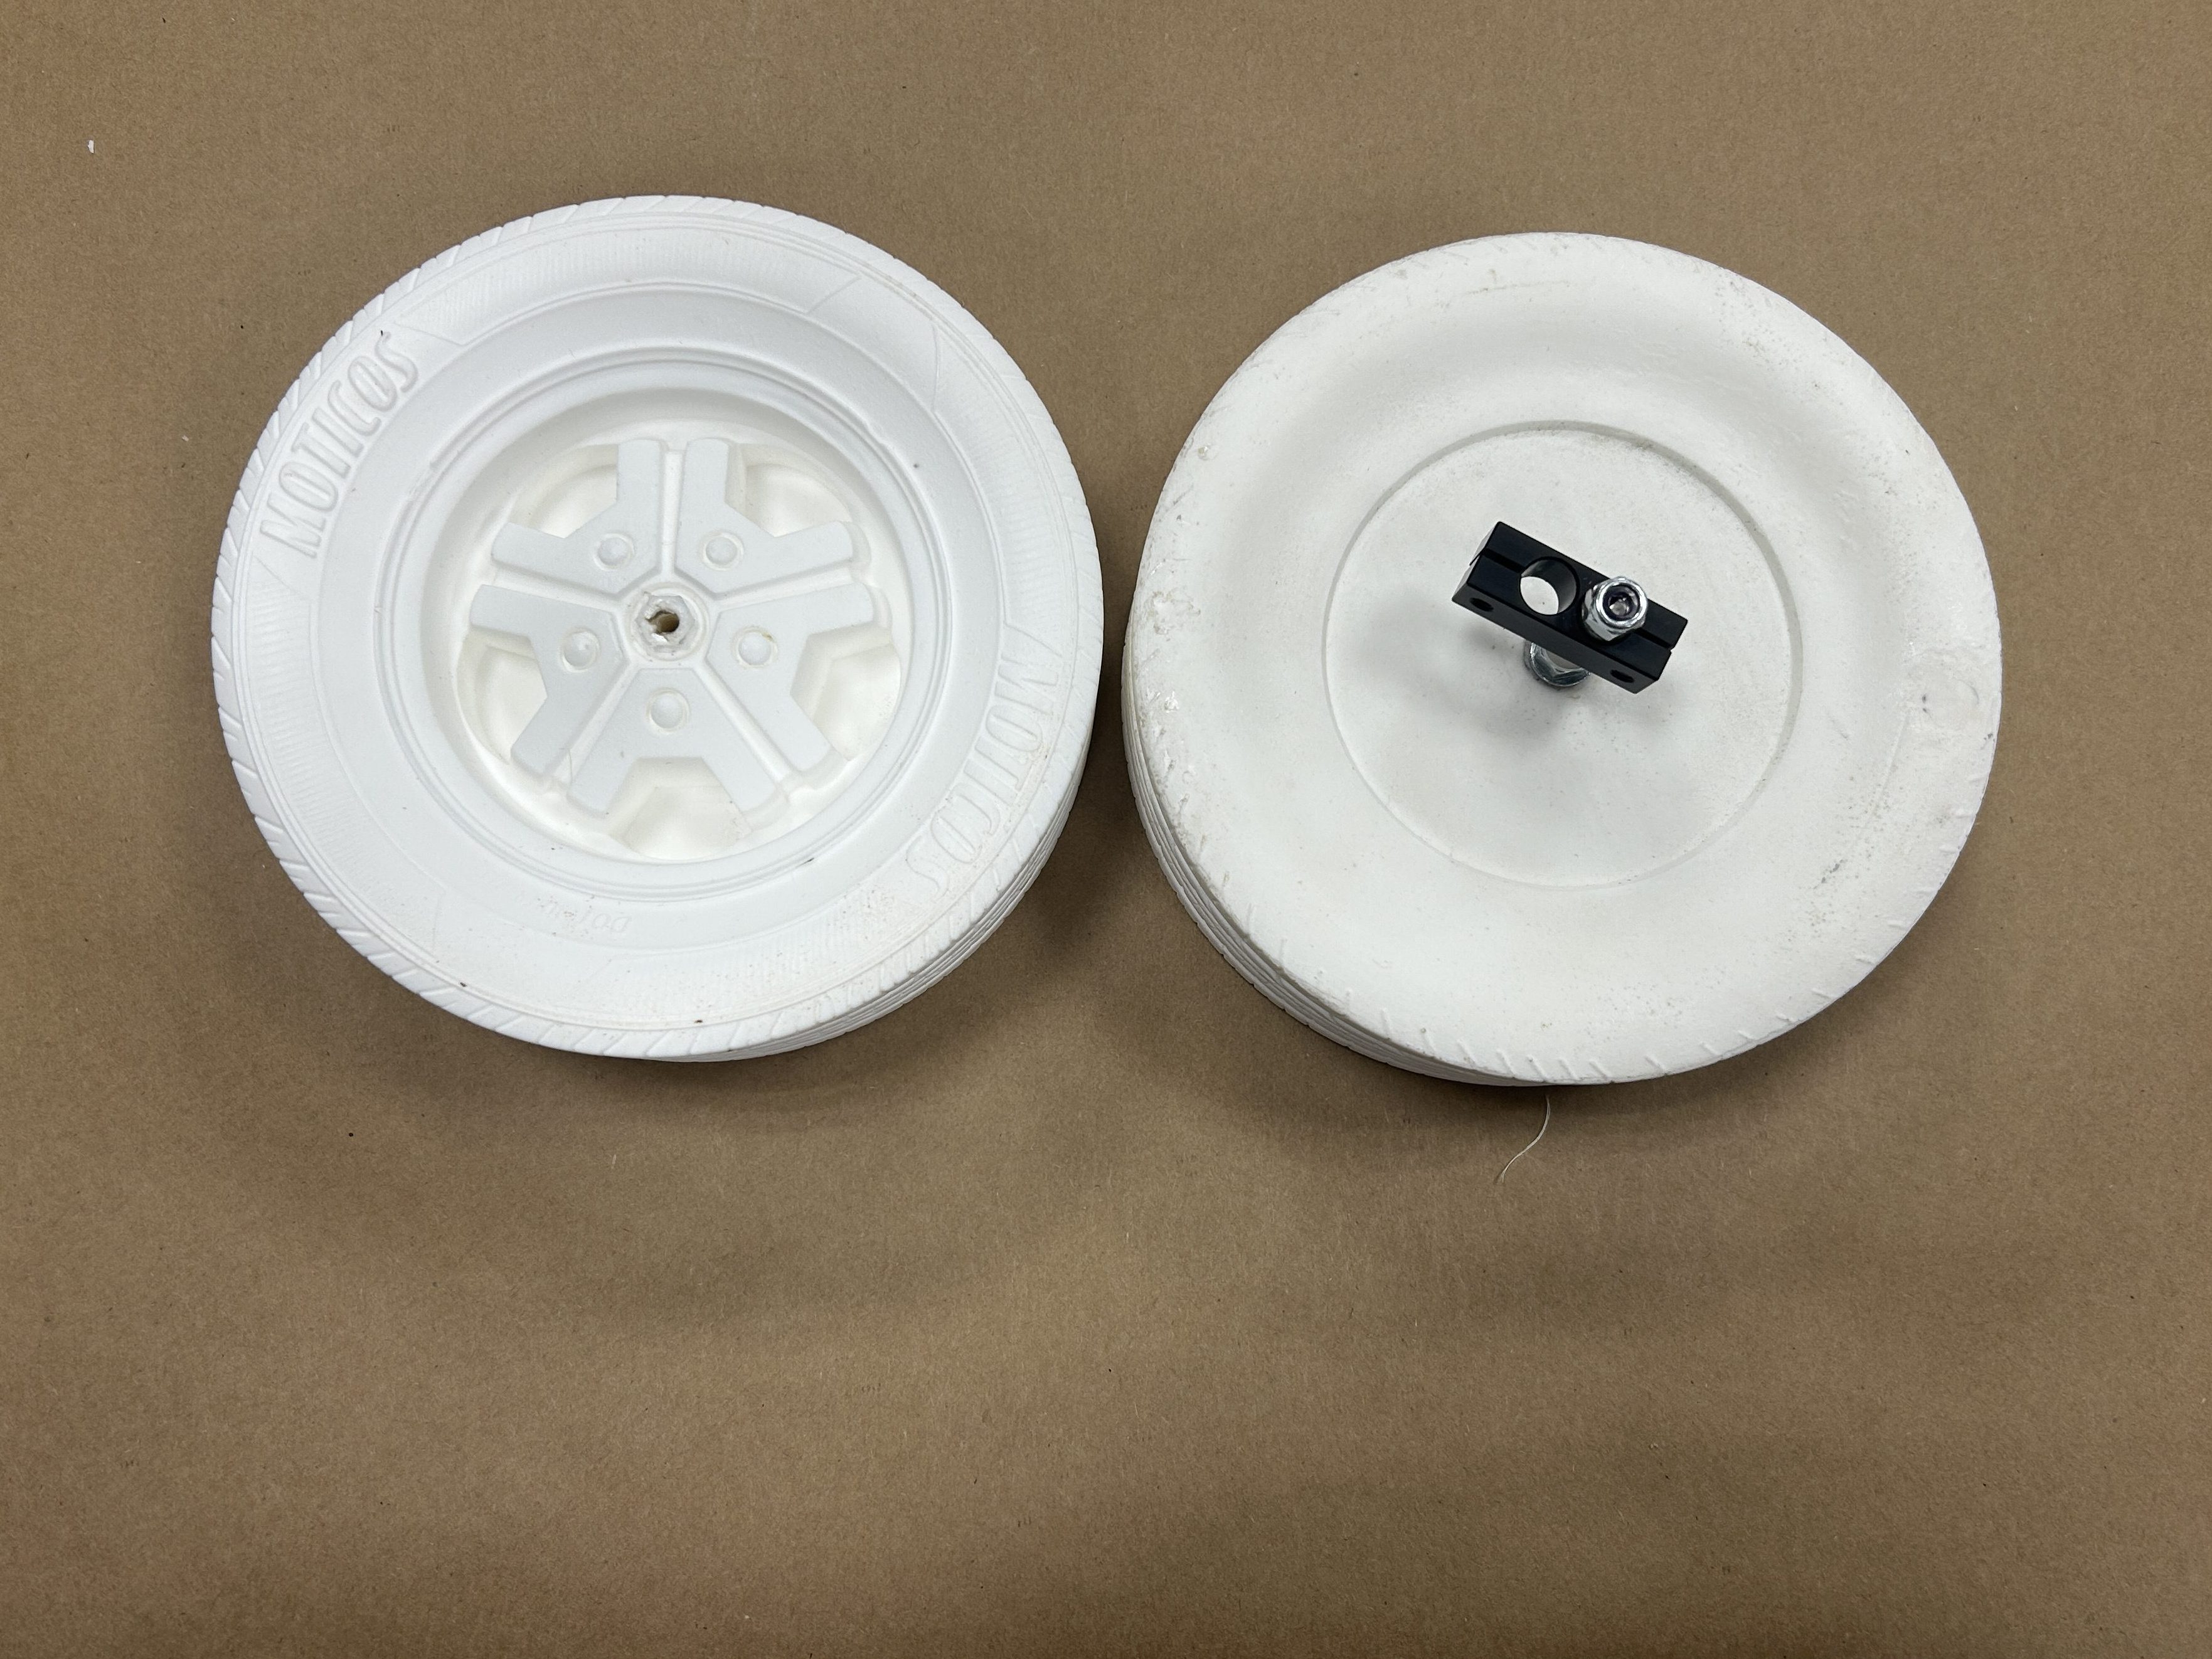
Wheel Mold and Casting
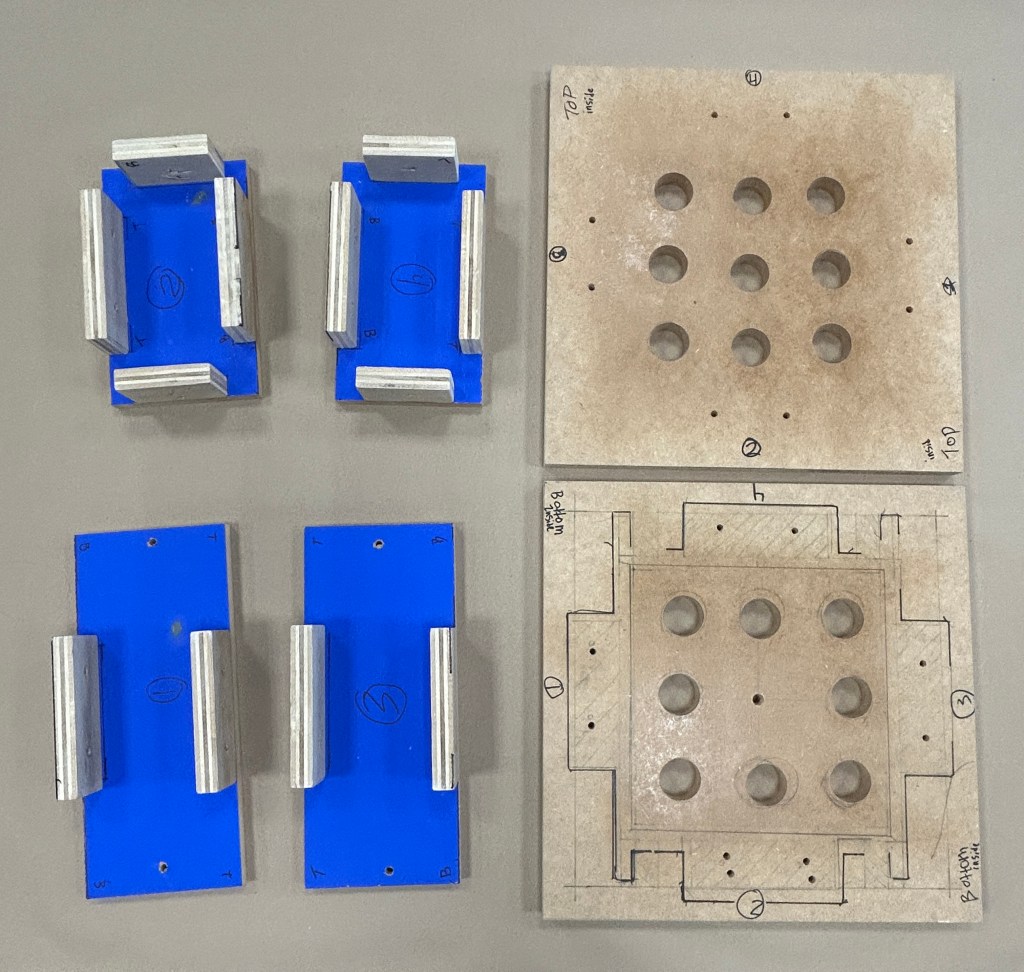
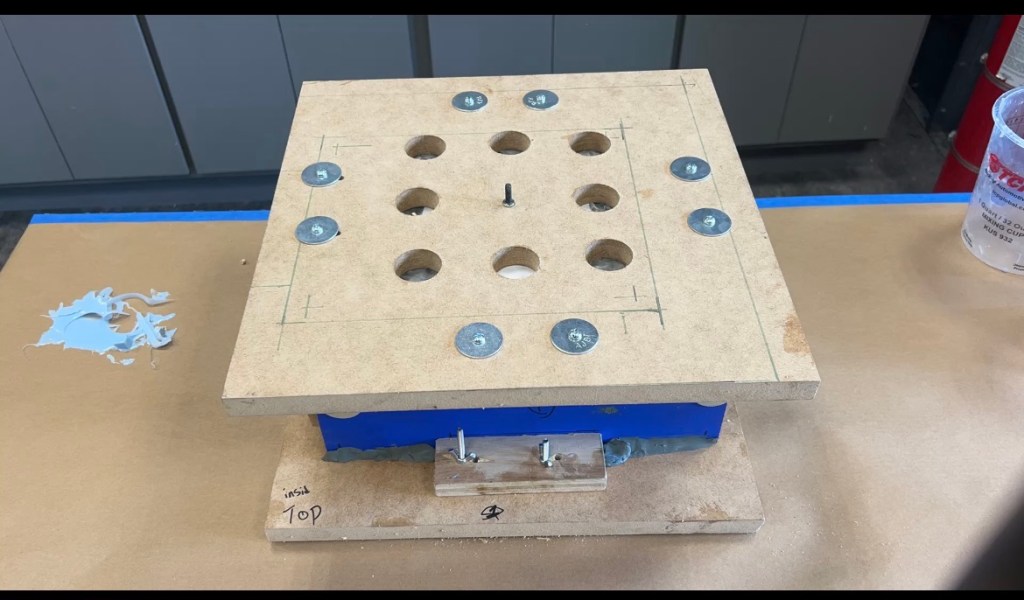
I built a mother mold for a 3D-printed wheel. I assisted with planning the wheel rigging during the molding process.
I constructed the box with MDF walls and 3/4 birch tabs. I set up the mold so it would be cast with the rigging for the axel of the car.
I clayed up the wheel, tapering it down from the bottom wheel, so it keyed better into the box. The mold was designed so the seam was in the back, ensuring it was not visible in the wheel’s texture.
Then the mold was injected on an upright stand with urethane plastic.
Car Body Weathering
I did some base weathering on the car and some other small details, like the worn-off sticker and the bumpers, but I was not the only person responsible for painting the car throughout the film.

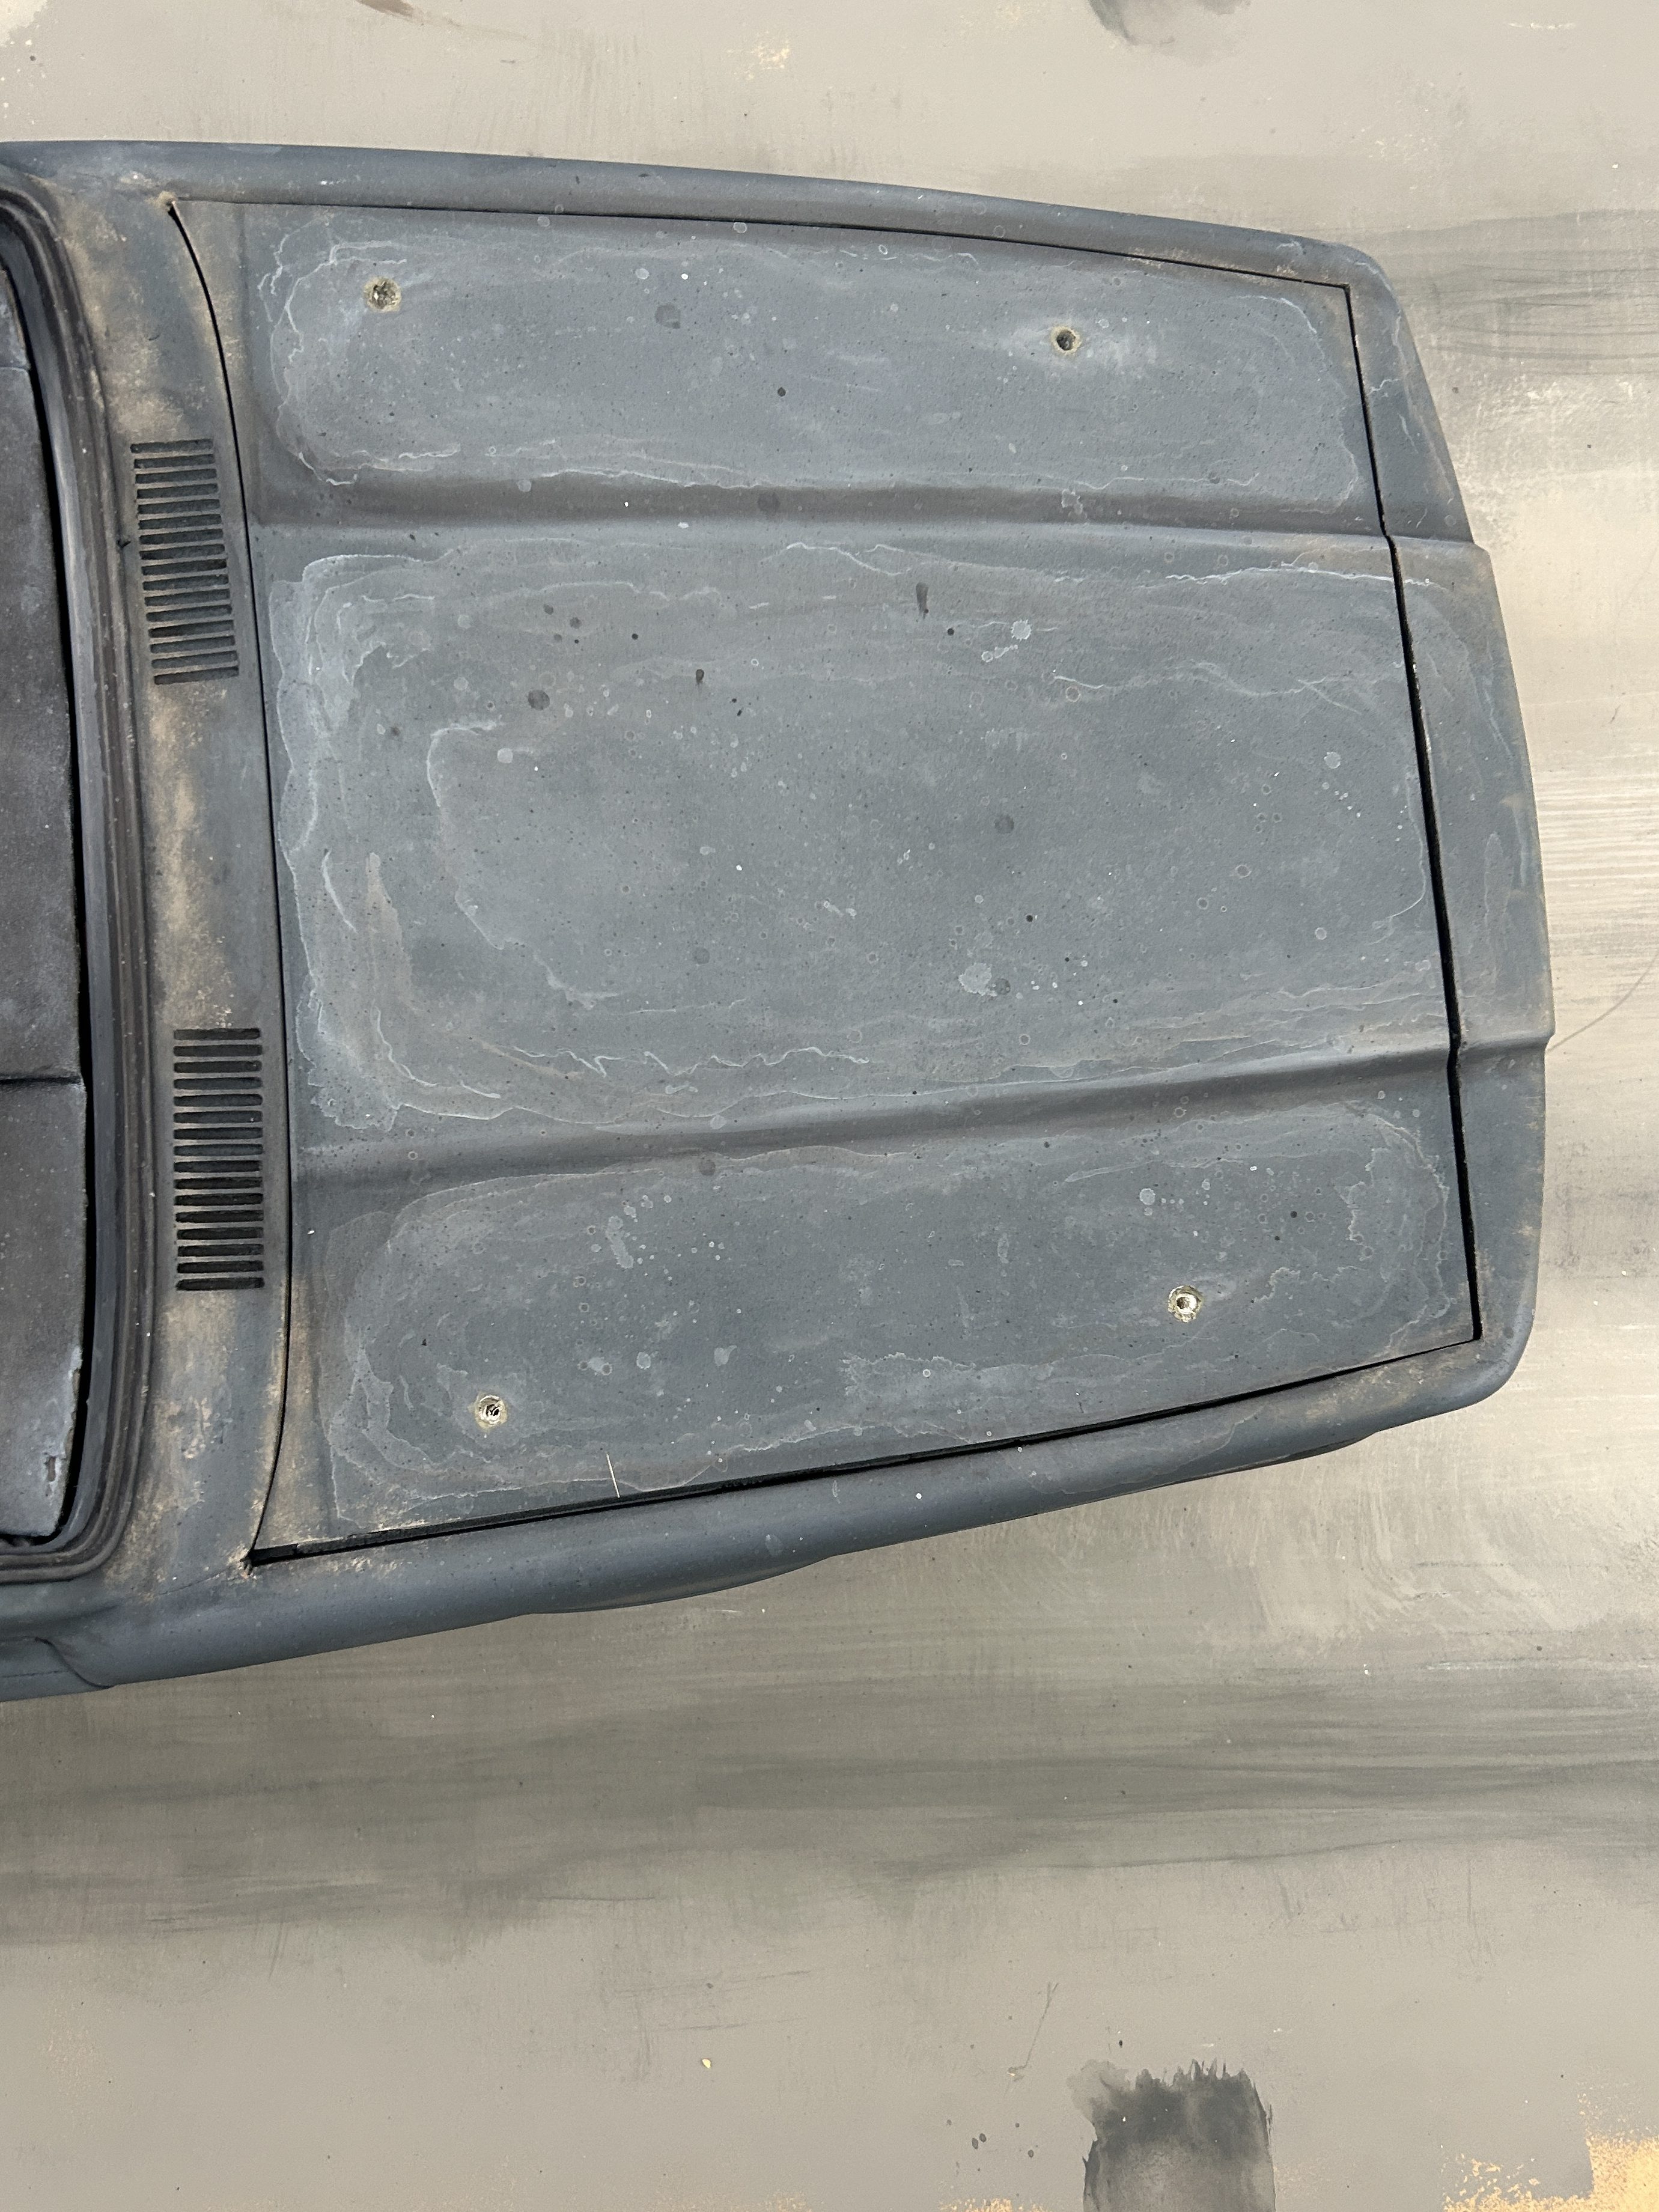
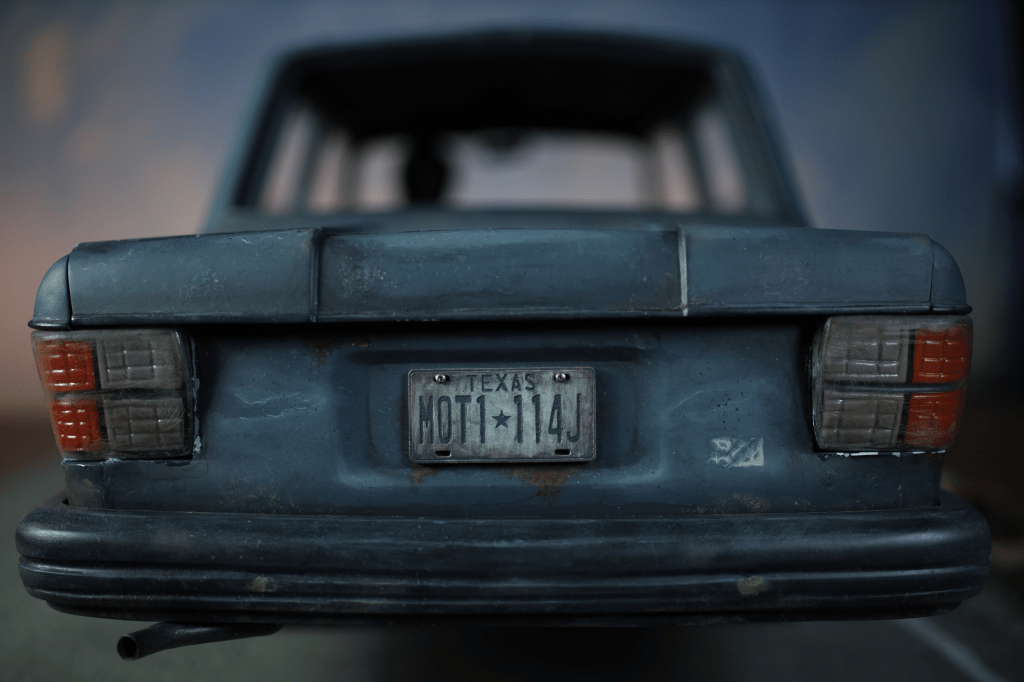
I also weathered the hood and trunk to look water-damaged, as well as other wear marks on these parts of the car. I did this through a series of washings, speckling, and dry brushing.
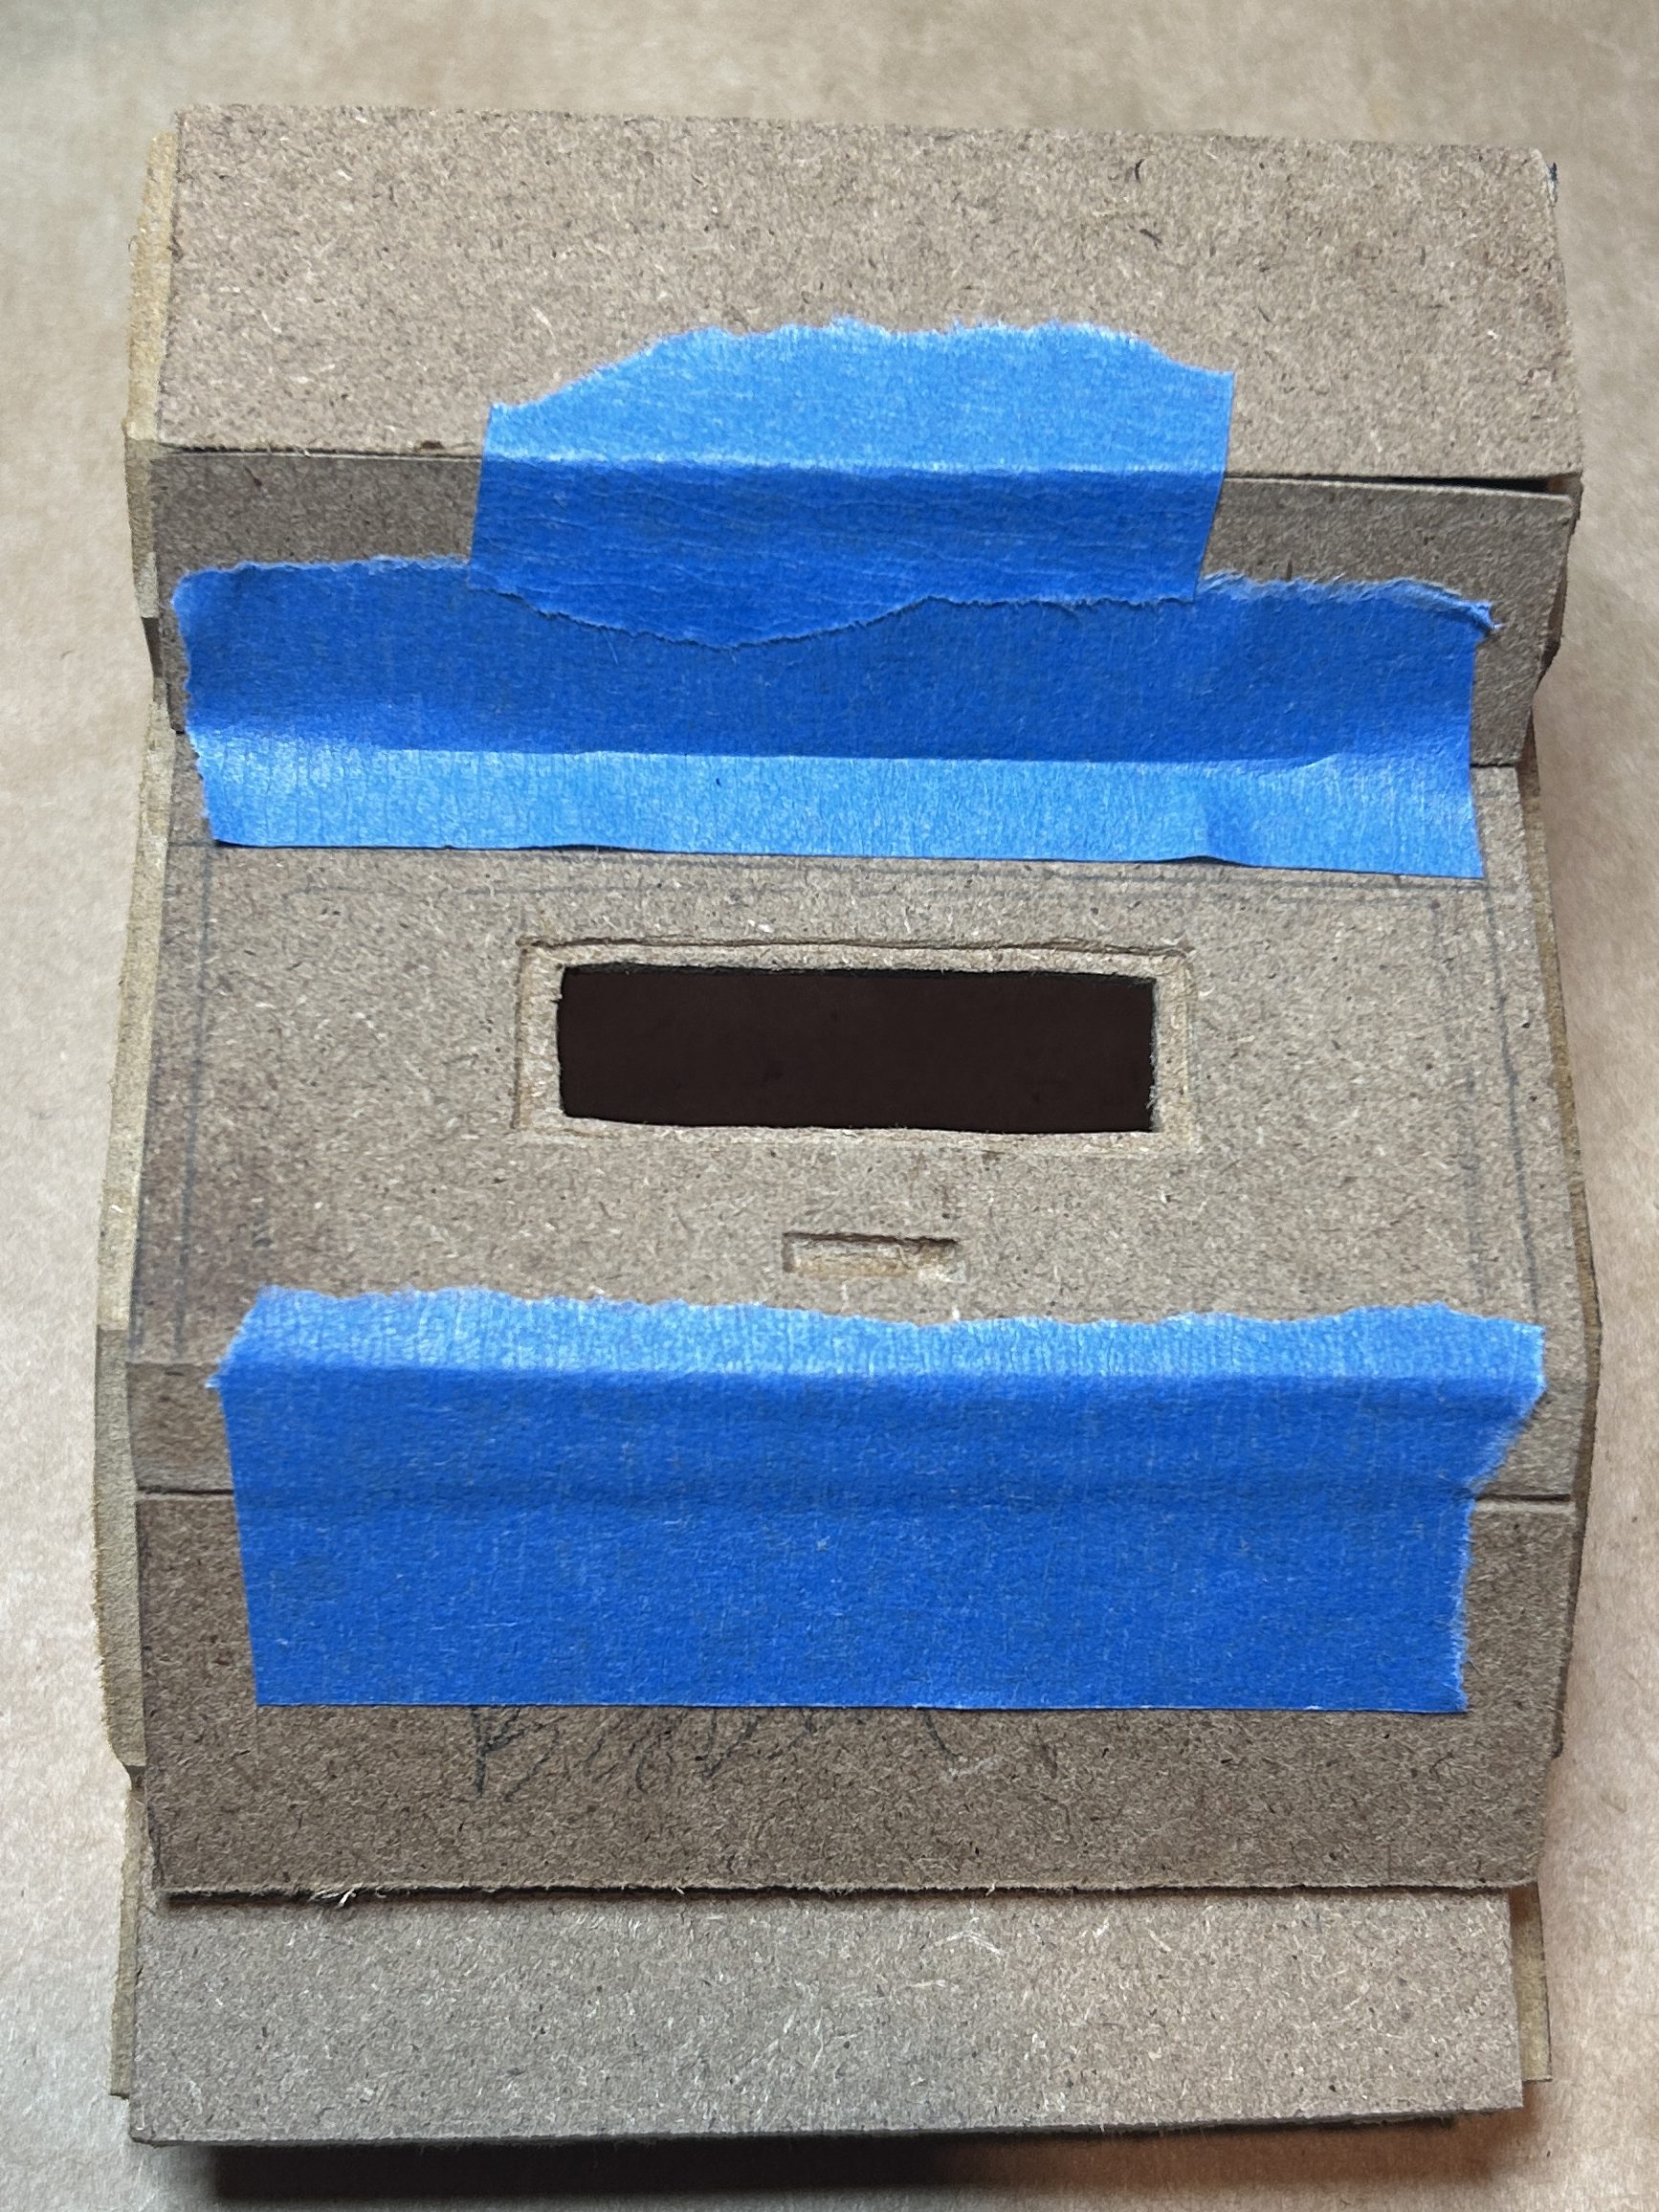
Radio
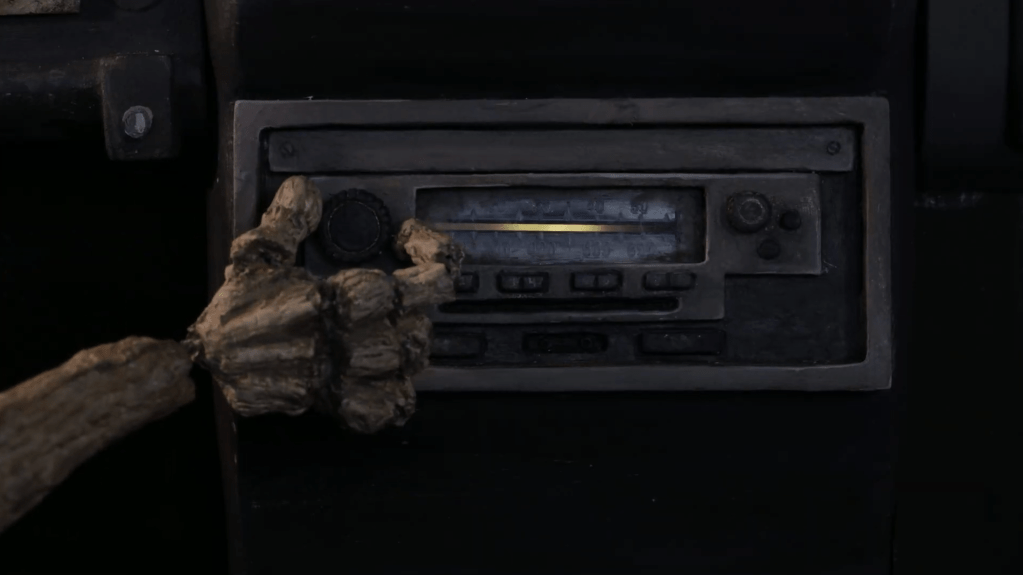
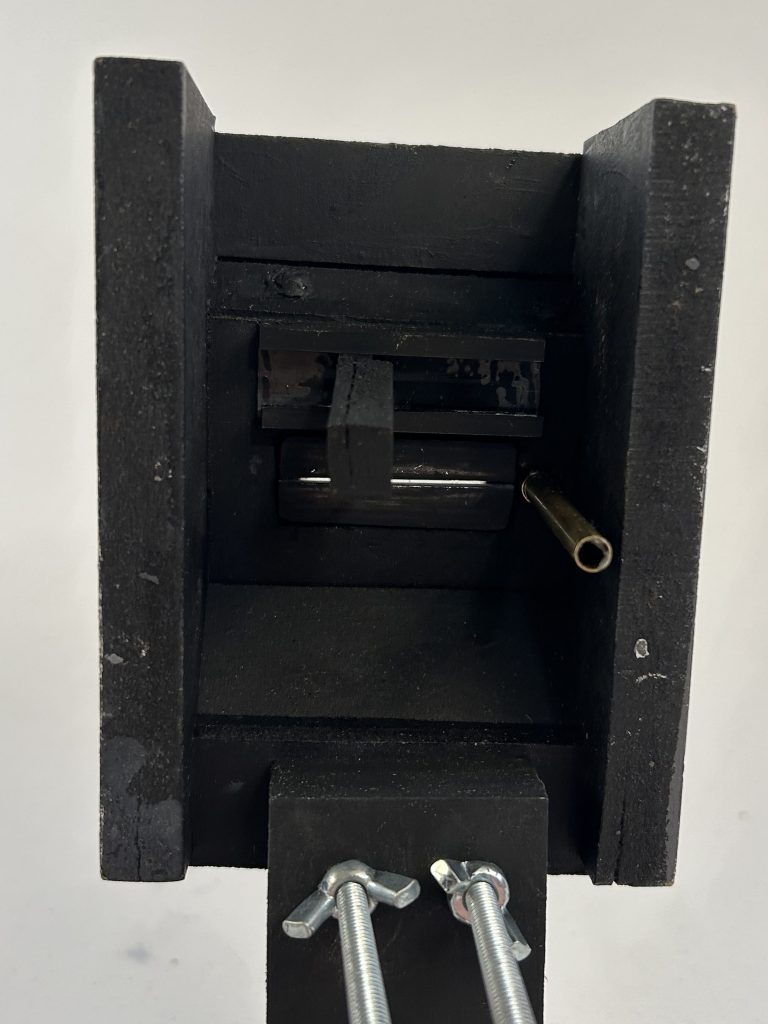
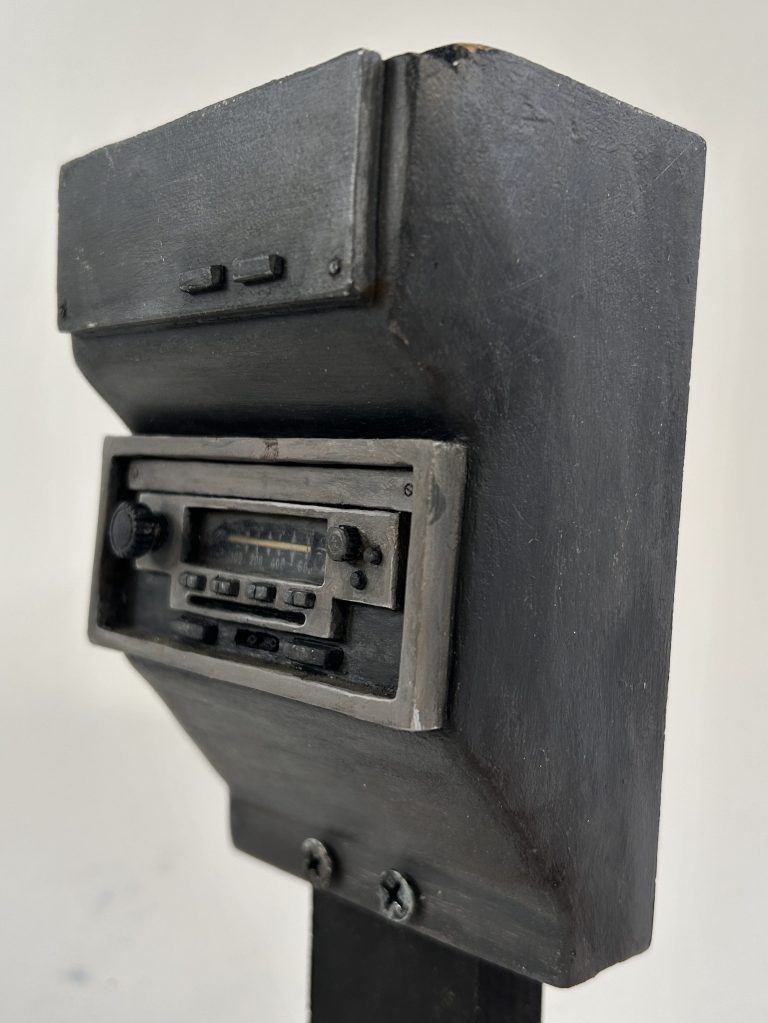
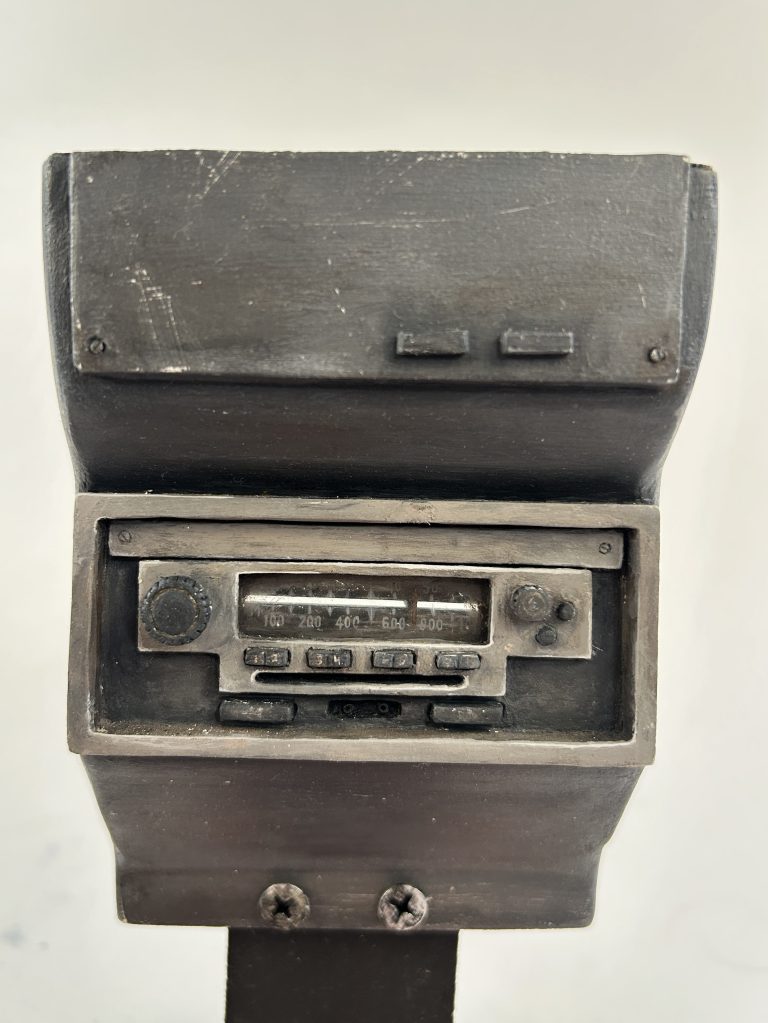
I made a 50% larger-scale car radio for an insert shot that matched the scale of the puppet’s hand. The radio needed to have a functional knob and channel wire. It is primarily constructed from MDF, with propoxy for details and polycarbonate for the rigging.
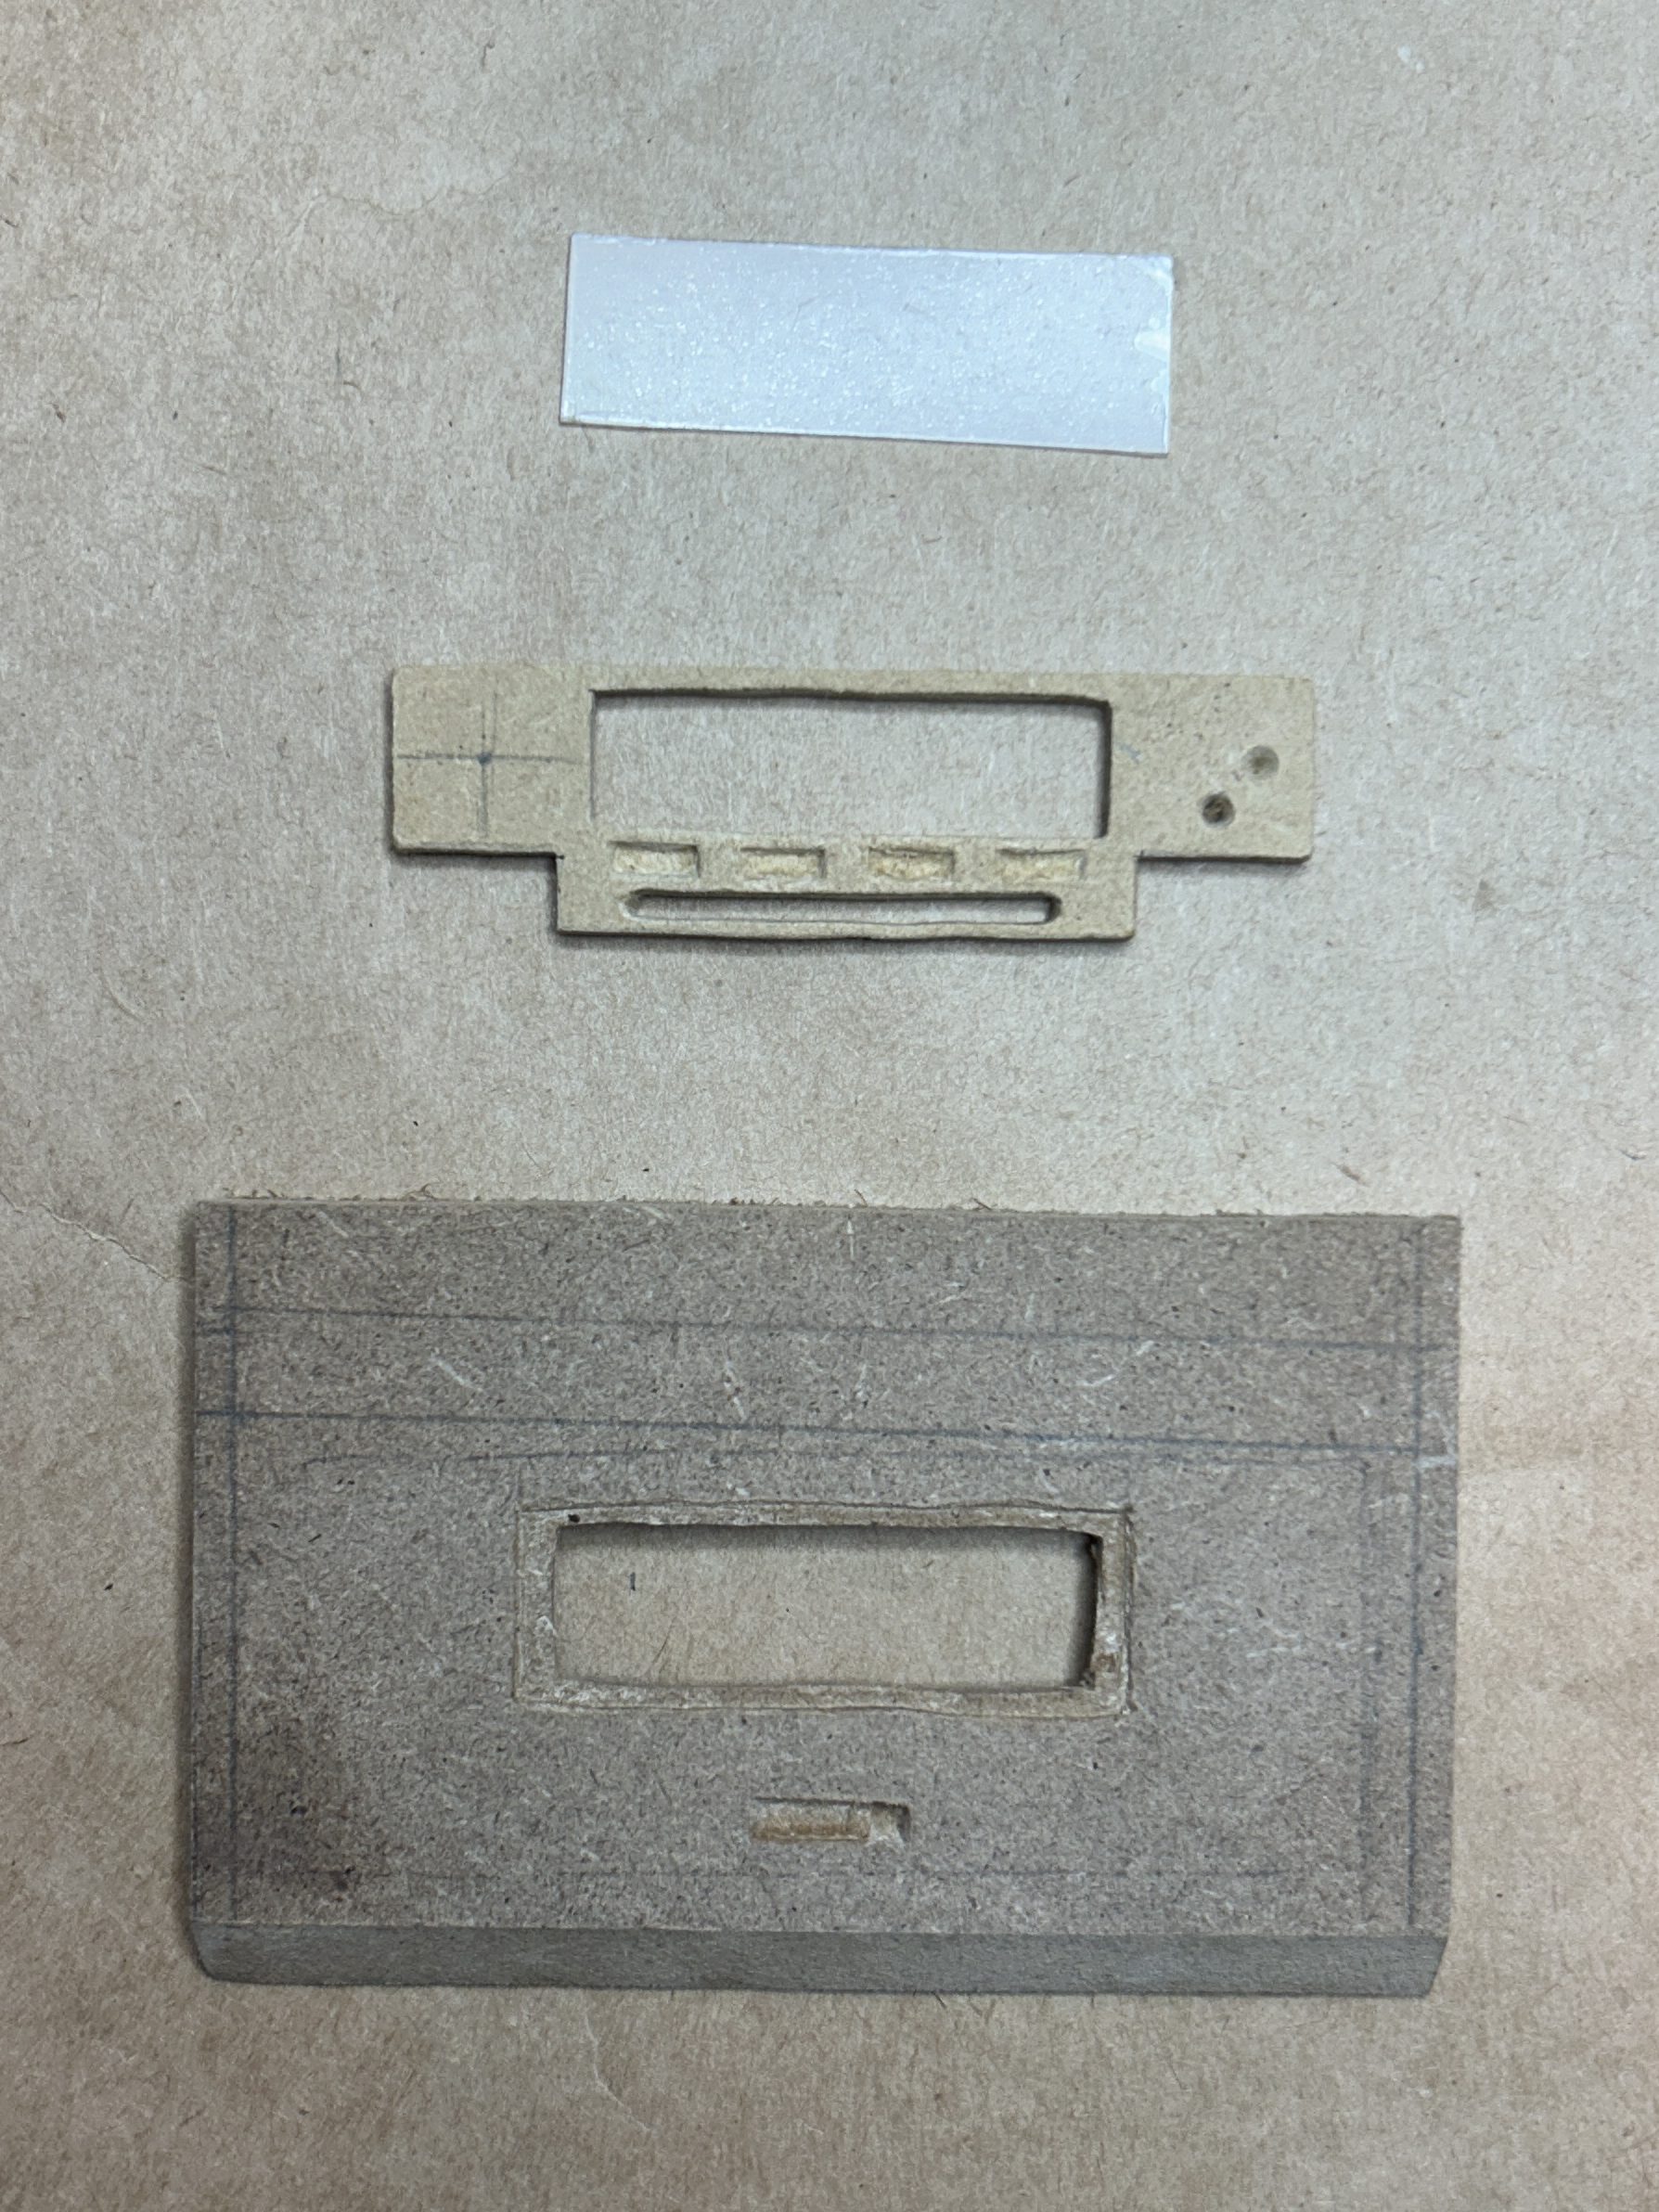
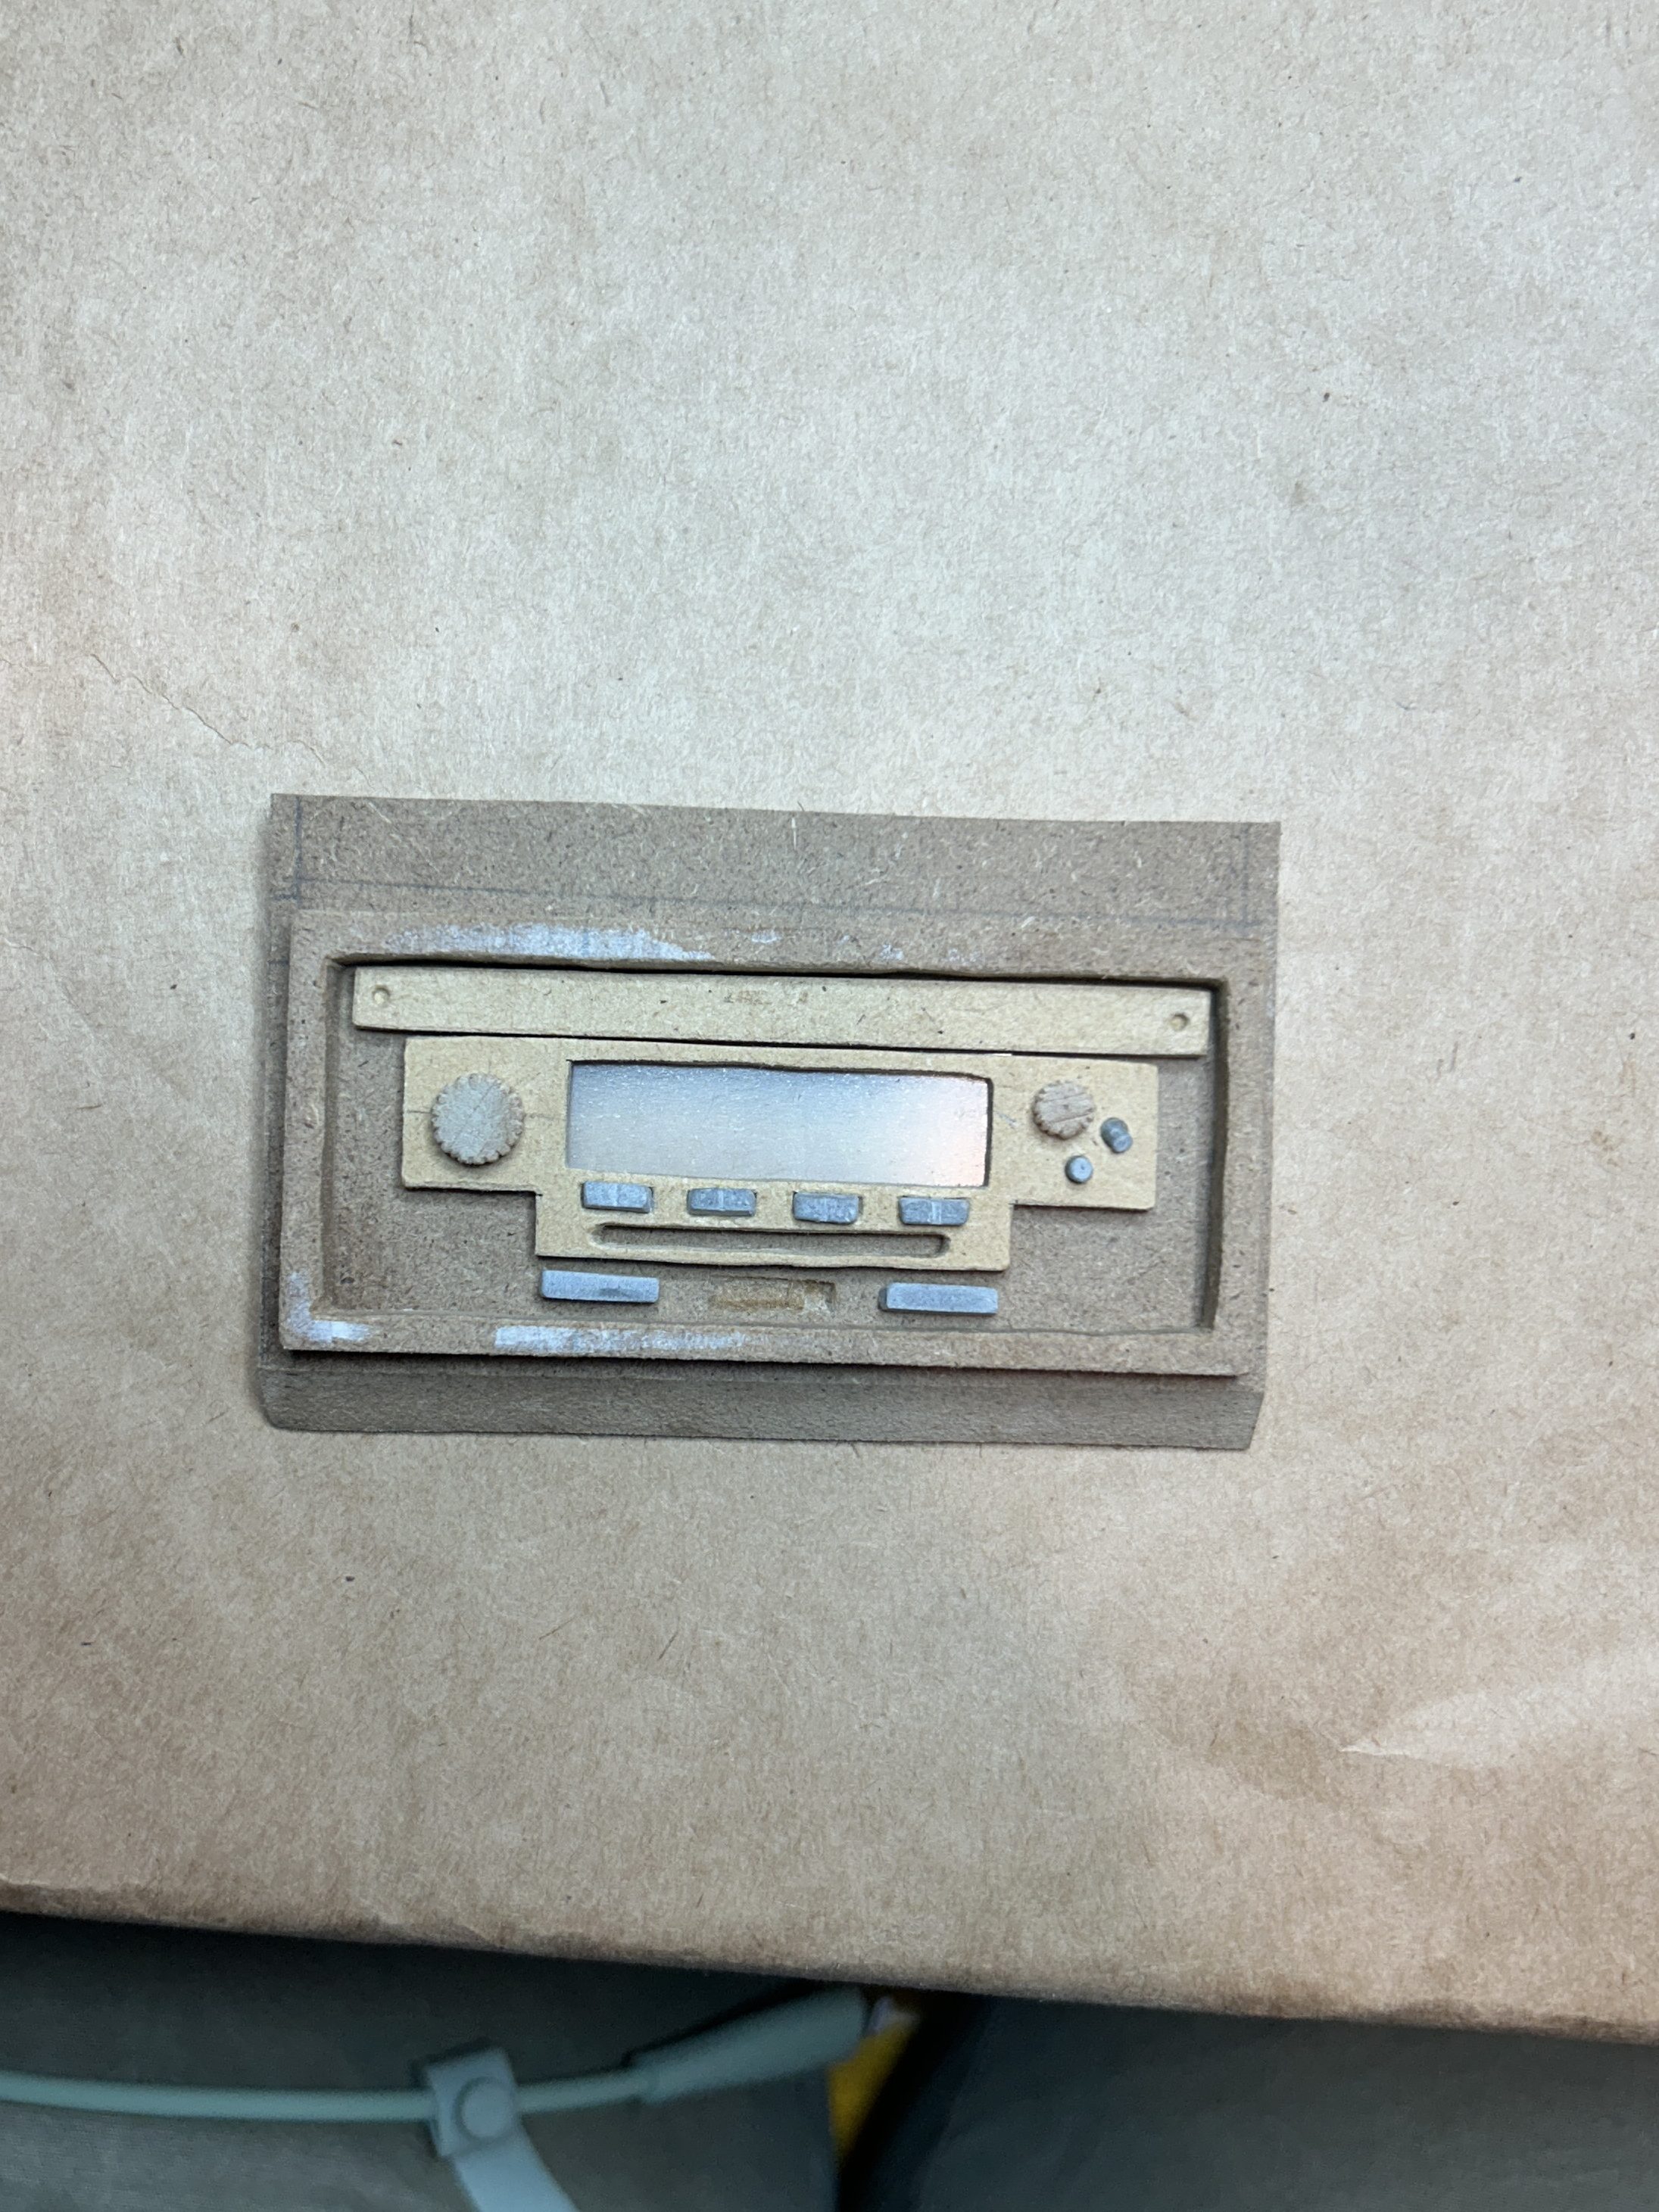
The station window was made by layering a small sheet of PETG in an indent between the MDF base and the top radio panel. Another indent was carved into the back of the base to fit a laser-cut acrylic sheet, which would display the radio channels and house the moving wire for changing stations.
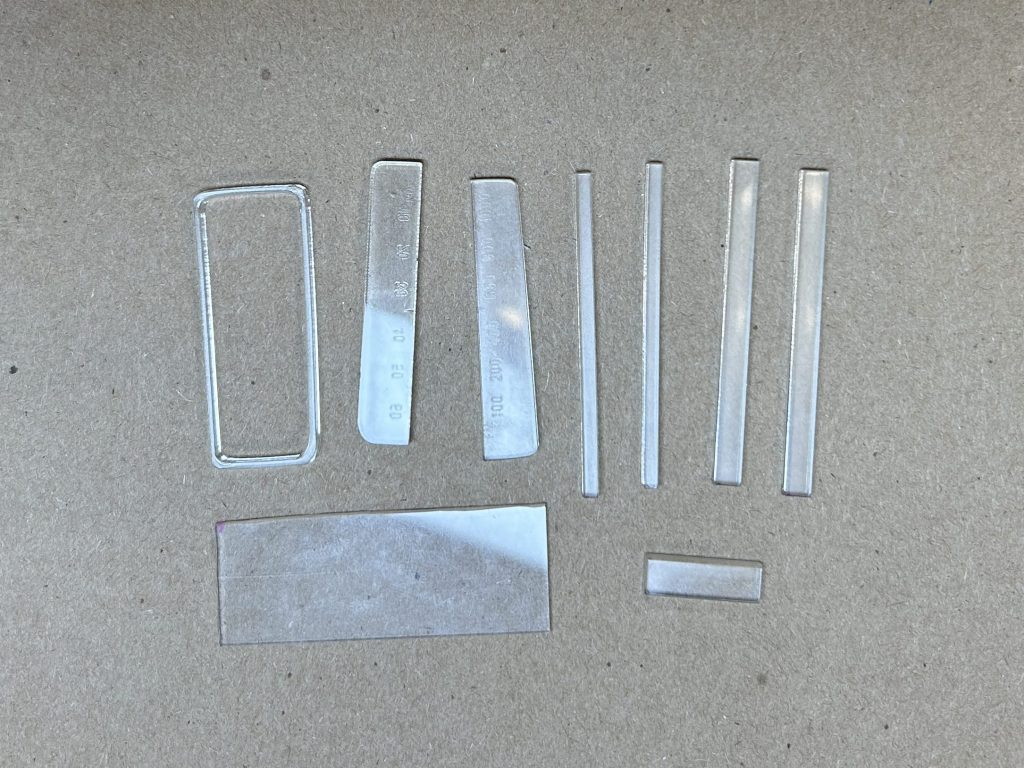
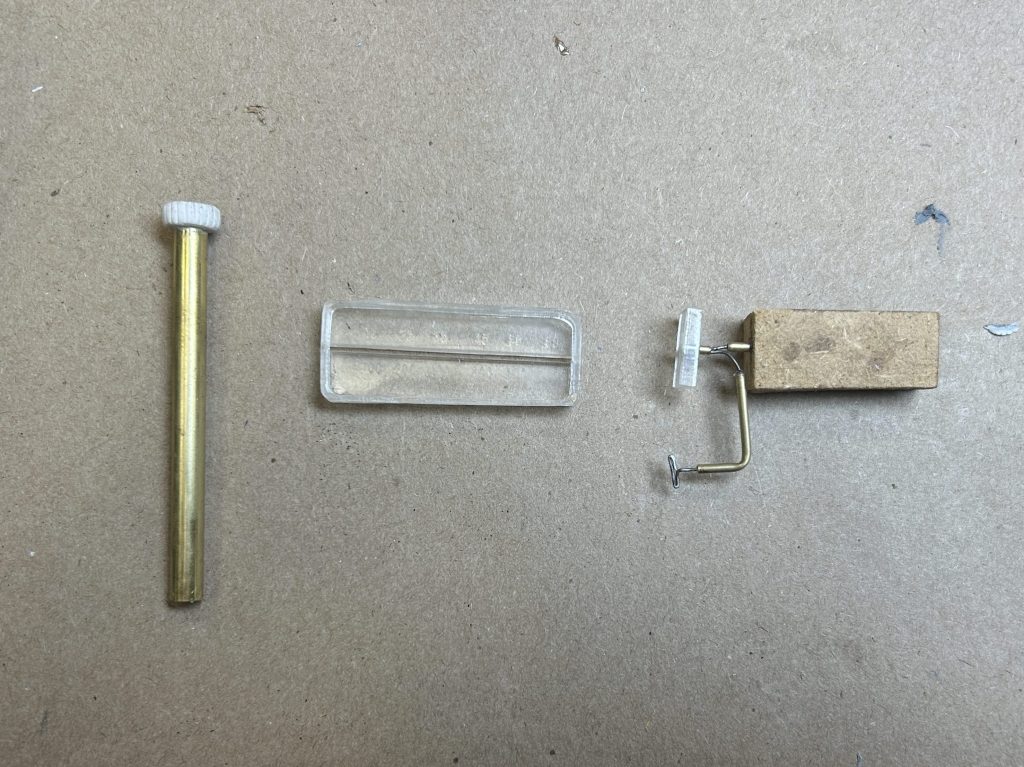
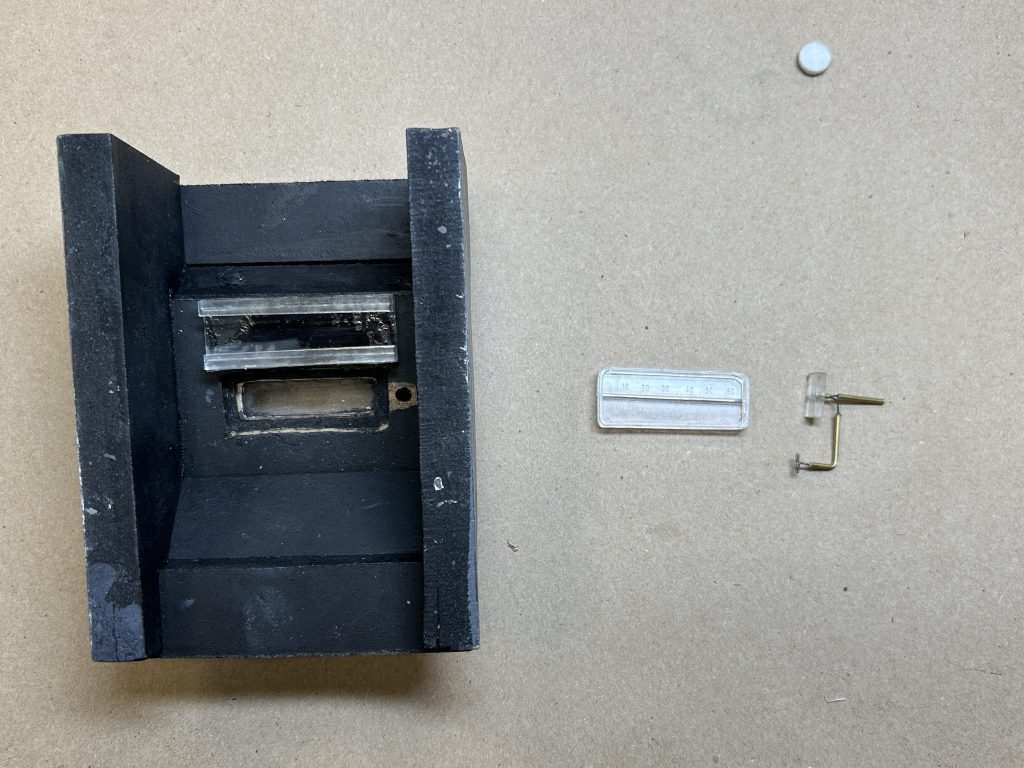
This was achieved by creating a small horizontal cut in the acrylic so that a T-shaped wire could pass through and be secured to a base to tension it in place, and for the animators to guide it side to side.
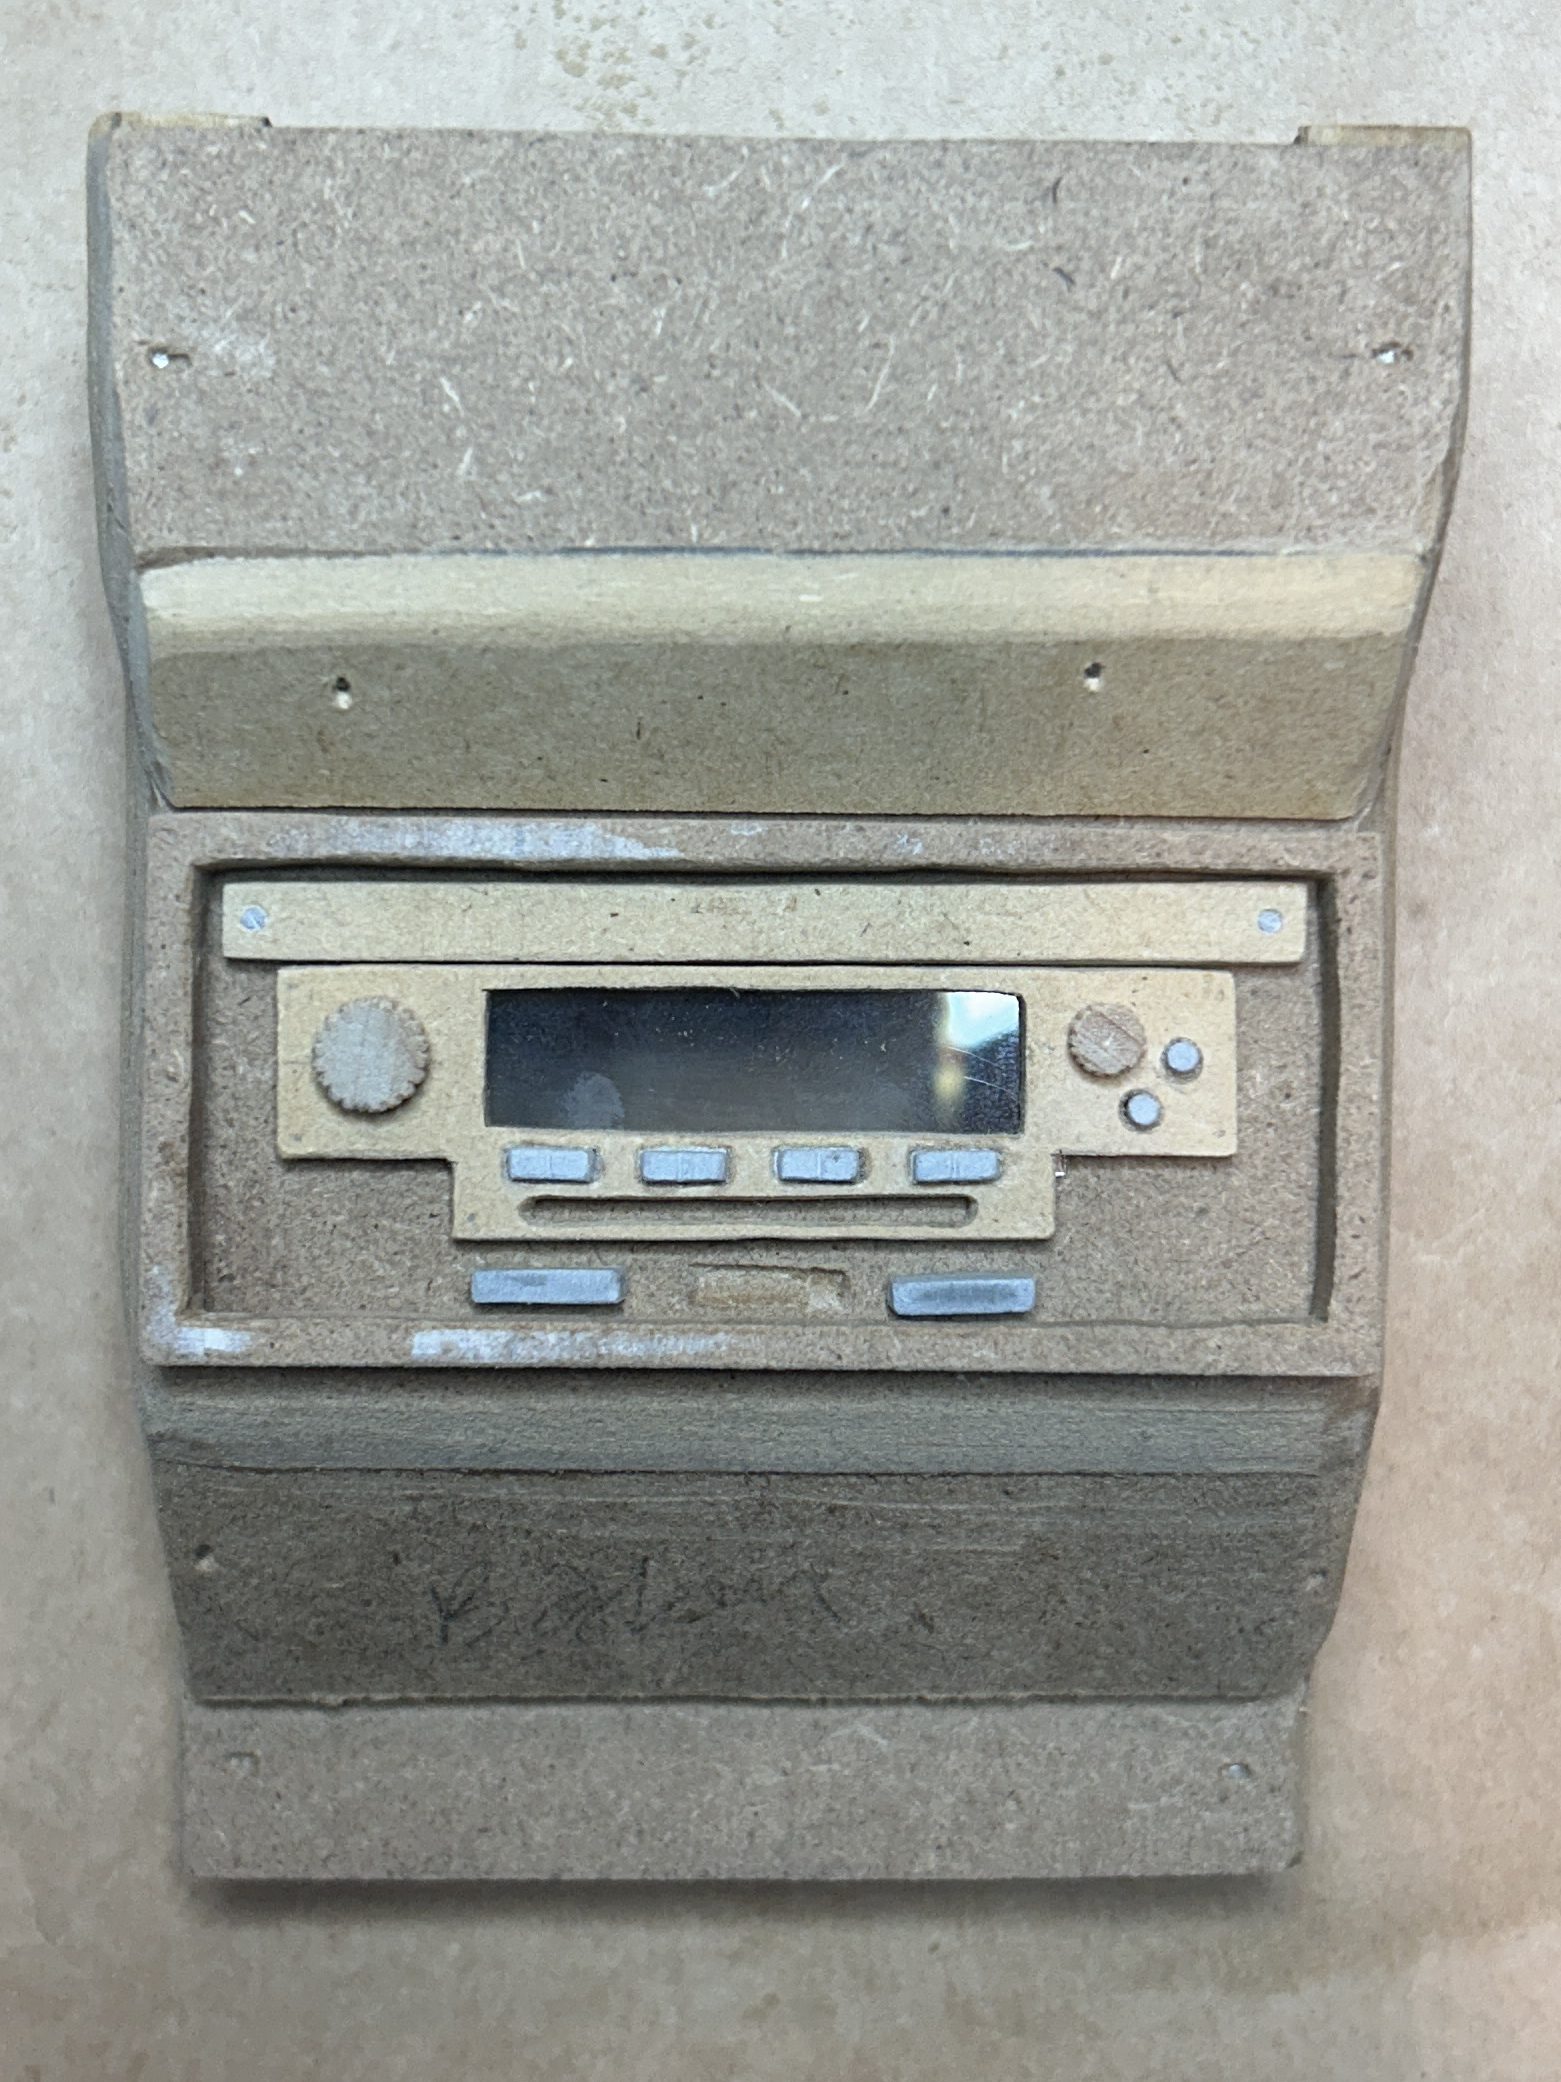
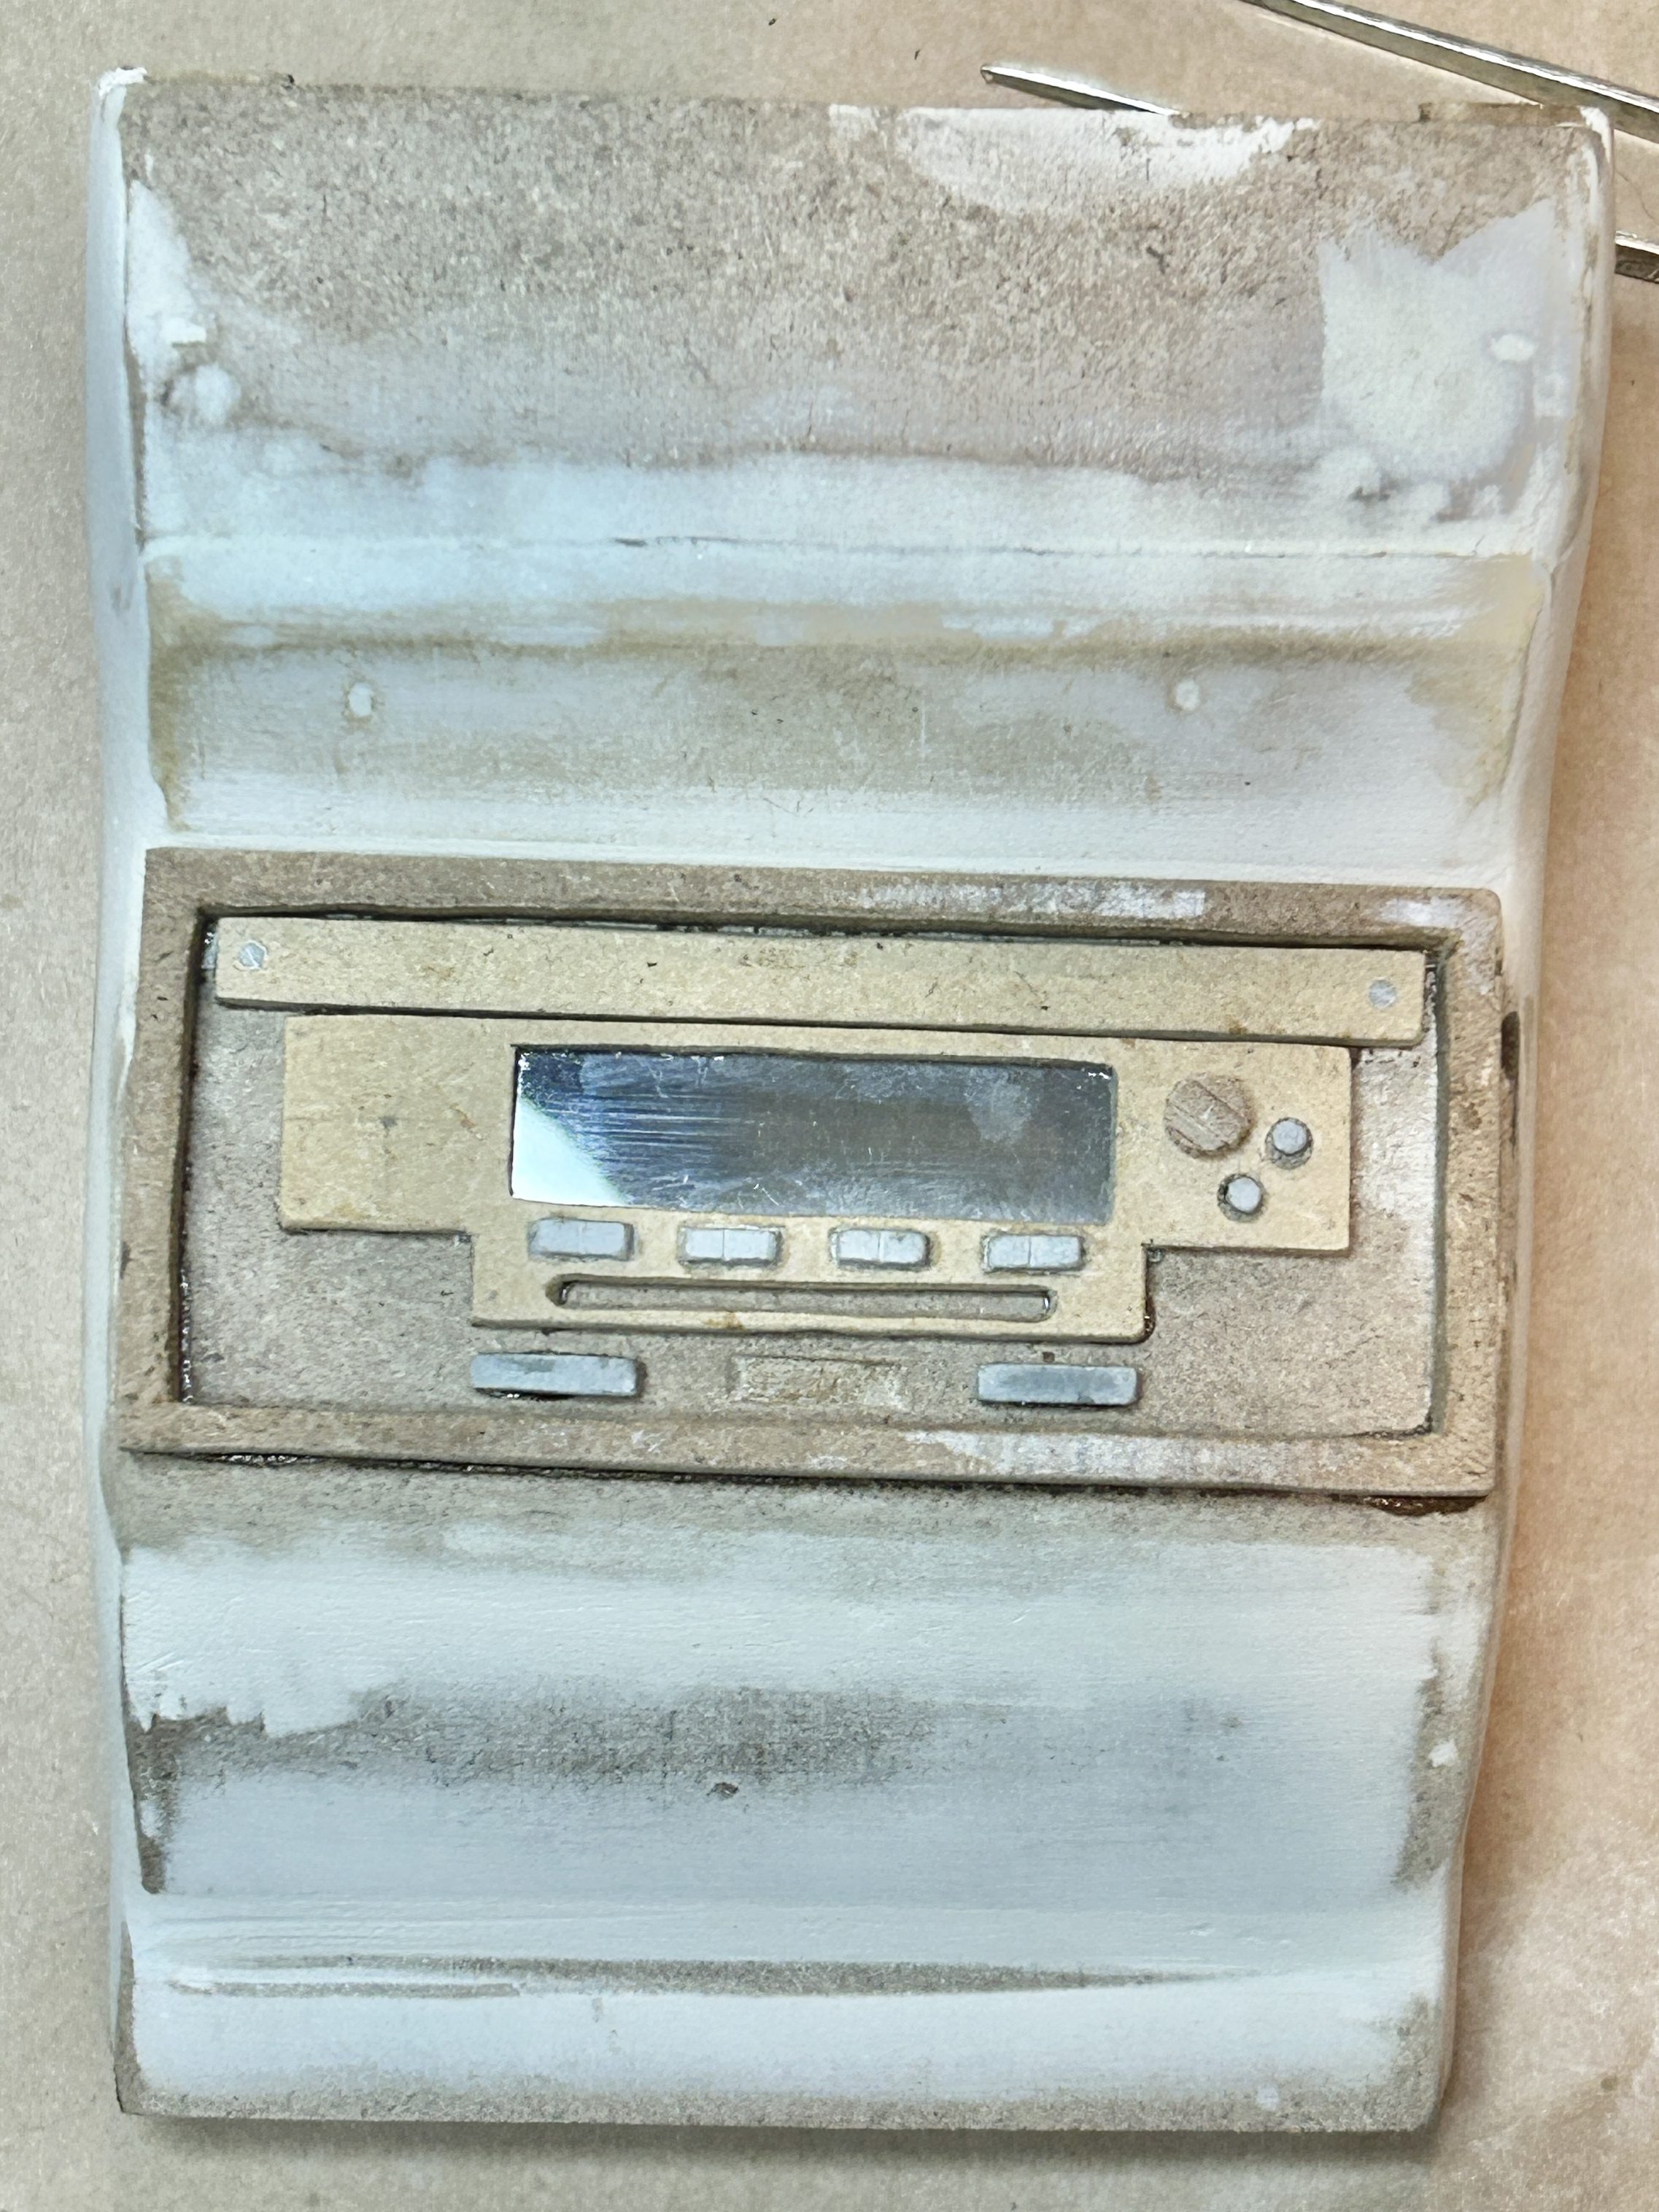
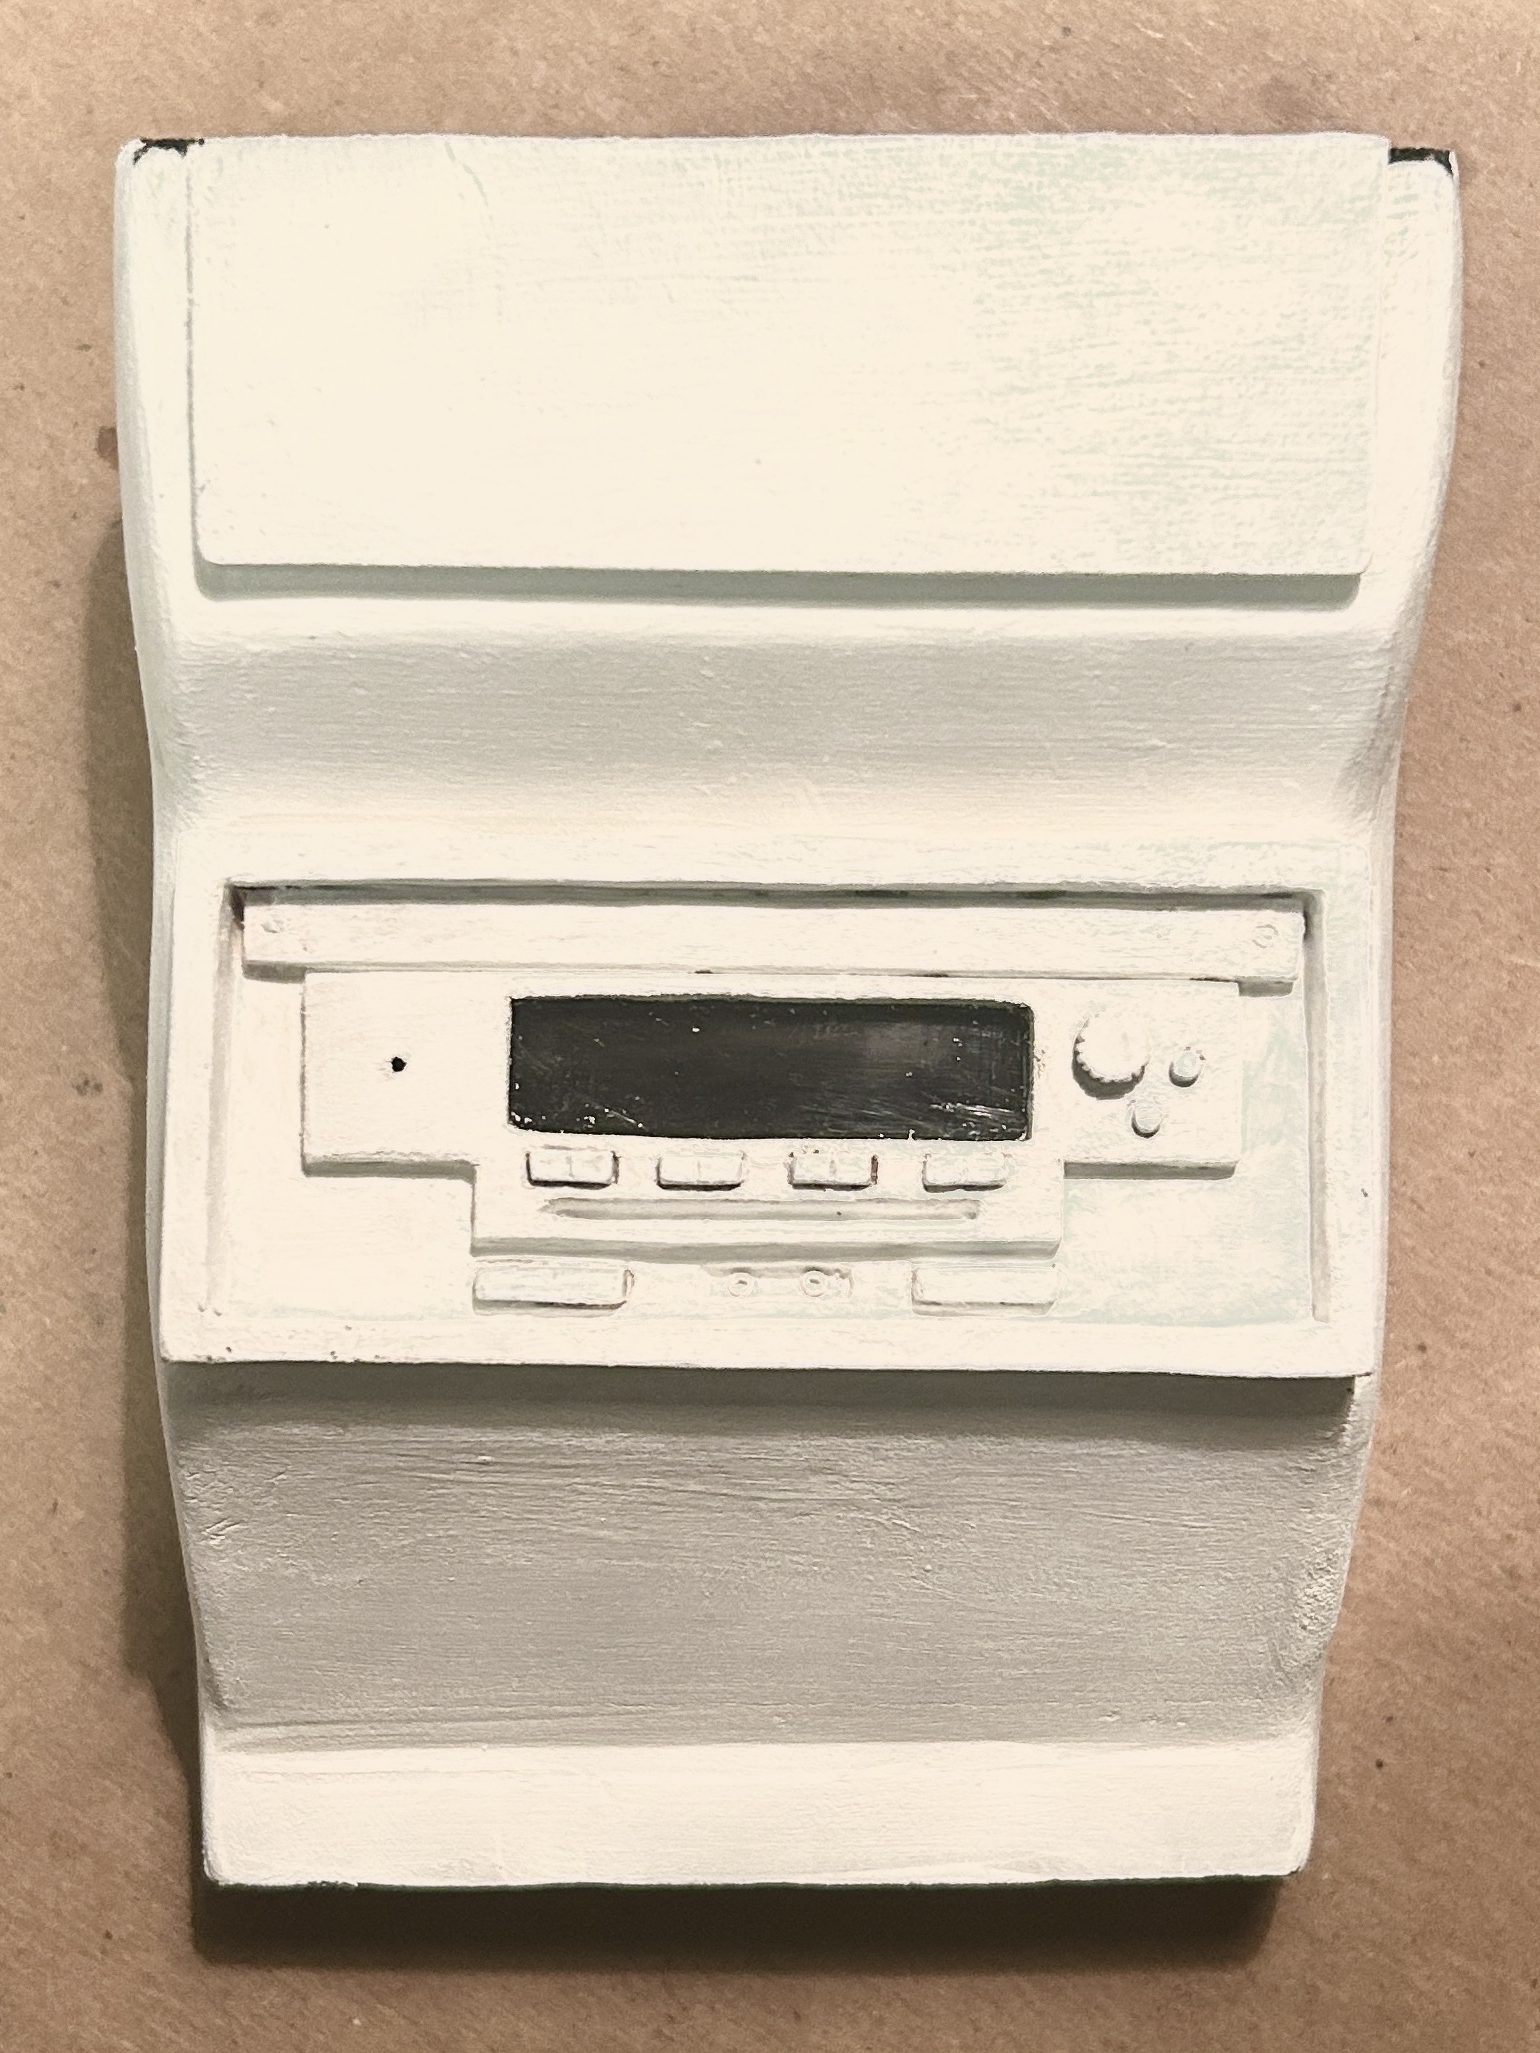
The whole radio and dashboard base was painted to match the smaller-scale version used for all the car interior shots.
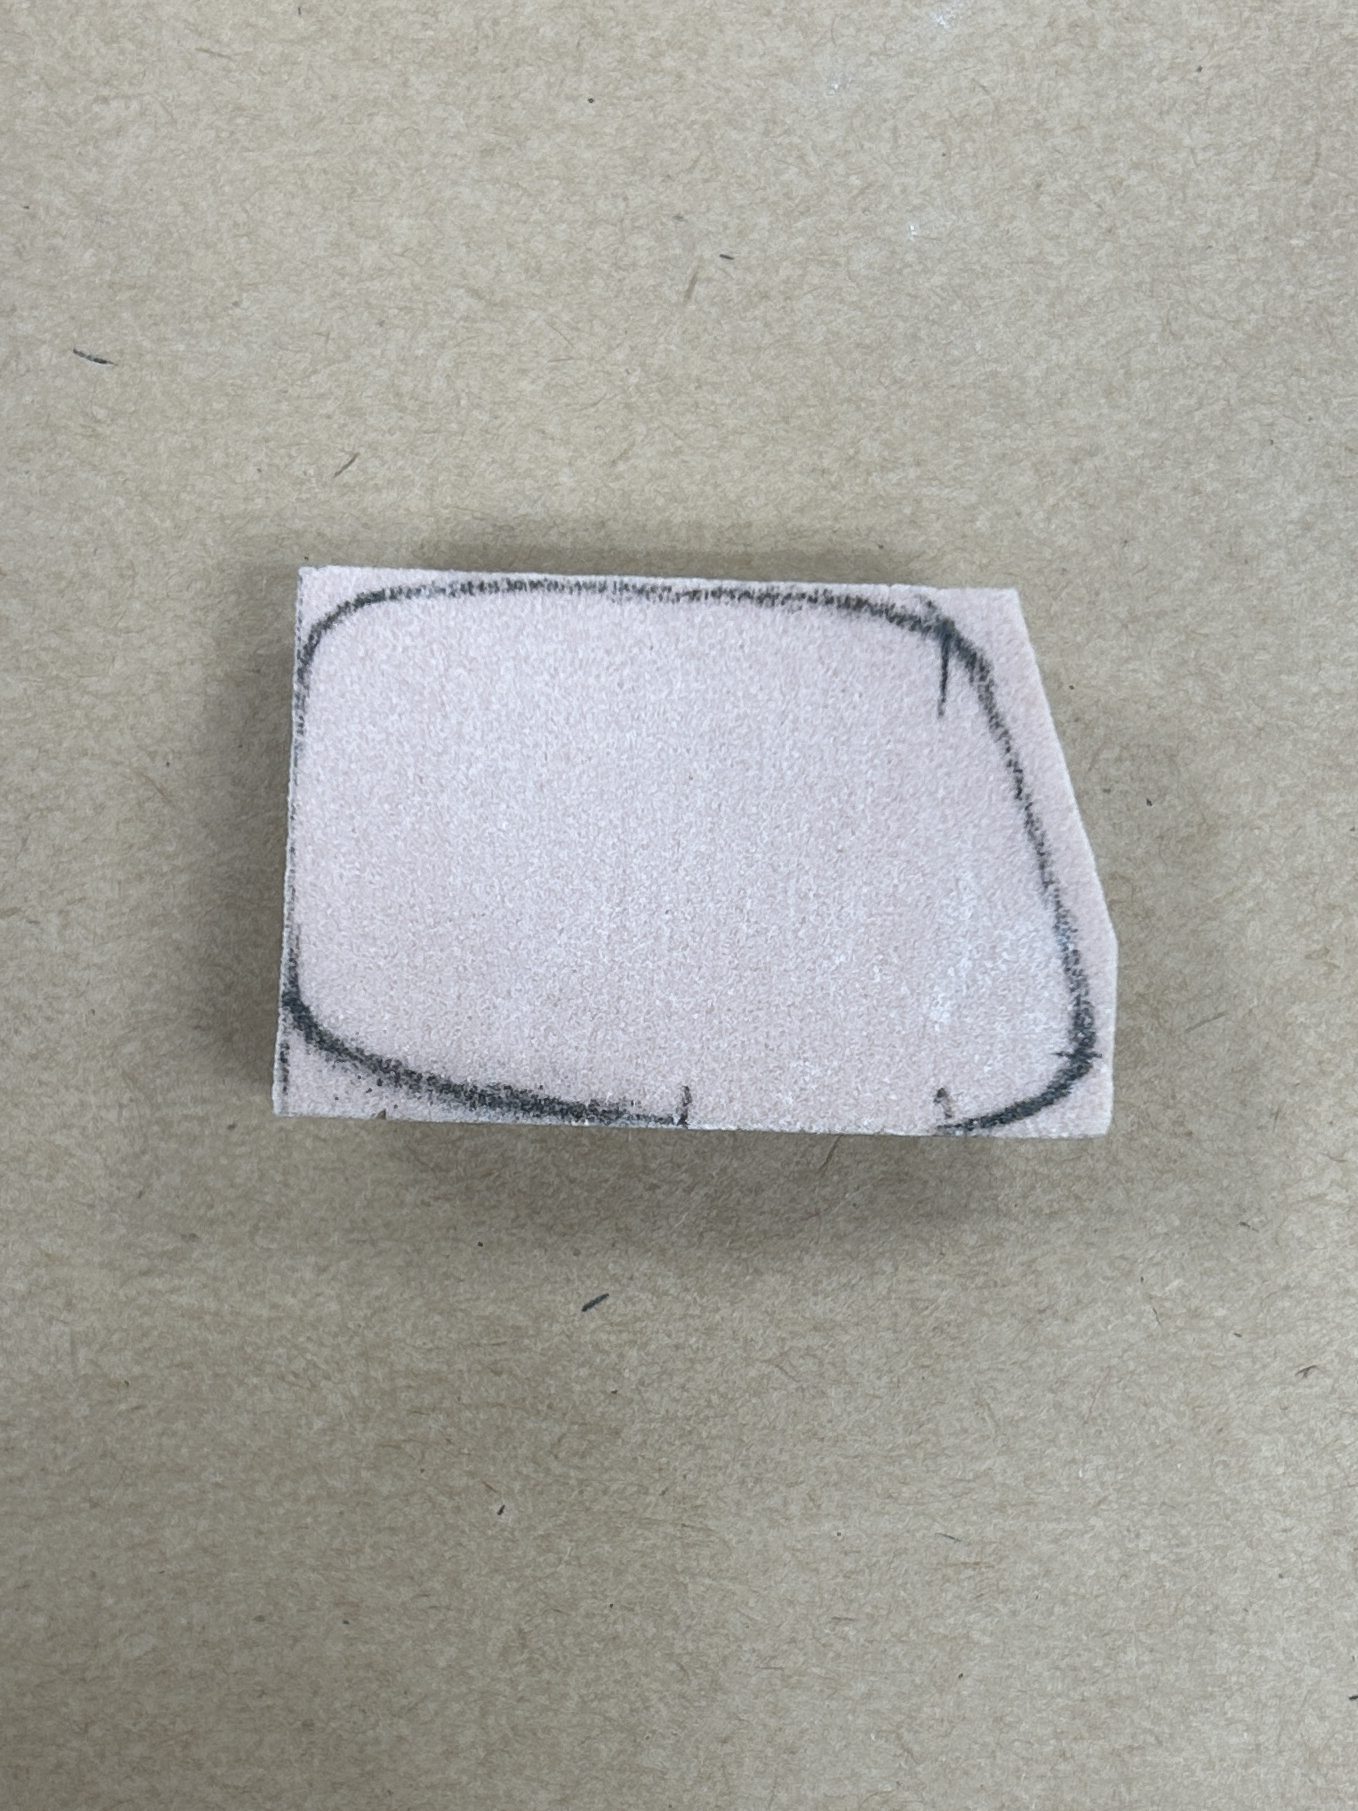
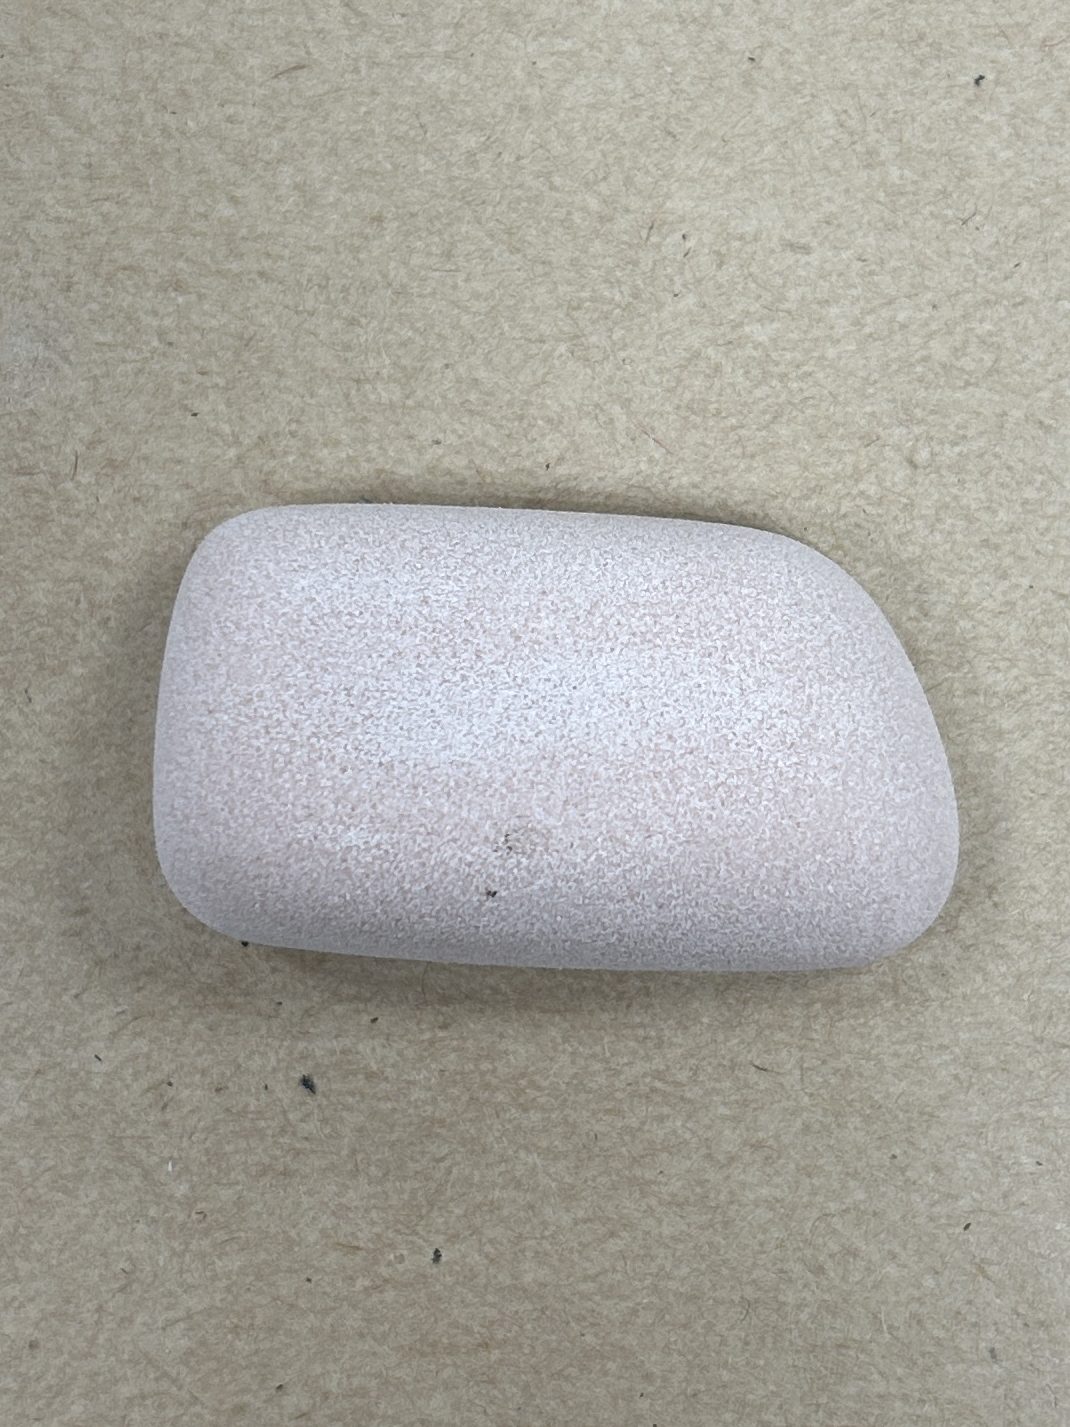
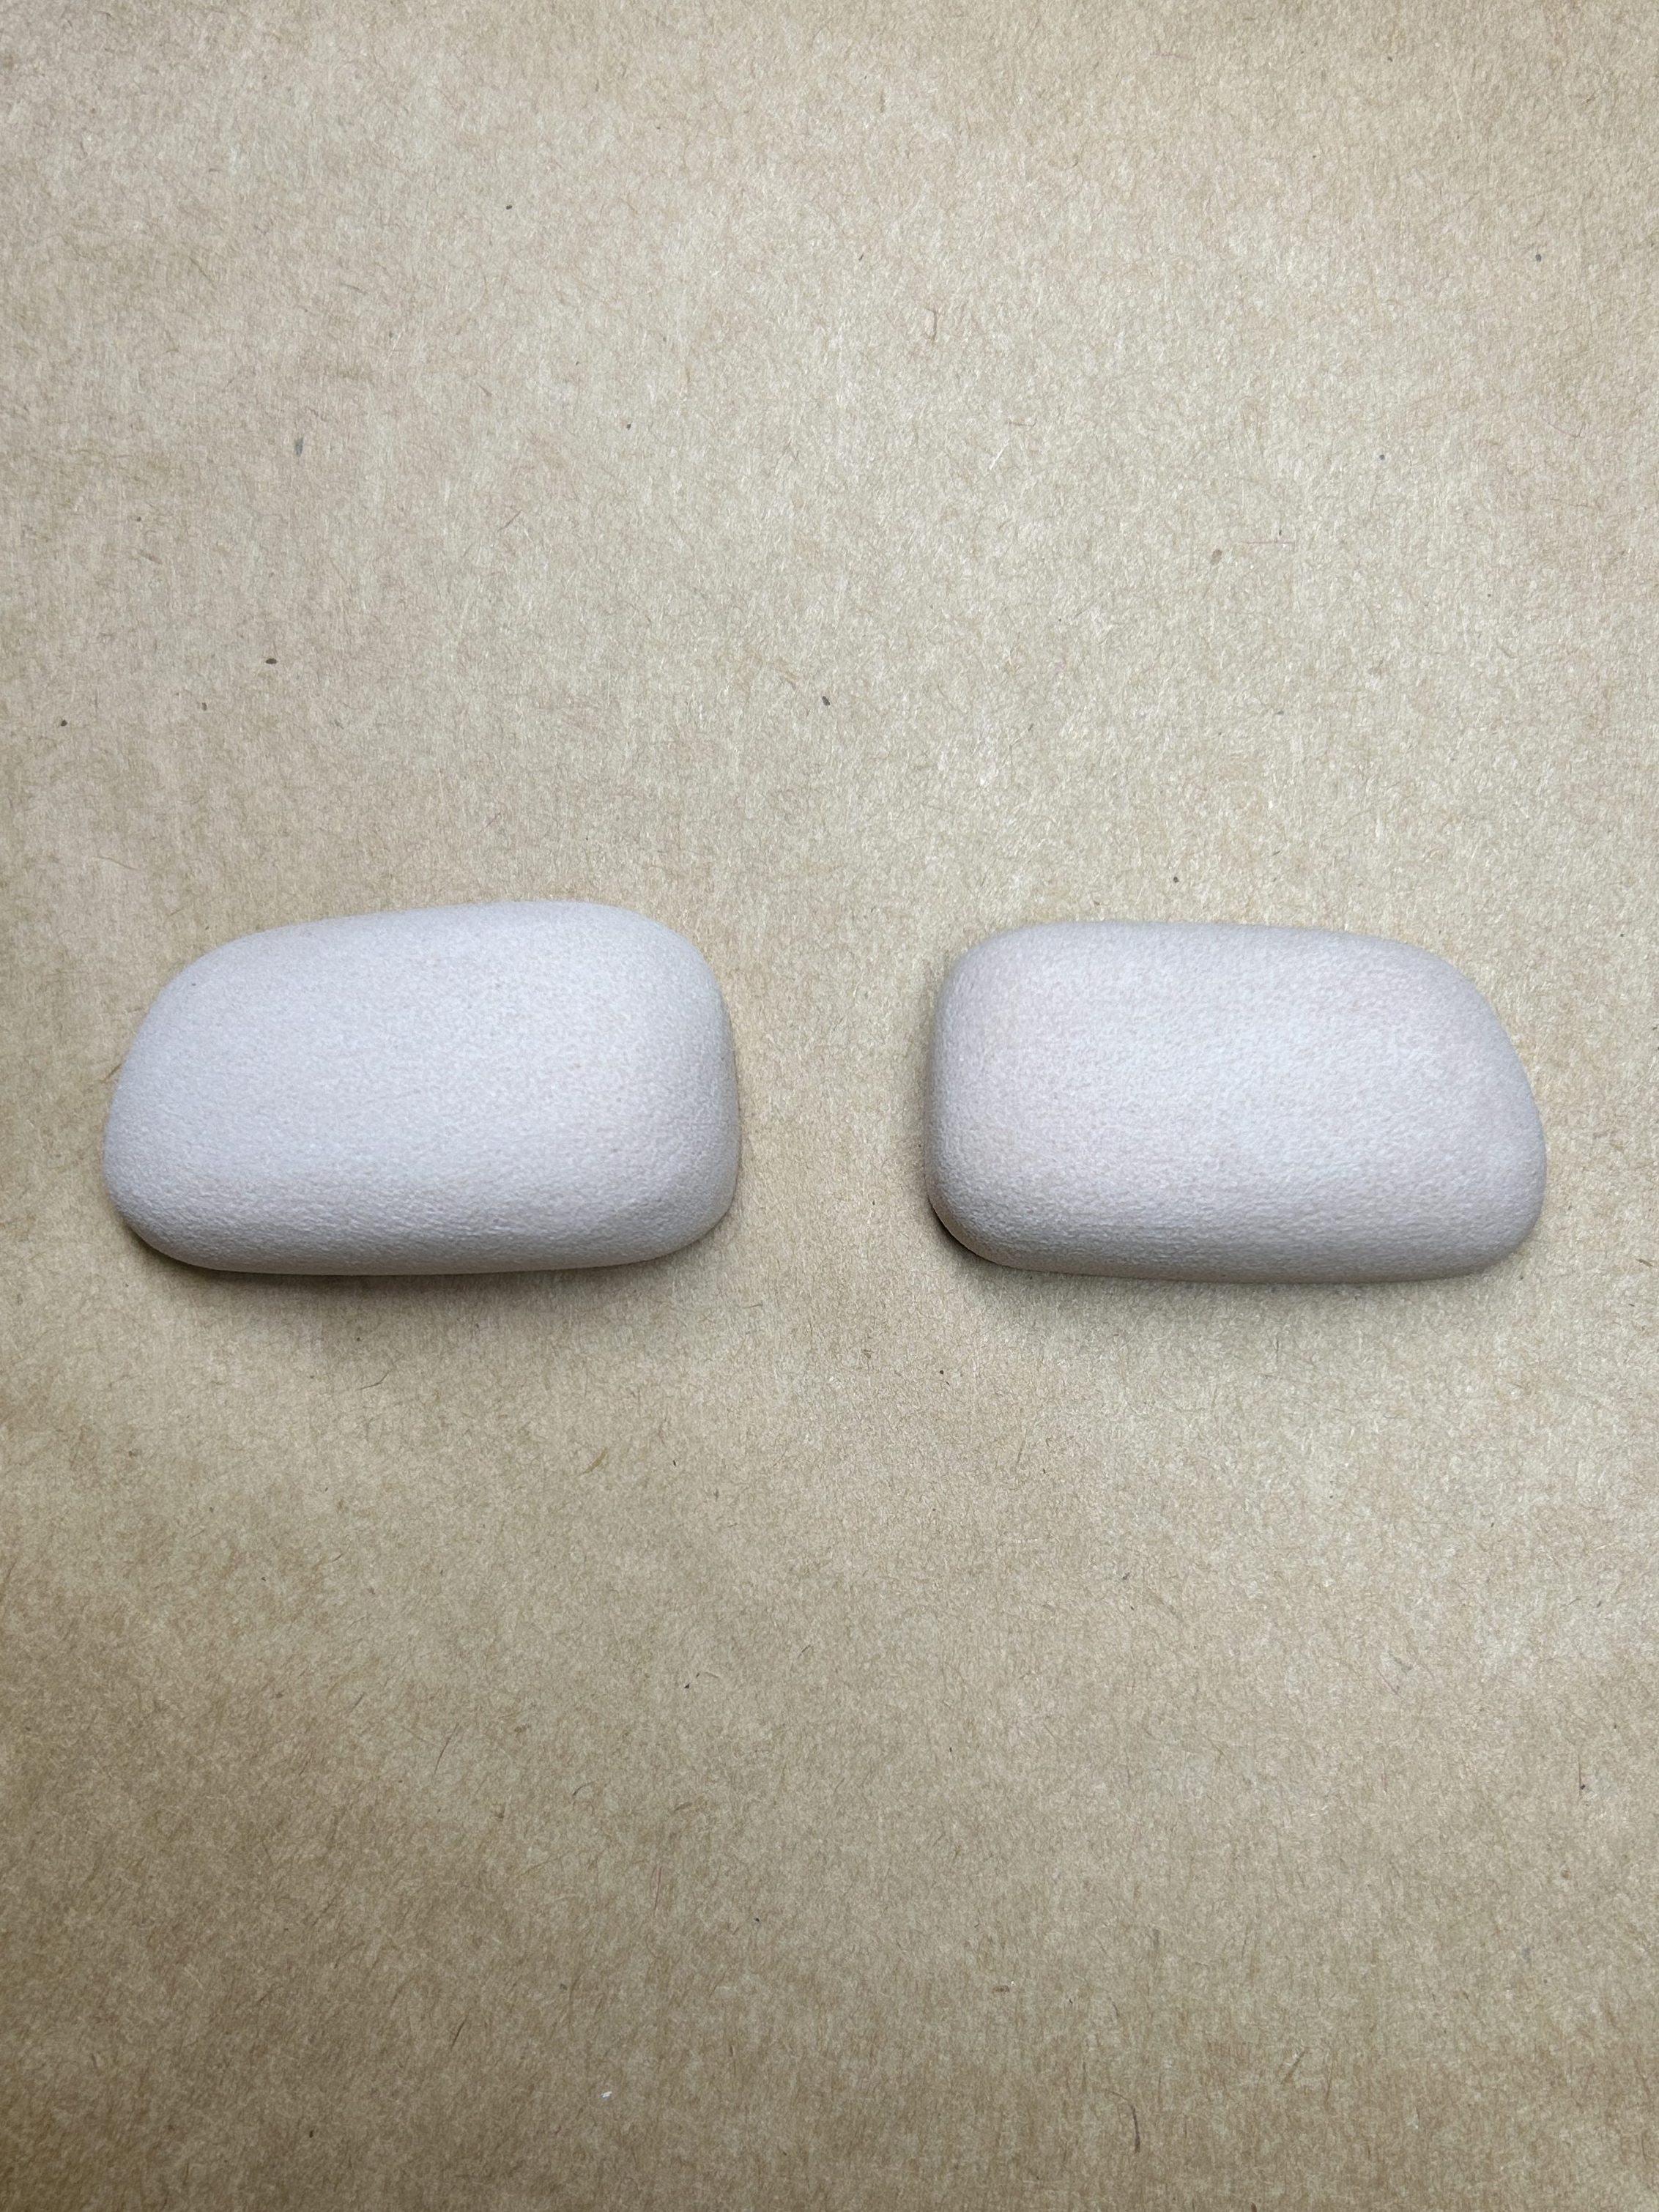
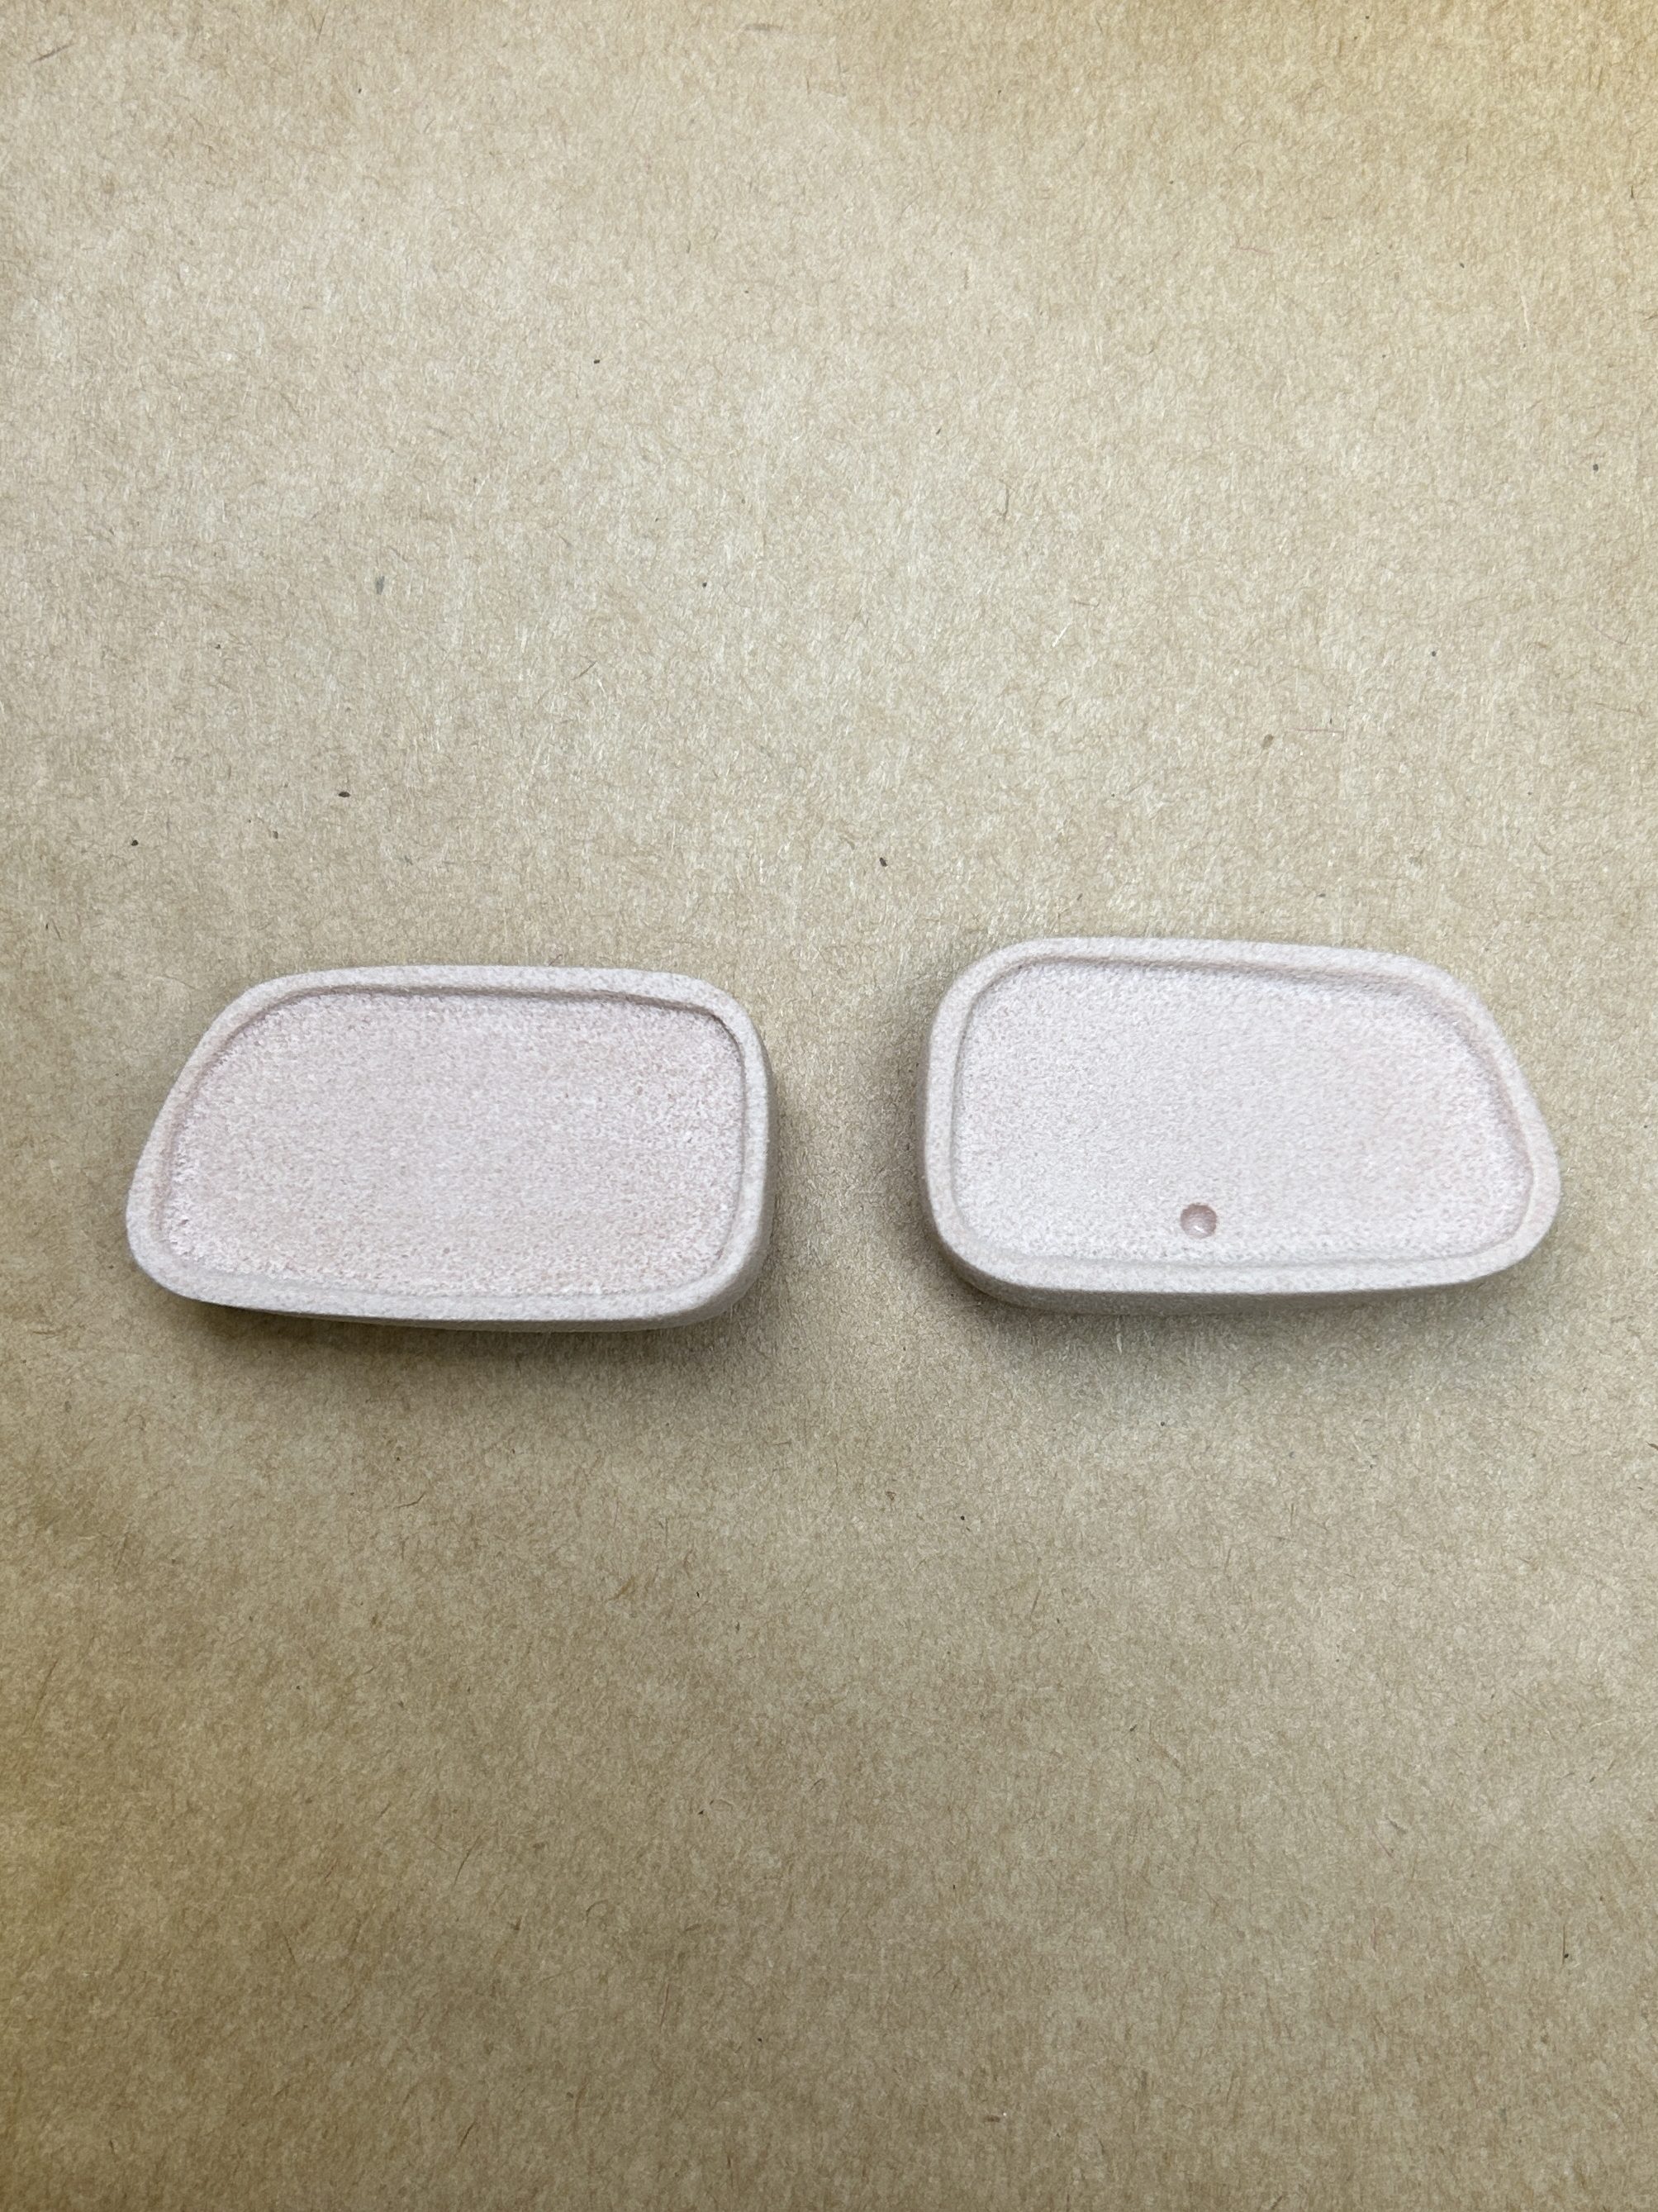
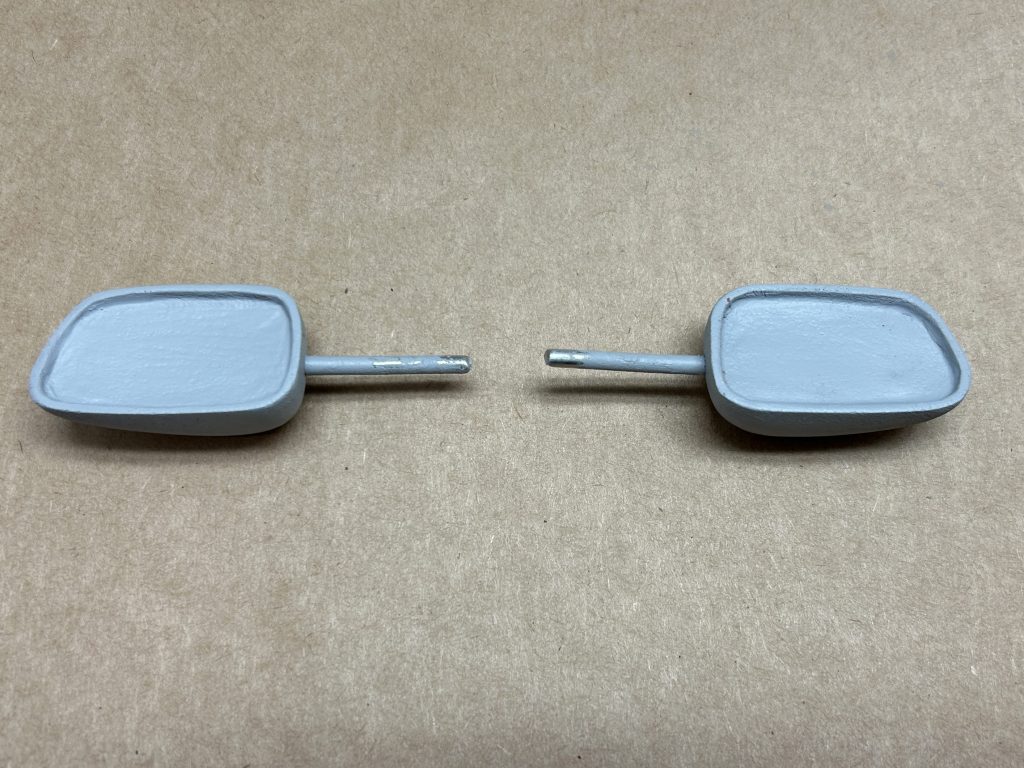
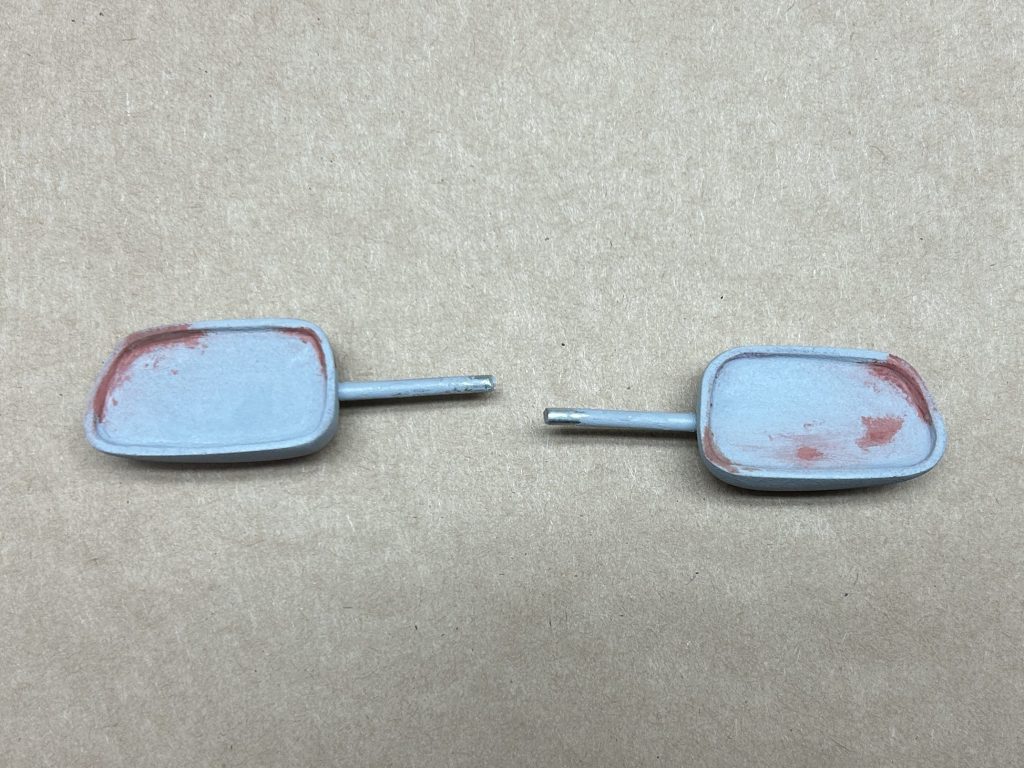
Side Mirrors
I created the car’s side mirrors from carved polyurethane foam using mechanical drawings. After it was carved, it was sealed with paint and molded.
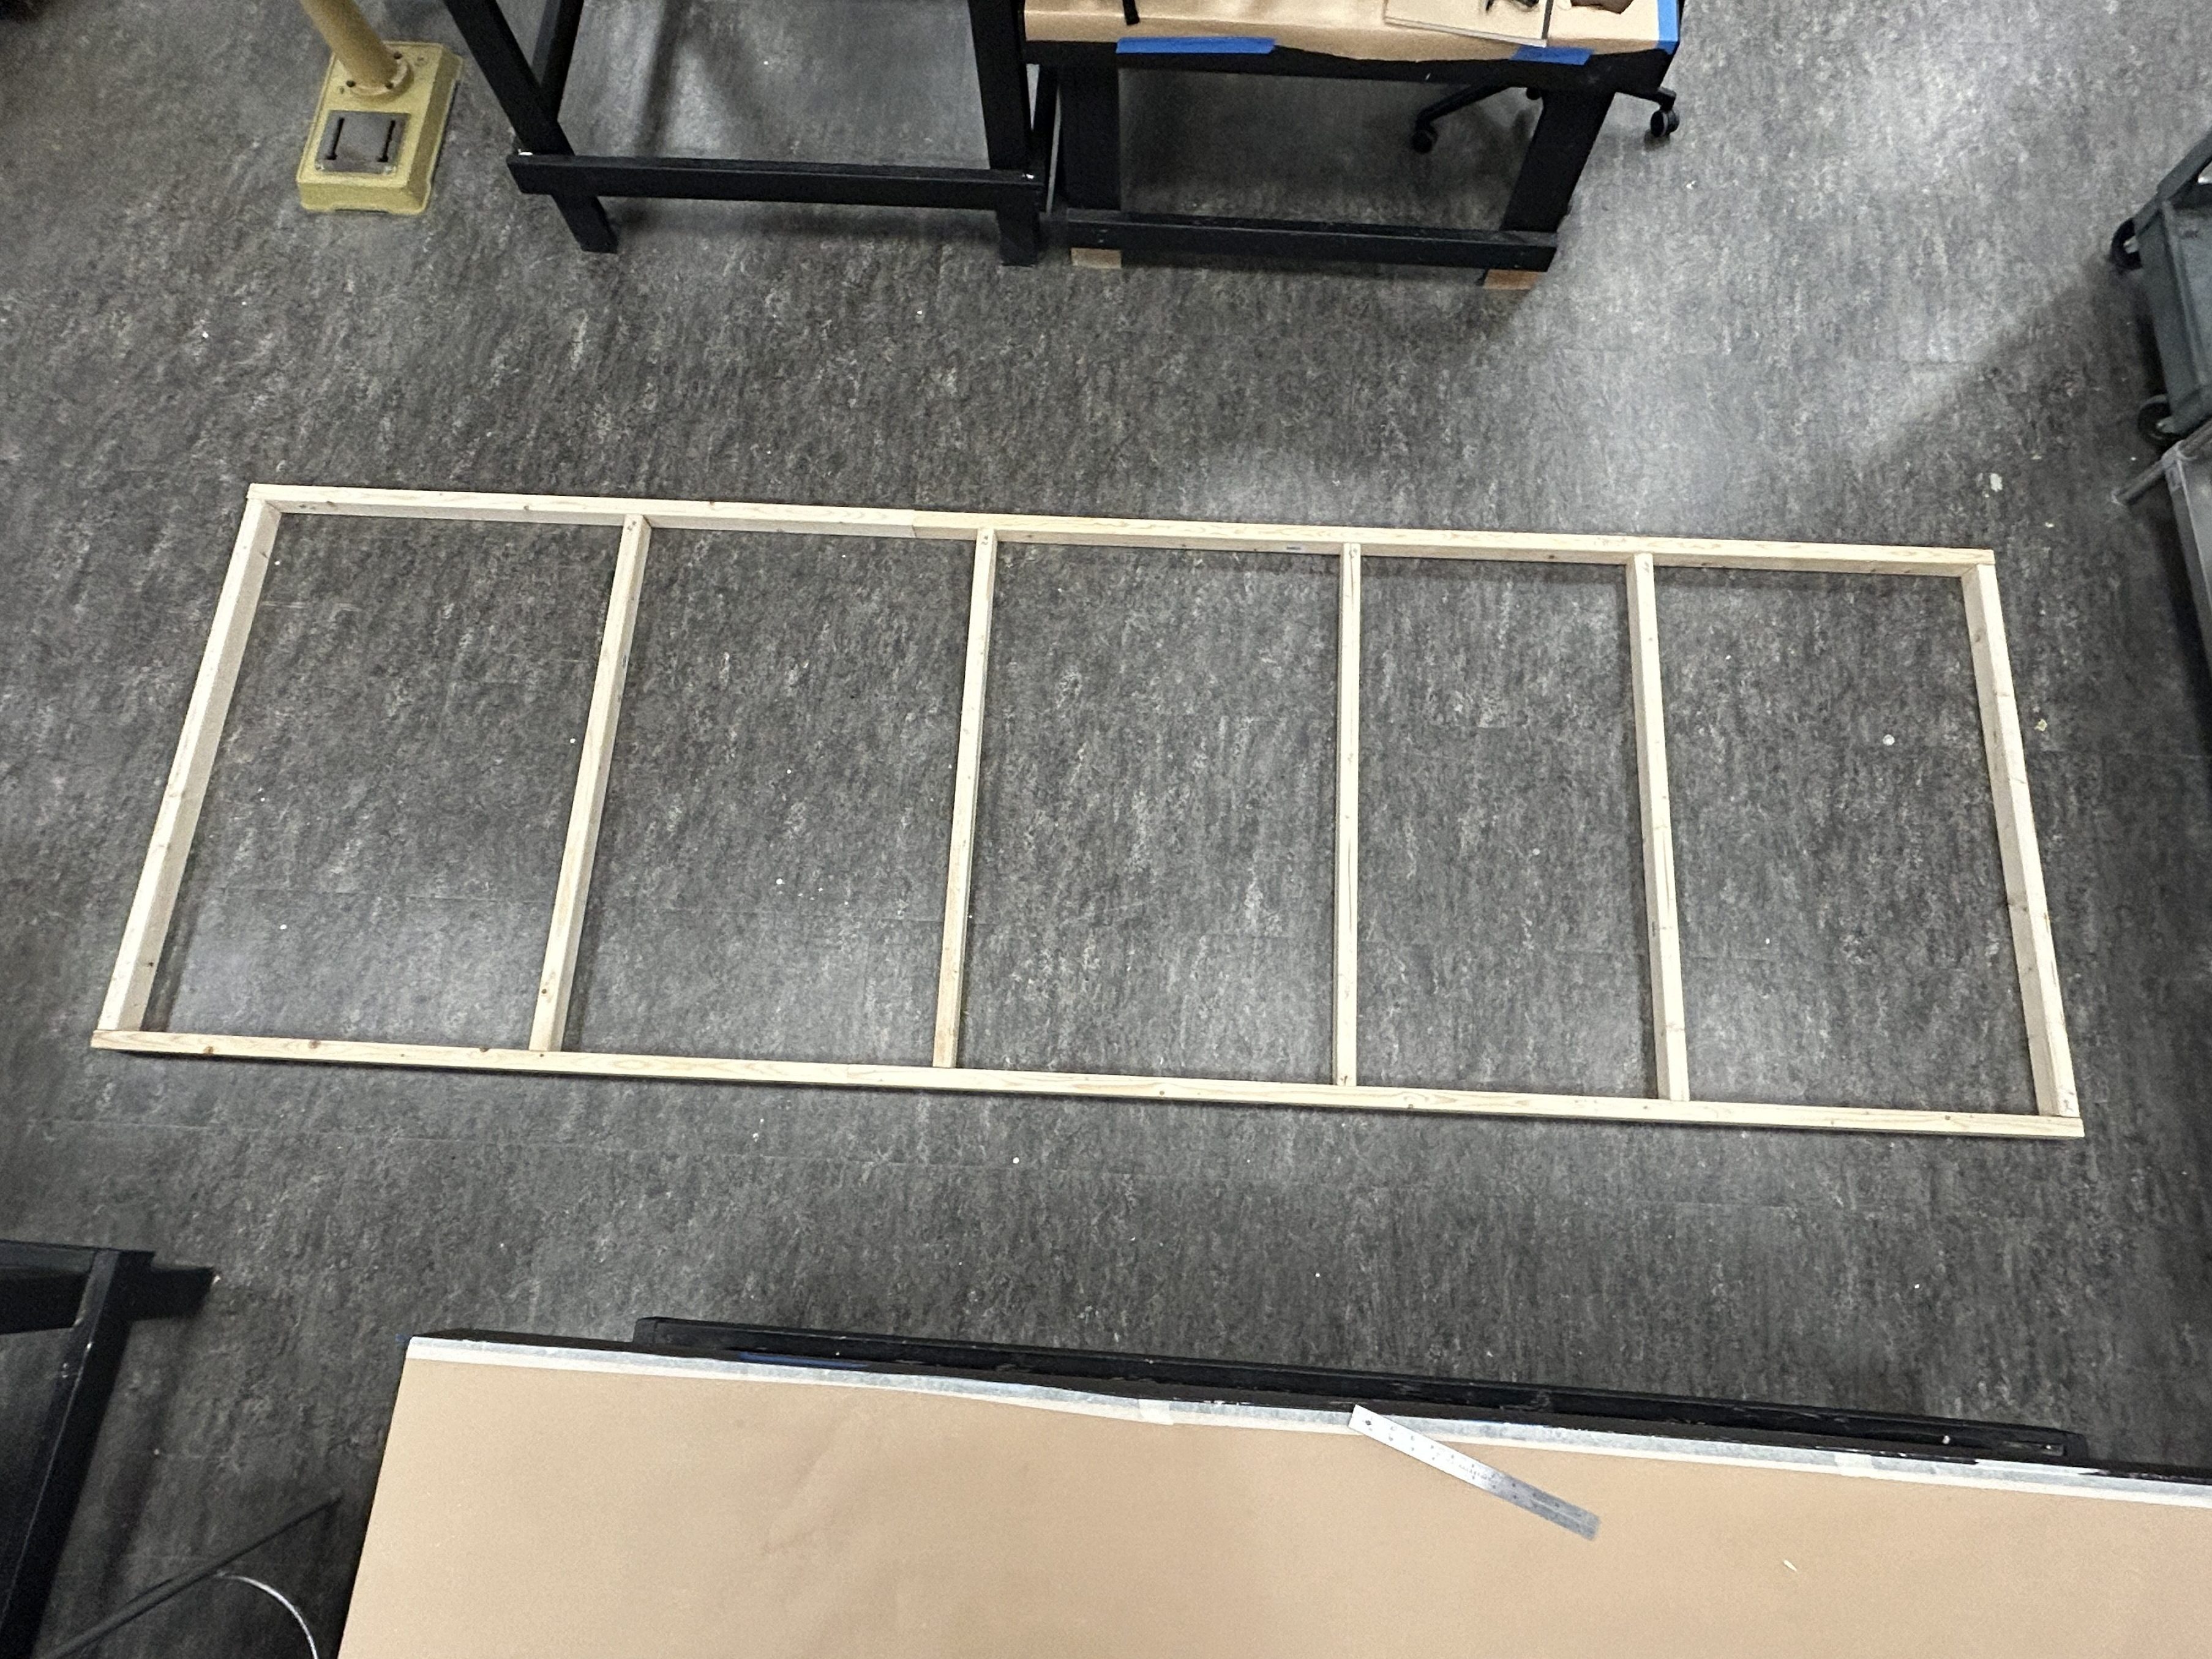
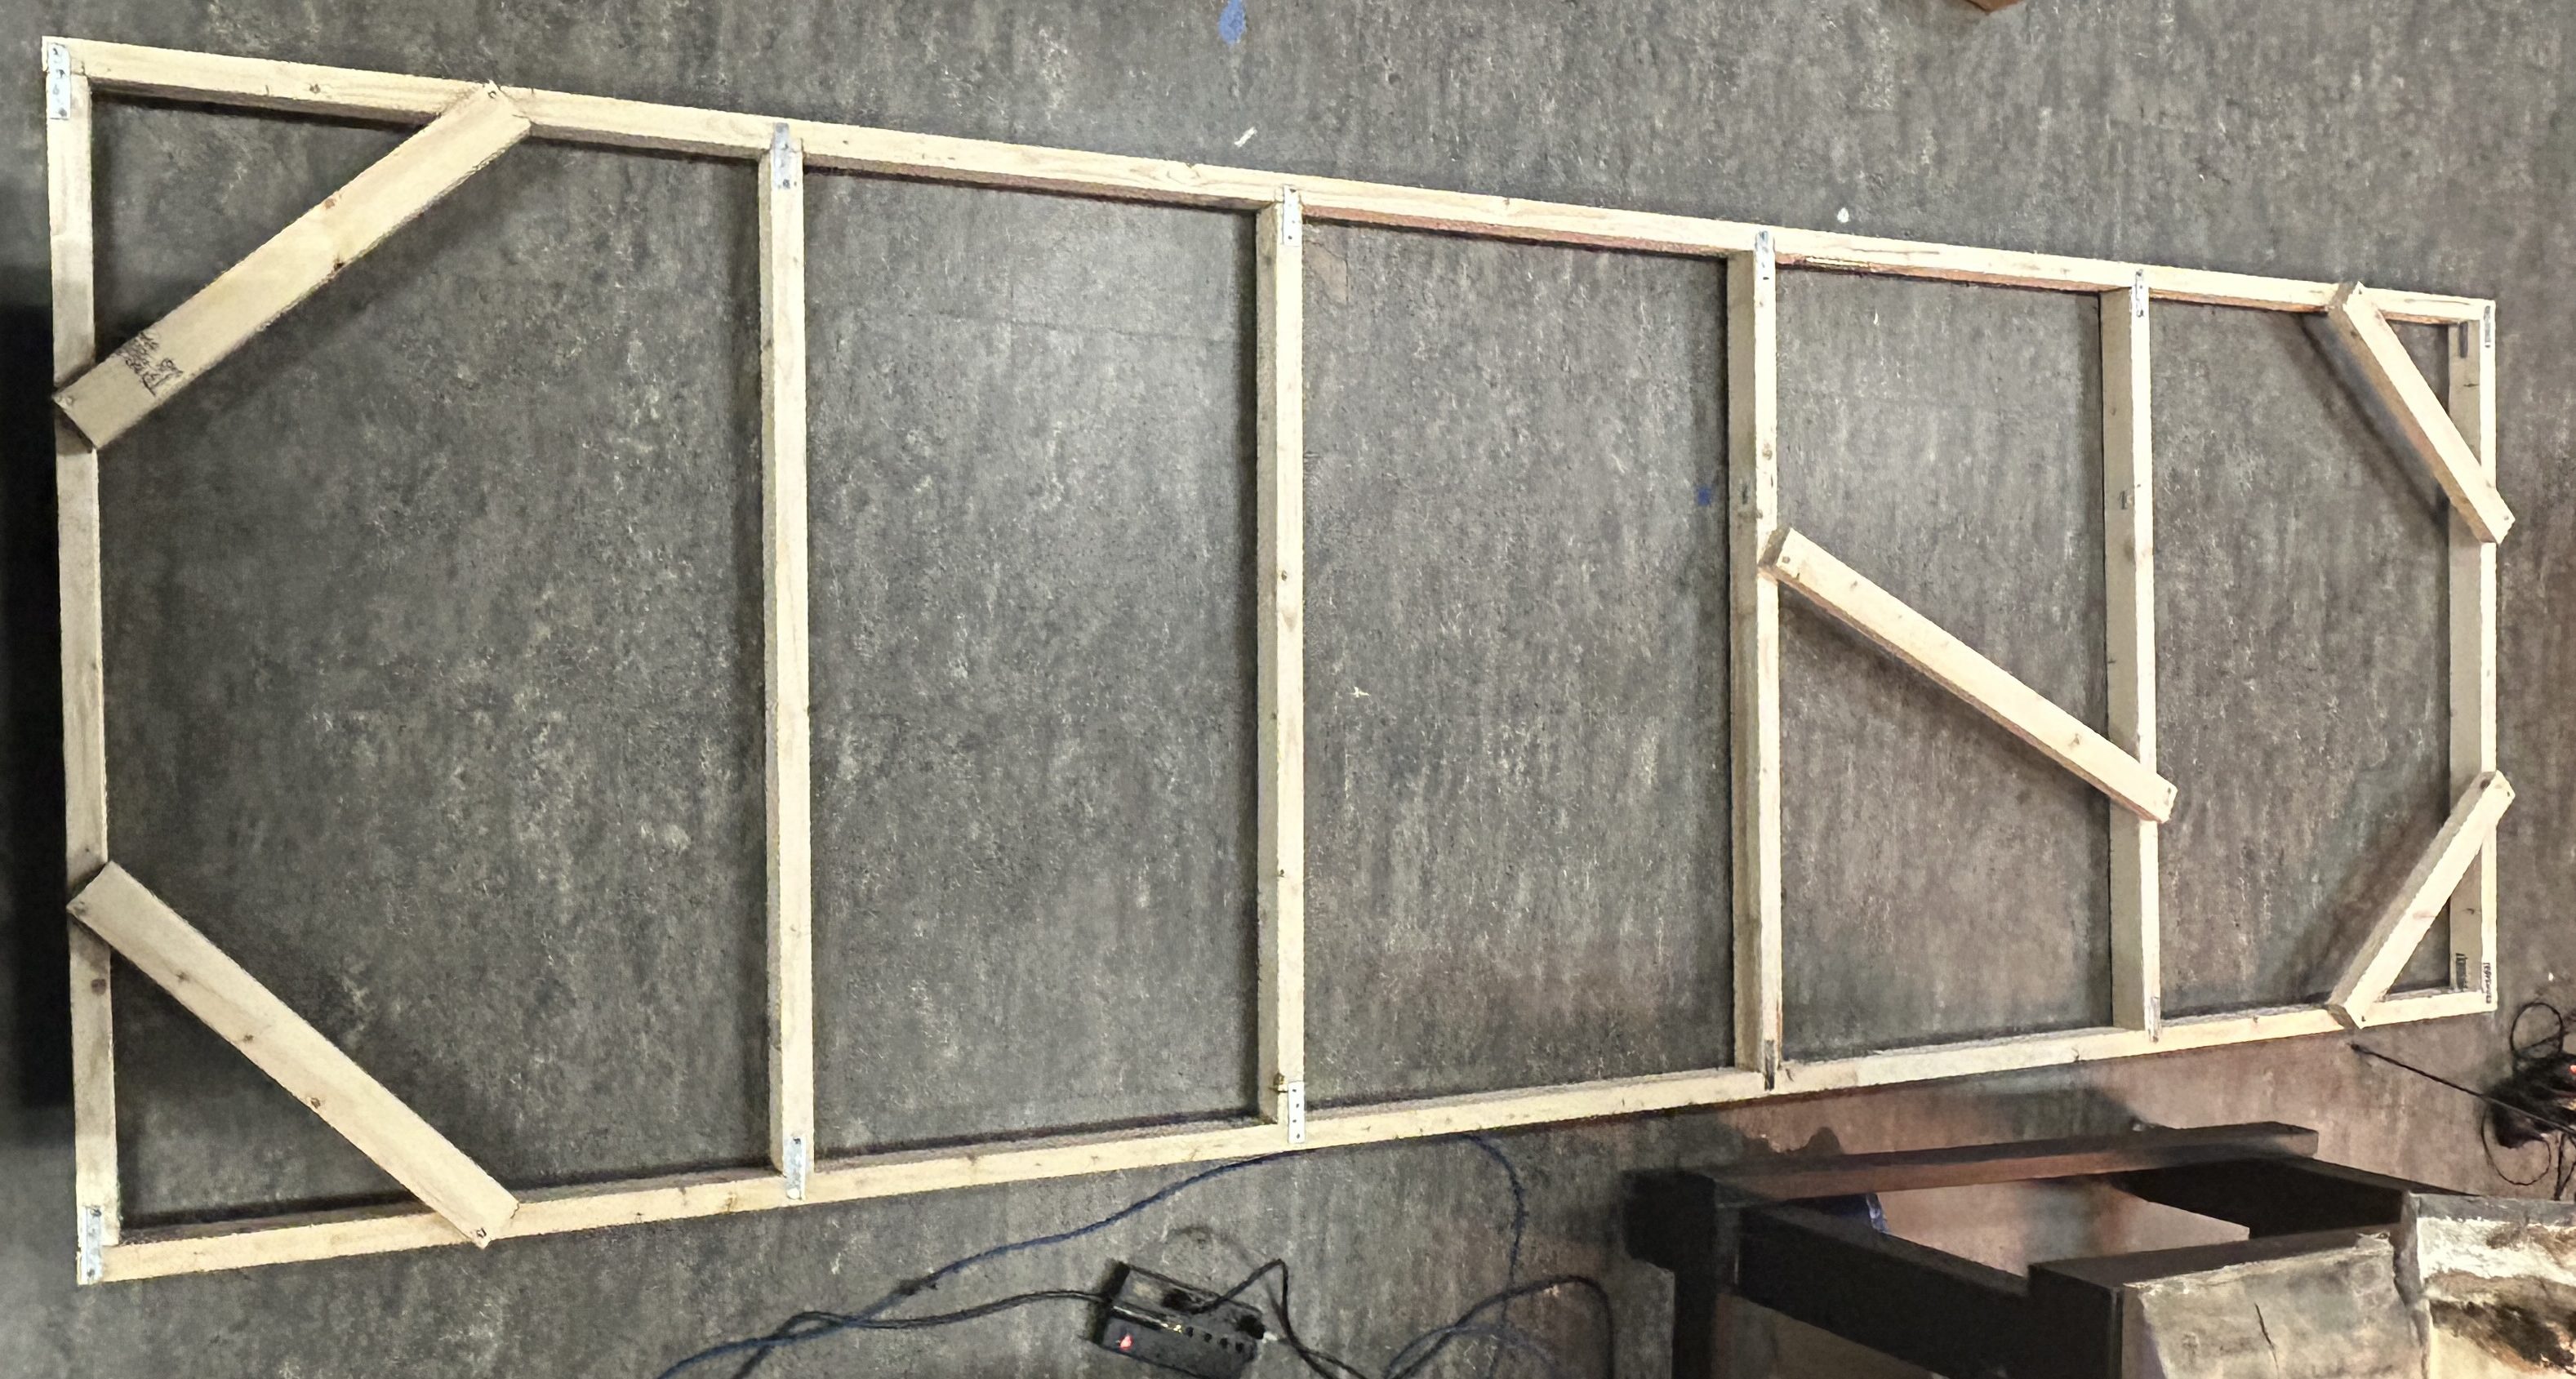
Parallax Background Set
For this film, we used rear projection to create scrolling backdrops seen through the car’s windows. I worked on a team to set dress and troubleshoot the parallax set for multiple scenes. By using pre-existing set assets, I reworked the materials into different backgrounds using the techniques and math designed for the first loop (the flat on the left side loop).
Every change in the camera’s angle dictated a different background loop. I worked primarily on the 3/4 angle shots. Each new angle brought new challenges and techniques to create the perfect look. The three to four rows of looping background panels move at different intervals per frame, creating the illusion of distance.
I also helped animate a couple of the loops, including the left-side flat view and a few of the 3/4 angles.
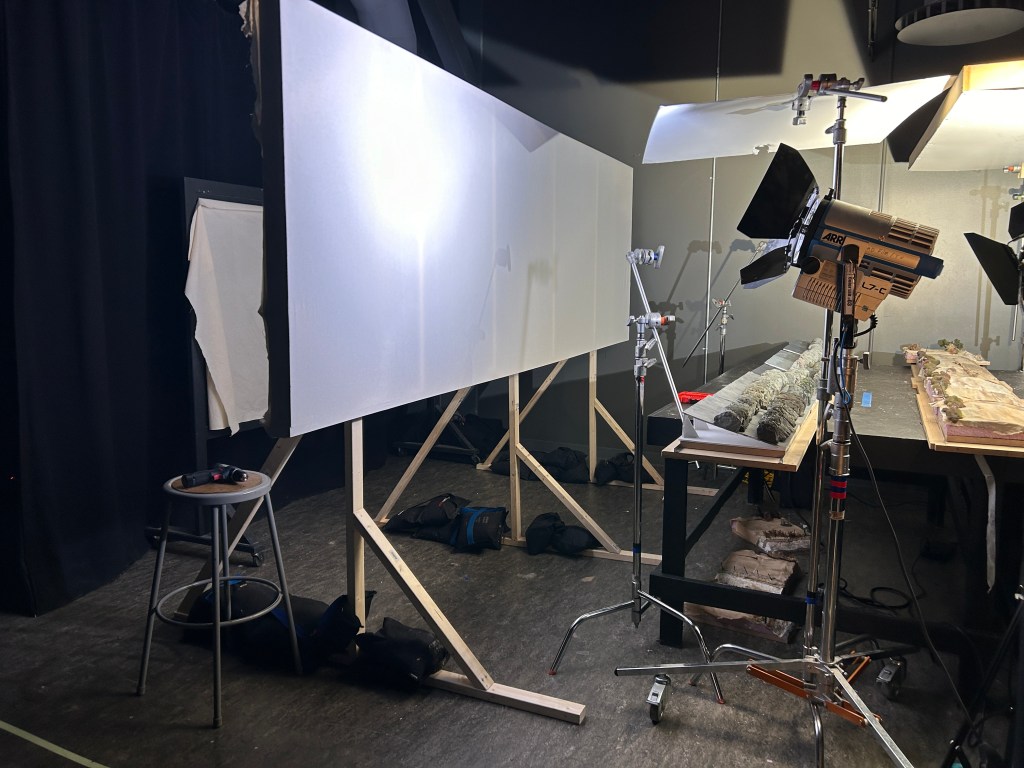
Set Backdrop
I also worked on designing and assembling the backdrop canvas and stand.